Reichbusters troops, transport and E-100

Quite some time ago I 3D printed a couple of vehicles that I was intending for use in the games of 7TV I ran at Hammerhead.

These were rescaled from the original files that were downloaded from Thingiverse. Designed to be printed at 1/100 (15mm) scale I blew these up to 1/48. I wanted a couple of pieces of ‘terrain’ to add to my UFO/V2 rocket base board and so went for something suitably ‘Weird War’. So here we have an E-100 (one of the so called ‘paper panzers’) and a slightly more realistic (in that it actually existed) Opel Maultier.

In the end these were both surplus to requirements for the game (I’d got more than enough terrain in the end and hadn’t realised just how big the E-100 would end up being).

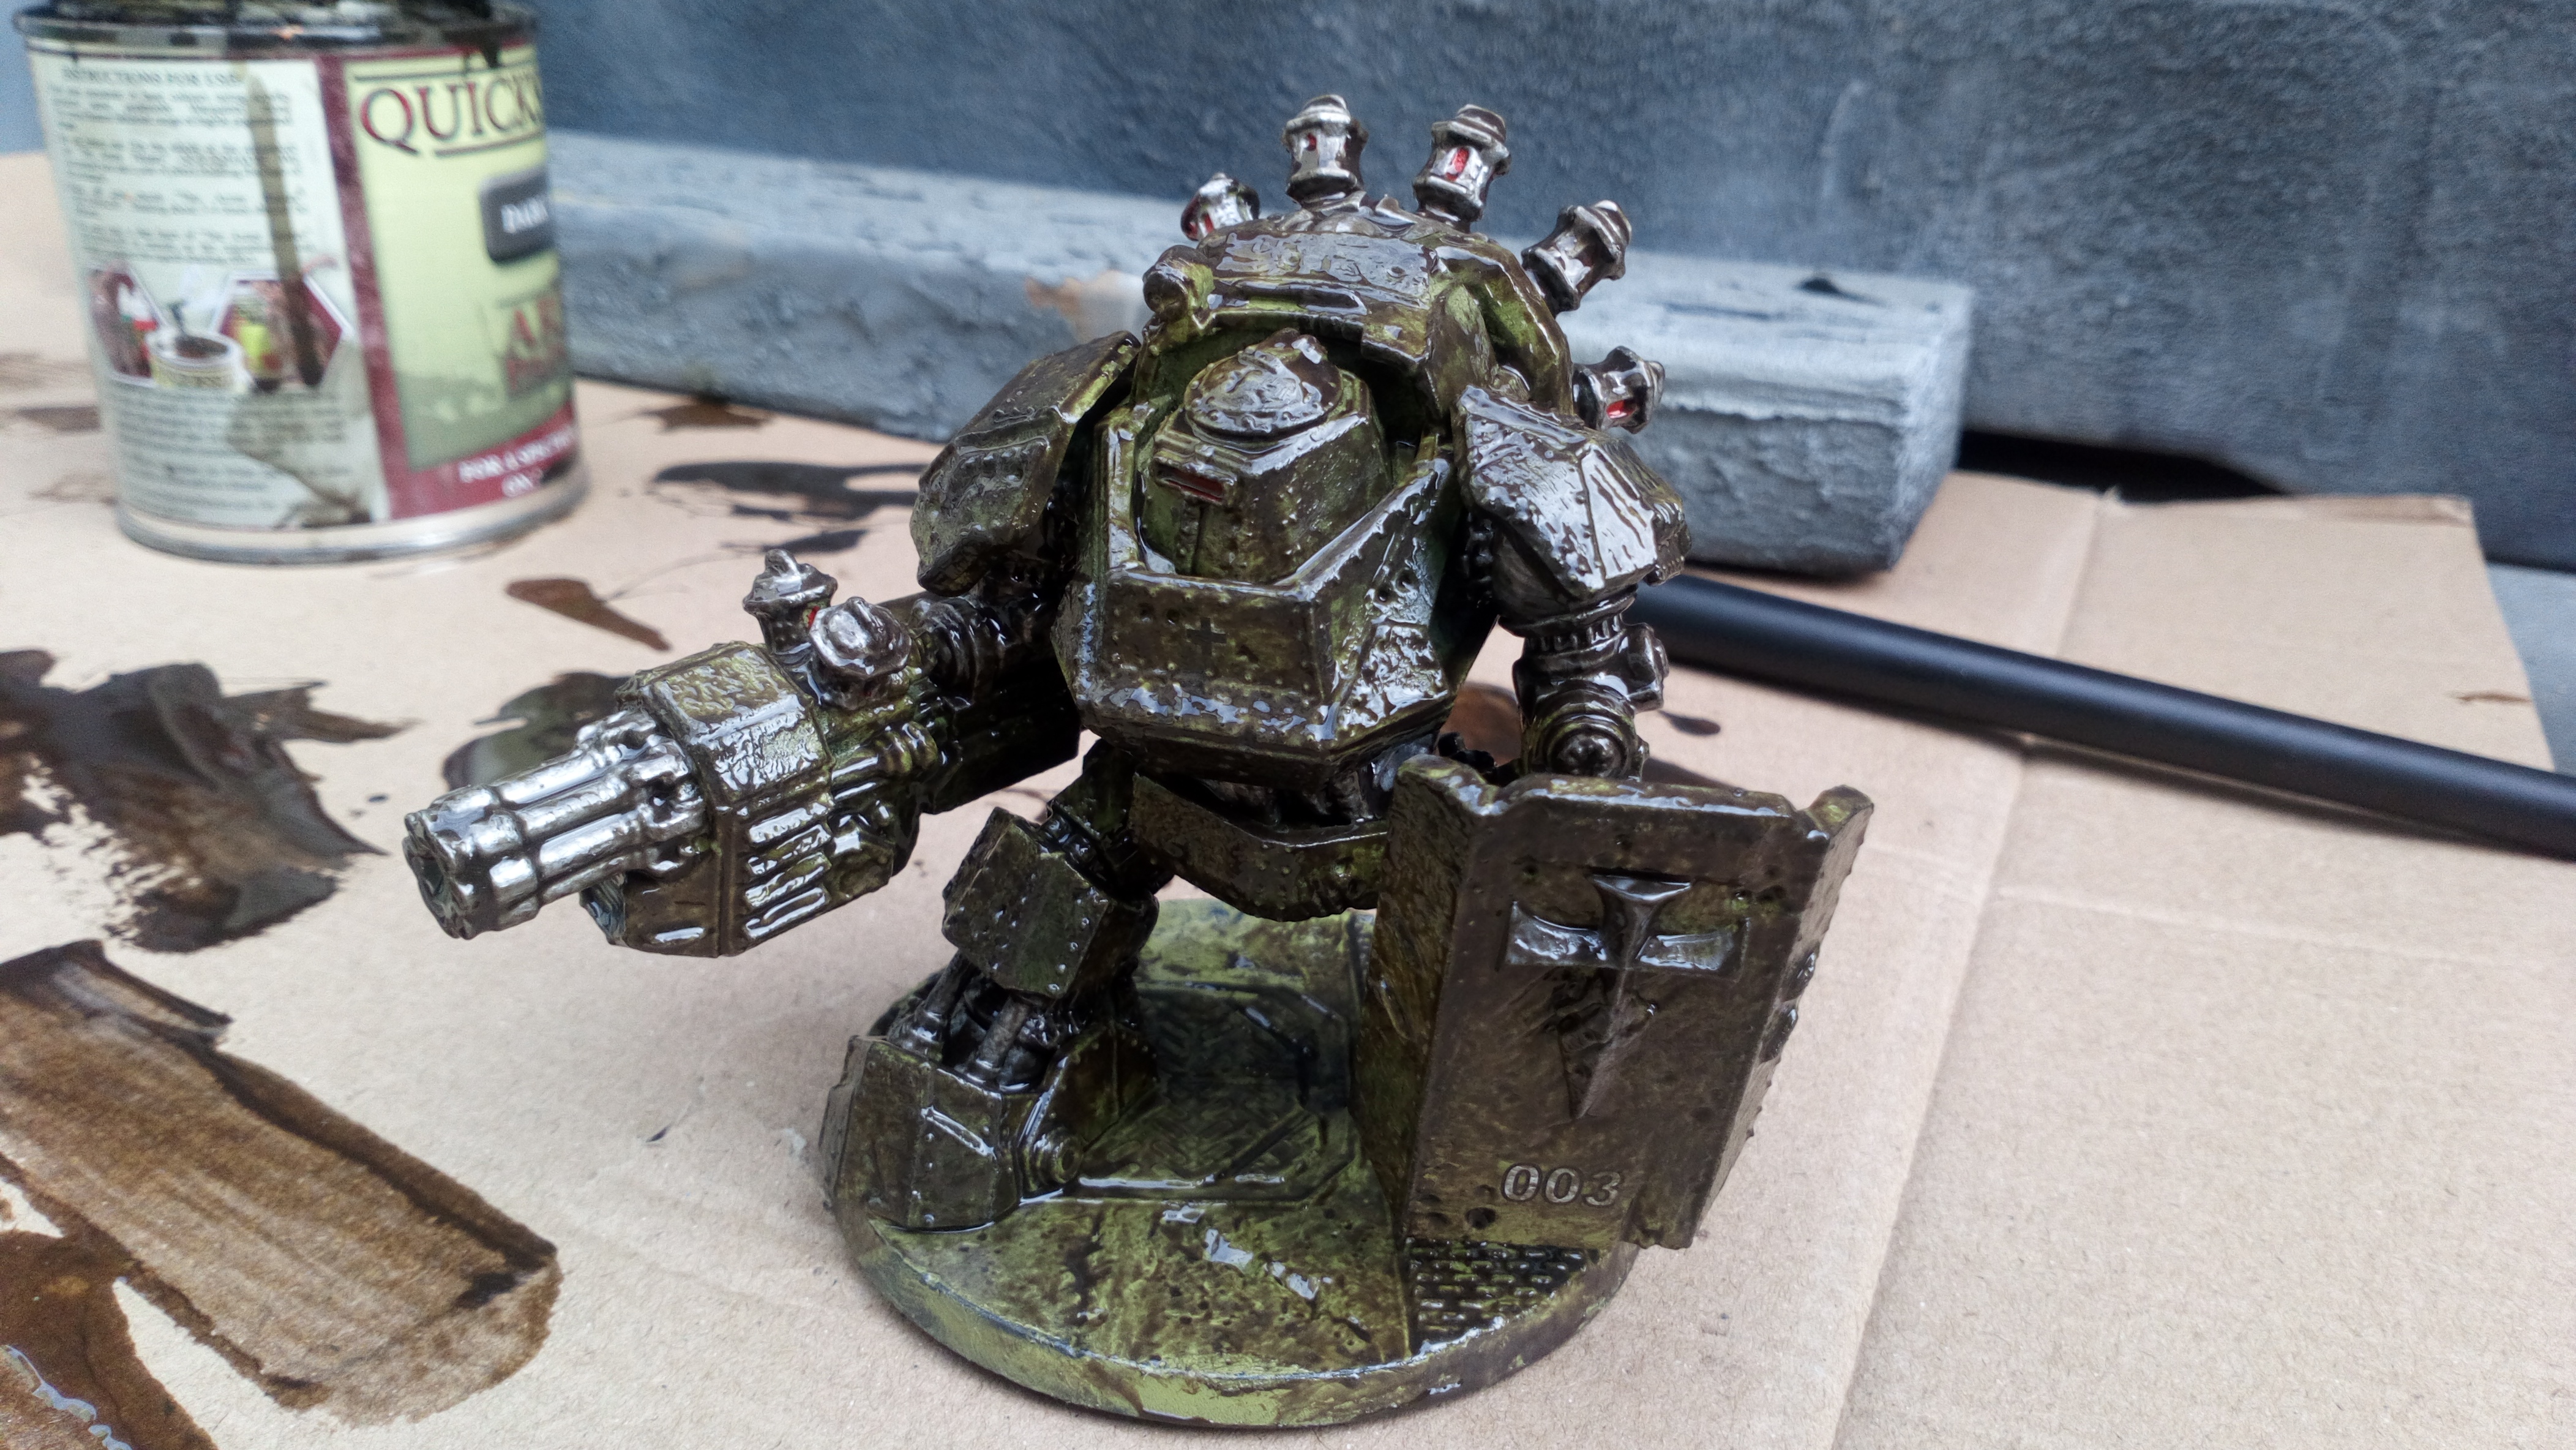
I got some nice smooth prints from my Creality CR-10S which made preparation and painting a joy. Both models were basecoated in Dunkelgelb spray (from Plastic Solder Company) over a black undercoat.

The airbrush was used to add the dark green camo patches and weathering was achieved using a sponging technique. Decals were appropriated from my stash (they were applied following the base coat / camo, but prior to the weathering).

Opel Maultier in 1/48 scale

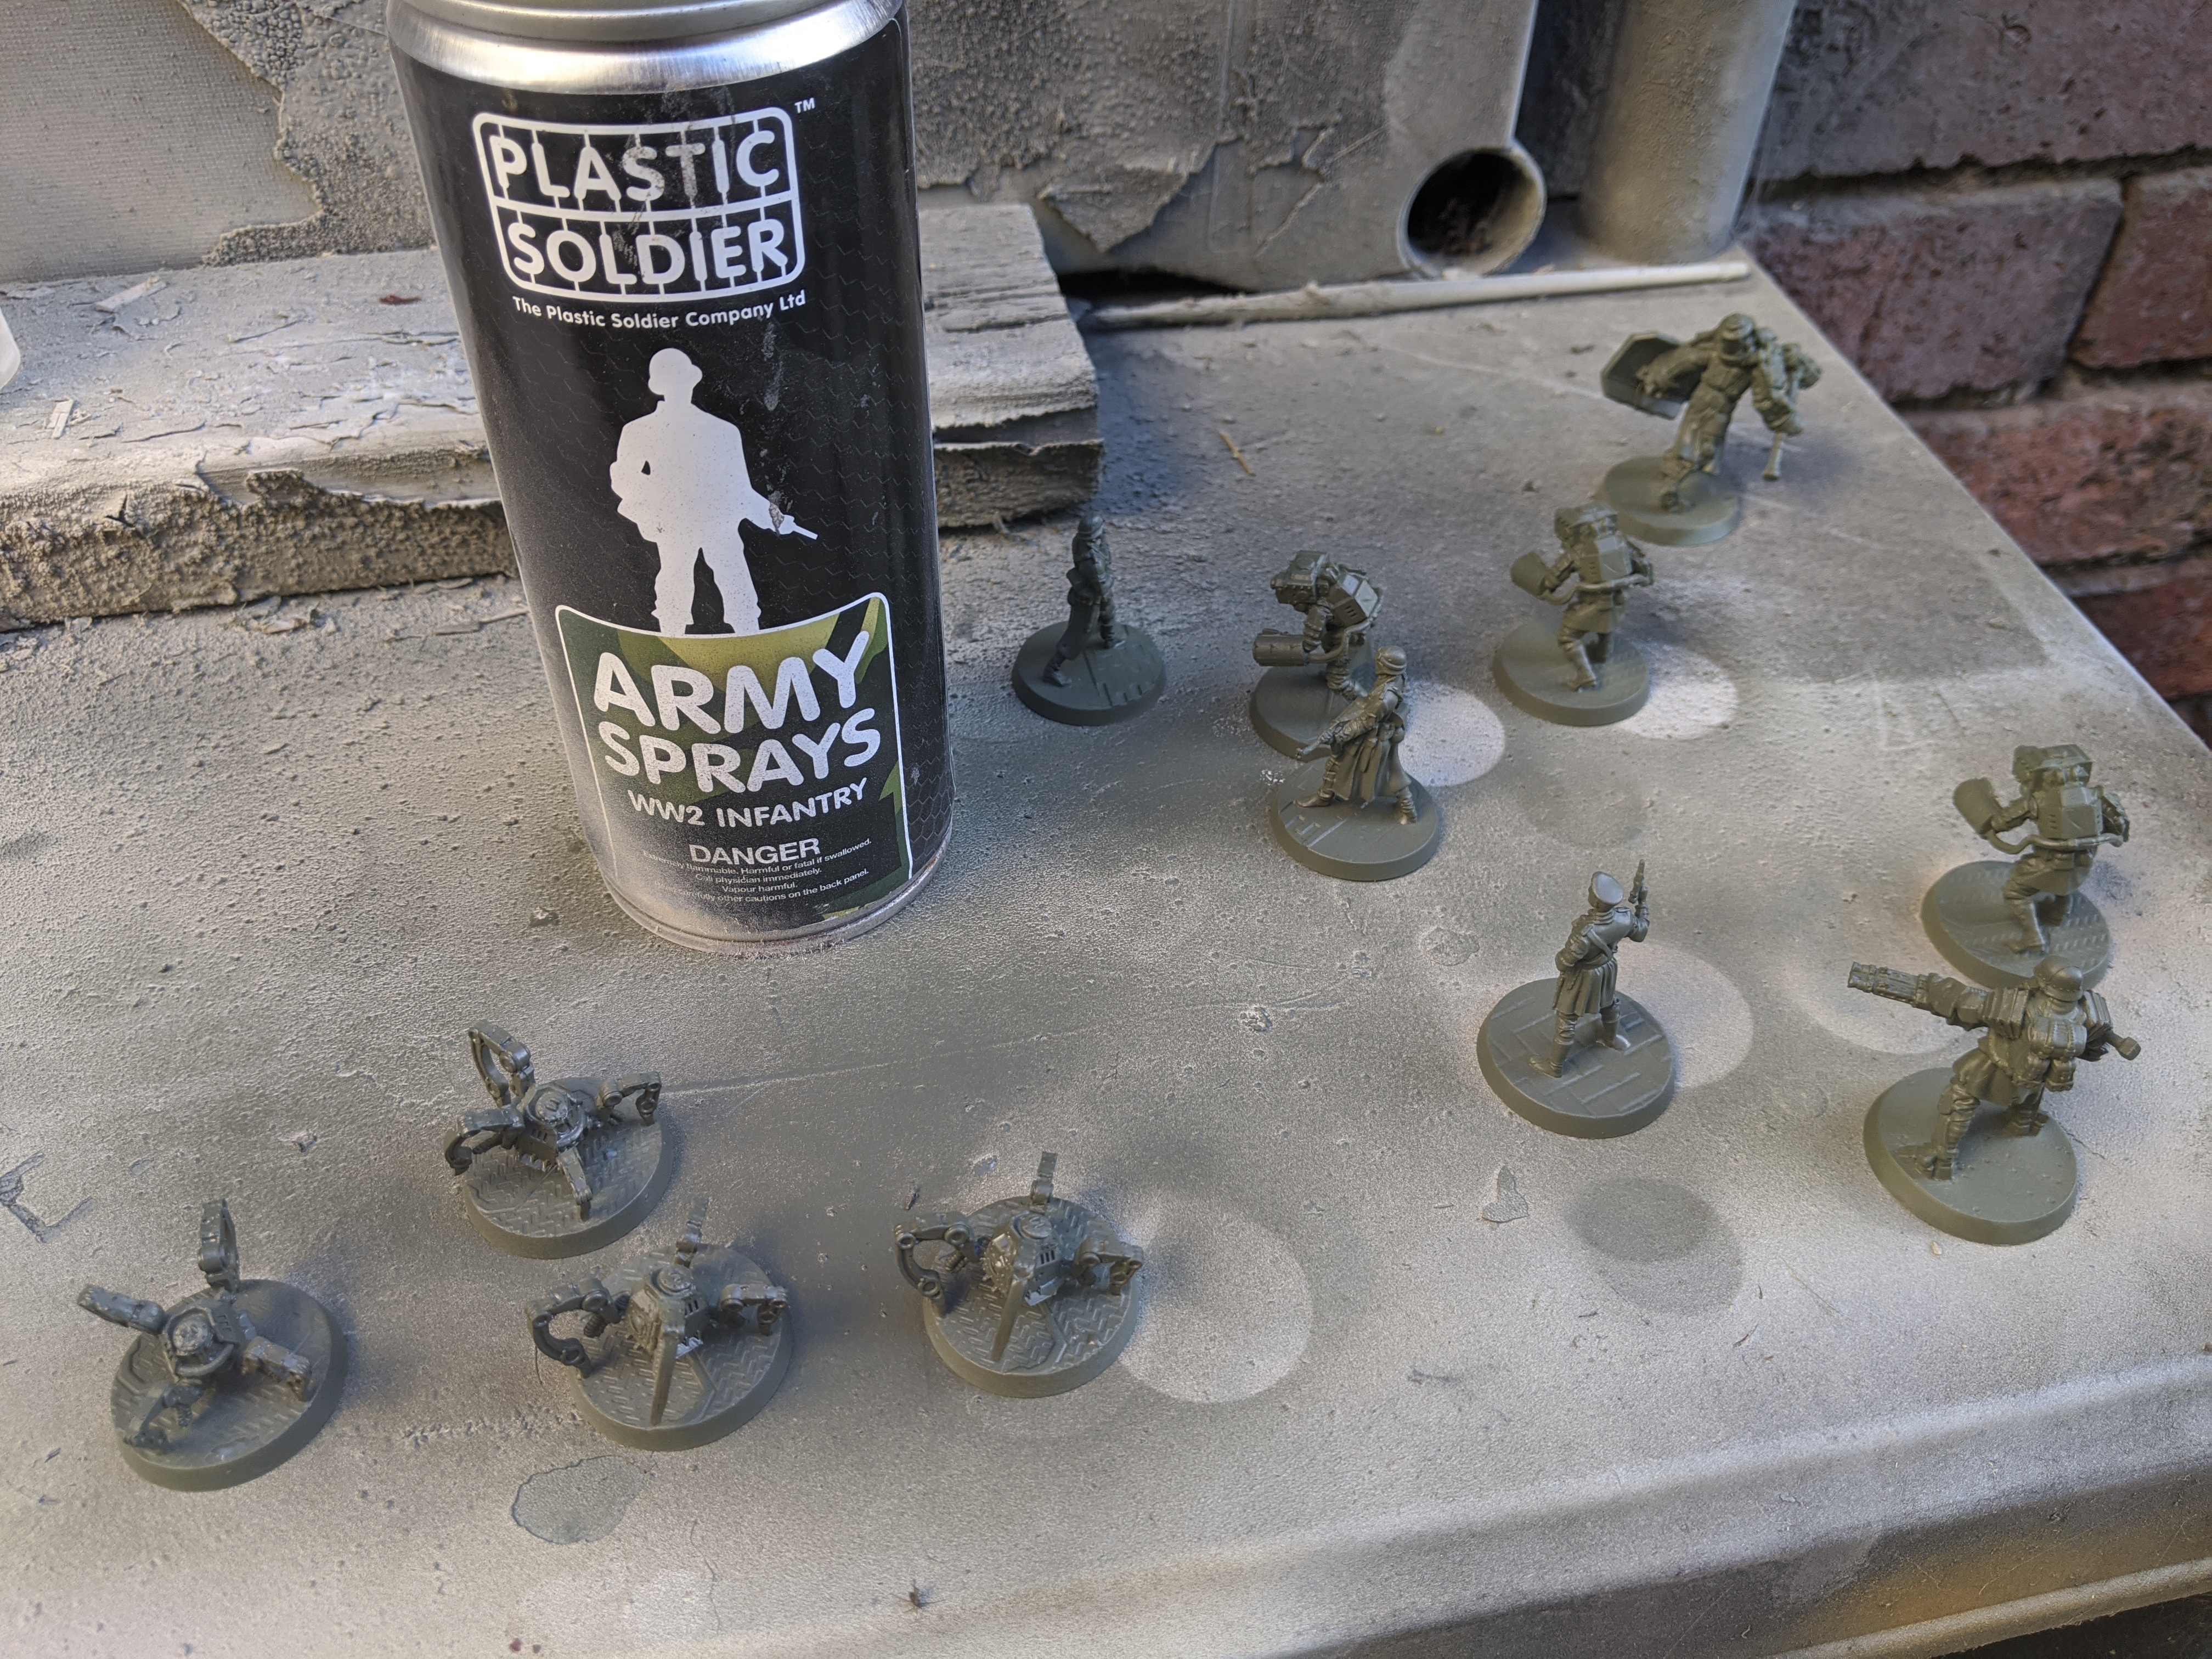
I’ve also recently been making a dent on the big pile of plastic miniatures I need to paint for Reichbusters. At about 35mm (maybe even 40mm) scale these also fit in very well with the 1/48 vehicle prints.

As an aside I am a big fan of using 1/48 vehicles for my standard wargaming with 28mm figures. I find the usual 1/56 vehicles (such as the Bolt Action and Rubicon ranges) while albeit nice models, just a little small in comparison to based 28mm miniatures. The bonus here is that I could use these vehicles with slightly larger figures, such as the Reichbusters ones, without having to worry too much.

Having done a couple of test pieces I chose a squad of ‘standard’ German troopers from the game to tackle first. These are lovely one piece miniatures, the sculpting and ‘hardness’ is good for boardgame pieces so I can see them being used extensively outside the actual game for more wide ranging tabletop adventures.

The test model – I subsequently switched from a black to a white undercoat

One of the disadvantages of course with board game minis (especially when considering troop types) is a lack of variety in poses. To work around this a bit for this squad I varied the colour scheme slightly. While keeping the basic field grey fatigues (for which I used an excellent multi-shade set from Andrea Colour) I varied things like the trenchcoats and boots by using different colours. This was mostly achieved using Citadel contrast paints (black, grey and various browns).

I kept the bases simple this time, dropping the rust effect
Maultier with troops

Unlike the test models which I had undercoated black I worked up from a white undercoat here (as I knew I wanted to use contrast to save some time).

Three of the troops showing slight variations in paint scheme

Although these chaps did get a bit repetitive I really enjoyed painting them and as such I’ve picked a variety of different models from the game to paint up next. As the weather has been so good recently I have been doing a lot of undercoating outside and some of this lot have been done using my new favourite tool, Citadel Colour Wraith Bone spray.

Pulp Painting Update

In between everything else I am finishing off at the moment I got the chance to put the final touches to a few Pulp themed miniatures (some of which I have had on the painting desk for a long time).

First up a trio of ‘bad ‘uns’ from Warlord Games. A BUF section leader and two blackshirt goons. Ostensibly for the ‘Very British Civil War’ or ‘Operation Sealion’ settings, I’ll be using these guys in my games of 7TV Pulp. Always good to have a few fascists to give a damn good thrashing to.

Extensive use of contrast paints on these chaps.

Next, more evil! This time a tommy gun armed cultist from the CMON board game, Cthuhlu Death May Die. Just slightly bigger than 28mm this lady owes her allegience to Hastur and is from that same expansion set.

Combination of airbrush base coat of light green with a yellow wash.

Next up, another rotter! This time a Crooked Dice 7TV Pulp era gangster. The base for this no good scoundrel was aquired from a set of Batman Miniatures Game figures I have not yet done anything with.

I used flock and a Modelmates mould effect to cover the slotta base and add some character to the flagstone base.

This next guy could sit in any number of settings or factions. I have had this figure for years (it is in fact from some of the left over stock I had when I ran the shop). He’s a Kung Fu master from the Ral Partha Europe Pulp Adventure range.

With the advent of contrast paints, I’m not longer actively avoiding painting white

Finally for now, some space based adventure. Here is one of the macguffin markers from the recent 7TV Pulp Science Fiction Kickstarter. Wouldn’t look out of place inside an Imperial palace on a far off world.

Warp Lightening green contrast paint over a silver base coat, highlighted with a dry brush of silver.

It is joined by some ‘Alien Legionaries‘ in an alternative blue garb (as opposed to their movie inspiration red).

I love these minis, but have really struggled to paint them to my satisfaction. Switching from red to blue has strangely helped.

“Fire in that direction!”

SAS Force Attack Buggy

This started off as something else, an oft stated phrase that applies to most of my hobby projects. In this case I was looking for 3D models from the ‘so bad it’s good’ 1982 cinematic masterpiece Megaforce.

I’m going to be covering Megaforce in it’s own project at some point soon, but having purchased and printed some excellent versions of the buggies from the movie I once more got distracted.

The inspiration

So here we have some more additions to the 28mm scale Action Force motor pool. This time it’s SAS Force getting some new wheels.

The buggies in the Megaforce film had a nightime adaptive camoflage and this idea of a fast stealth single man attack vehicle kind of fits in with the SAS aesthetic.

Render of the 3D model purchased from CGTrader (original scale 1/24)

The 3D print files were scaled down from their original 1/24 scale to 1/48 (my chosen vehicle scale for 28mm gaming). After an unsuccessful test print on my FDM printer (too many tiny parts), I switched to the DLP resin printer and mangaged to get two done in a single print.

Painting was a simple black undercoat followed by a grey drybrush, concentrating on edge highlights.

Black undercoat applied with spray can

Details were picked out in yellow to match the colour scheme of the classic toy line. Weapons and windscreen were painted silver (with the later getting a blue wash). Reproduction stickers were from Vintage Star Wars Collectibles.

My plan from a gaming perspective is to use these in 7TV, with the vehicle rules from the 7TV Apocalypse box set.

So, what is next for SAS Force…..?

Red Shadows New Recruits

The ranks of the Red Shadows have recently expanded with the addition of three new recruits.

First up we have this great model from Crooked Dice Game Design Studio, ‘The Jack Booted Sadist’. Bearing a not disimilar look to a 90s Bond villian I decided to go full on Red Shadows with the uniform.

Painted primarily in contrast paints, I’m still trying to think of a suitable moniker for her. Red Fury perhaps?

Next we have a miniature I have painted quite recently in the past, but which once I’d completed I knew I would have to re-do as one of the Baron’s fanatics. This guy is from the Prince August Future Shocks line of vintage post-apocalyptic models. Getting on for 40 years old, these sculpts are lovely and benefit from being 32mm scale (which of course dating from the 80s means they match up well with modern 28s).

Again I used contrast paints for the block colours, but then highlighted up using more traditional methods. I’ve gone for an Asian skin tone here using Citadel Darkoath Flesh contrast over a white undercoat. I’m quite pleased with how it has turned out.

Finally we are onto a 3D print. This is the ‘Enemy Escape Armour’ (more familiar to GI Joe fans as the Cobra Snake Armour). A 3D print design by ‘Jabberwock’ on Thingiverse (based on the original toy), this was scaled to 45% and printed in resin on my Anycubic Photon.

Yet again Blood Angels Red contrast paint was used for block colours. The highlighting and stripes were based on consulation of the excellent Palitoy Collectors Guide published by Blood for the Baron.

Action Force SHADO Mobiles

I’ve recently been on a roll with the 3D printing and have got a setup I am really happy with now for both FDM and resin.

On the FDM side (using my Creality CR-10S) I have been concentrating on vehicles and scenery.  This has given me the opportunity to go back and visit models I previously tried to print with limited success.

2020-04-19 11.45.16
There were three in the bed…

One such example is the excellent SHADO mobile by AlPokemon that is available free to download on Thingiverse.  I had previously tried to print this before I had got my settings ‘fully dialed in’.  Armed with a new found (if not slightly tentative) confidence I loaded up the printer bed and set to work on not one, but three of these iconic vehicles.

2020-04-20 22.47.43
Fresh off the printer.  One standard, two with turret options.  Note the size of the recess for the turret, I’ll come back to that later.

At the same time I have been going back to my ‘Action Force and the Red Shadows in 28mm scale‘ project.  Having done something similar before (albeit with a commercial model kit) I decided it was time for the Action Force teams to buy up some of that surplus SHADO inventory and kit themselves out with some mobile support.

2020-04-22 20.41.22
Tracks are one piece but applied to individual pegs which were extremely fiddly to glue in place on the model (as opposed to my fingers)

I printed two variants this time, one the standard SHADO mobile, but the other with a ‘turret’ option.  The STL files contained options for a gun turret and a couple of different communiations arrays.  In order to provide some flexibility for gaming I decided to magnetise these turrets and their attachments.

2020-04-22 21.41.27
Turret recess

In the end I went with a tiny magnet and a 5p piece, which just perfectly fit the recess in the model.

It’s probably important to note at this point that I made no scaling changes to the file prior to printing, and the models I would say at a rough guess are approximately 1:48 scale (more than good enough for 29mm gaming).

Top tip if using coinage with magnets – check them first.  Apparently not all 5p coins are magnetic (who knew?).

Having previously tackled Space Force I decided that it was the turn of Z Force (infantry) and Q Force (naval) to add to their arsenals.

For the Z Force Mobile (which I envision as a HQ vehicle or forward observer) I went with the traditional green and black camo. The airbrush was used for this with Vallejo Russian Green as the base over a black undercoat.

2020-05-10 21.56.21
Z Force camo for that 80s cold war flavour!

Camo was black with grey highlights and details were picked out in red and yellow as a nod to the original toy line.

2020-05-10 21.56.28
Windows were base coated white prior to a coat of Citadel Contrast Space Wolves Grey

Decals and stickers were primarily reproduction Action Force toy stickers from Vintage Star Wars Collectibles.  However I also added some waterslide decals from my stash.  In both cases I applied a coat of Humbrol gloss varnish to the area prior to application.

2020-05-11 20.39.12
Designed for the original toy vehicles which were scaled to the 3.75″ action figures these were also perfect for wargaming scale.

For sticker application I did not wait for the varnish to dry; this enabled me to reposition these with relative ease.  Once dry I then re-applied gloss varnish as a top coat to seal both the stickers and decals.

Finally some highlights were picked out in yellow and red and some weathering was applied (more on which later).

The end result, ready to take on the Baron!

On to the Q Force variant.  Unlike the Z Force mobile I went for one of the turreted versions.  Many of the Q Force toys had a strong yellow, blue and red livery and I decided to try and, if not replicate, at least give a nod to this.

action-force---q-force---swordfish--loose--p-image-348121-grande
The original Q Force Swordfish toy provided some of the inspiration for the colour scheme as did the primarily yellow action figures.

Unlike the previous version, the majority of this model was painted from spray cans, rather than using the airbrush.  Undercoat for this one was Citadel Wraith Bone (which is a kind of off white) applied from a can.

2020-05-05 18.37.19
Taken outside this photo shows the Wraith Bone much more grey than it actually is ‘in the flesh’.  It is nearer to a cream colour.

Basecoat was a dark yellow using again a spray can, this time Averland Sunset.

2020-05-17 12.56.02

Highlights were achieved with a lighter yellow Humbrol spray.

2020-05-17 13.01.47

Interestingly this is a gloss paint, but I was trusting to the final coat of Dullcote to sort this out.

2020-05-17 12.55.47
Tools of the trade.

Highlights were picked out in blue, with an orange tint for the windscreens.  Next up was weathering, which as per usual I went unintentionally a little overboard with.  Chipping on both this and the previous model was achieved using a sponging technique.  A weathering spray (from Plastic Soldier) was further added for a really grimy look.

2020-05-24 22.19.17

On the assumption that the Q Force vehicle would spent a lot of time by the sea I also added in some streaking using a Modelmates rust effect.

For both models, tracks were simply painted dark grey, dry brushed with a ‘plate mail’ silver and then weathered down with Army Painter Dark Tone wash.

2020-05-24 22.27.19
Finished and ready to take the fight to the Red Shadows.

So you may have noticed from the photos that I printed three models and have only mentioned the two so far.  Well the final one isn’t going to the Action Force motor pool, it’s destined for another fighting force, a Megaforce if you will….

5bfc4c0d8da22ec30531825a5599569a

Reich Busters Vril Panzer

I recently got a rather large box in the post all the way from France.  Inside, my Reichbusters Kickstarter pledge rewards.  I am a bit of a sucker for Weird War settings and games and from what I saw when the campaign was running, the game looked right up my street too.

However it was really the miniatures I was after.  I fully intend to play the game, but like many things in my collection the thought ‘I could always use this for 7TV‘ is never far from my mind.

Now, there are a LOT of figures here.  The scale is somewhat larger than standard 28mm and probably sits somewhere between 35 and 40mm.  Fine on there own in any game, but might look a little odd alongside other parts of my collection.  Where this isn’t really a problem is with the ones that immediately caught my attention when opening the boxes for the first time.  The ‘Vrill Panzers’ – basically big stompy (piloted) robots.

2020-04-10 10.51.43
Vrill Panzer top right (more on the big chap in a bit…..)

There are two of these in the set of boxes I received, they are (like all the miniatures) one piece casts in a very hard PVC style material.  Absolutely no sign of warping or bending weapon syndrome from what I have seen so far.  The Vrill Panzers are chunky, really nicely detailed and heavy; however they are by no means the biggest models in the set (more on that later).

So in terms of getting the Vrill Panzers painted up I thought I would go for a ‘late war’ dunkelgelb, by really weather it up.  With there being two in the set I could afford to experiment a bit on this first one.

First step was a wash in warm soapy water.  This is something I never used to do on any models, but now religiously do whether I am painting PVC, hard plastic, resin or metal.

Once dry I undercoated with a can of black primer and followed this with a base coat of dunkelgelb (from Plastic Soldier Company – again in a can).

2020-04-14 13.02.05

Once dry I applied decals.  There were none provided with the game, but I have a huge stash of World War II and Dust Tactics decal sheets that I have amassed over time, so I had plenty of choice.  My usual approach, which I used here, is to paint the area I am going to apply the waterslide decal to with gloss varnish first.  Once dry I applied the decal itself and again let it dry before another coat of gloss.  I placed a few markings strategically then moved on to the weathering.

The first stage was to stipple using an old bit of sponge both dark brown and then silver across the most worn areas of the model.  Next it was time to dirty it all up. My plan here was to paint on Army Painter Quickshade Dark Tone.  I have had some success in the past with a fairly light coat of this brushed on to models.  It leaves them very shiny, but protected and I always apply matt varnish as the final step in these cases.

2020-04-16 23.09.42
Ready for Quickshade

2020-04-17 17.18.06
It’s all about to go wrong

The problem I hit here was my can of Quickshade was quite old and hadn’t been sealed properly the last time I used it.  As such I had to remove a thick skin from the surface of the shade within the tin before application to the model.  This is where the alarm bells should have run, however I proceeded to ‘slap in on’.  It was at this stage I noticed how thick and gloopy it was.  I stirred it up as usual but once applied it became obvius that something was wrong.  Rather than apply the subtle shading I was after, and rather than immediately receeding into the contours and crevises of the model it just sat there like some vile dark slime.

2020-04-17 17.35.21
Bit much?

Through excessive mopping up with a brush I was able to dave things to some degree, but the weathering has ended up being much, much heavier than I intended.  Once the matt varnish (Testors Dullcote) was applied things looked a lot better, although I had made some of the decals rather difficult to make out.

The final weathering stage was to add some rust (it seemed apt with how heavy beat up the mech now looked).  I drybrushed on some Citadel Dry Ryza Rust and in the end I think this turned out OK.

The base was in part basecoated in silver and then painted over with Citadel Basilicanum Grey (a contrast paint, this is my new favourite way of painting a gun metal effect).  All the bases in the game have a metal gantry / walkway look to them, so this fitted quite well especially when finished up with some more drybrushed rust.  The areas that looked more stone like were done in greys.

2020-04-29 13.34.39
The finished article

All in all I think I managed to rescue it.  Apart from the Quickshade incident it was an enjoyable model to paint.  As I have another one in reserve I might go with a different, cleaner, more fresh of the production line look.

In addition to the Vrill Panzer I also painted a couple of the ‘troop’ models from the game to test out some colours and techniques.

I’ve also started on the monstrous Projekt X mech.  Remember when I said the Vrill Panzers weren’t the biggest model, well this fella is truly gigantic (and actually quite difficult to lift).  He is still work in progress and I’ll cover this in another article.