Imperial Entanglements – Rebuilding my (Star Wars) Legion

A few years ago I got heavily into Star Wars Legion, but then relatively quickly sold the collection I had built up. This was partly due to a lack of gaming opportunities, but primarily because I needed the cash. However recently my Star Wars enthusiasm has been stoked again by the Mandalorian TV series and I have found myself wanting to ‘hobby Star Wars hard’!

Two big things have changed in my world since my last foray into the tabletop of a galaxy far, far away. These things are Games Workshop’s Citadel Contrast Paints and 3D printing. With the former I am no longer averse to painting lots of white Stormtooper armour and the latter (combined with the availability of designs online) means I have a lot more options available in terms of scenery and vehicles.

Base coat – contrast – highlight – Contrast paint actually making white fun!

Game-wise I am yet to decide whether to give Legion itself a try again (this would require investing in a new core set), but what I do know I want to do is give the 7TV version of Star Wars ago.

Published a few years ago and still available (for free) from the Crooked Dice Game Design Studio website this is a ‘programme guide’ of profiles and gadget cards based on the 7TV second edition rules. These profiles are based on the original trilogy and being 7TV I am fully intending to expand on some of these and add in some support the Mandalorian cast and potentially other characters.

So far I have been concentrating on the bad guys. My Stormtroopers are 3D files from Dark Fire Designs (printed in resin on my AnyCubic Photon) and mix in well with a box of Legion Scout Troopers I recently aquired.

A mix of Star Wars Legion plastics (Scouts) and 3D printed models (everything else)

The recipe for painting these guys was to start with a white undercoat (in this case GW Corax White from a can), slap down some contrast Apothecary White, dry brush highlights in Corax again and then fill in the under armour gaps with contrast Black Templar.

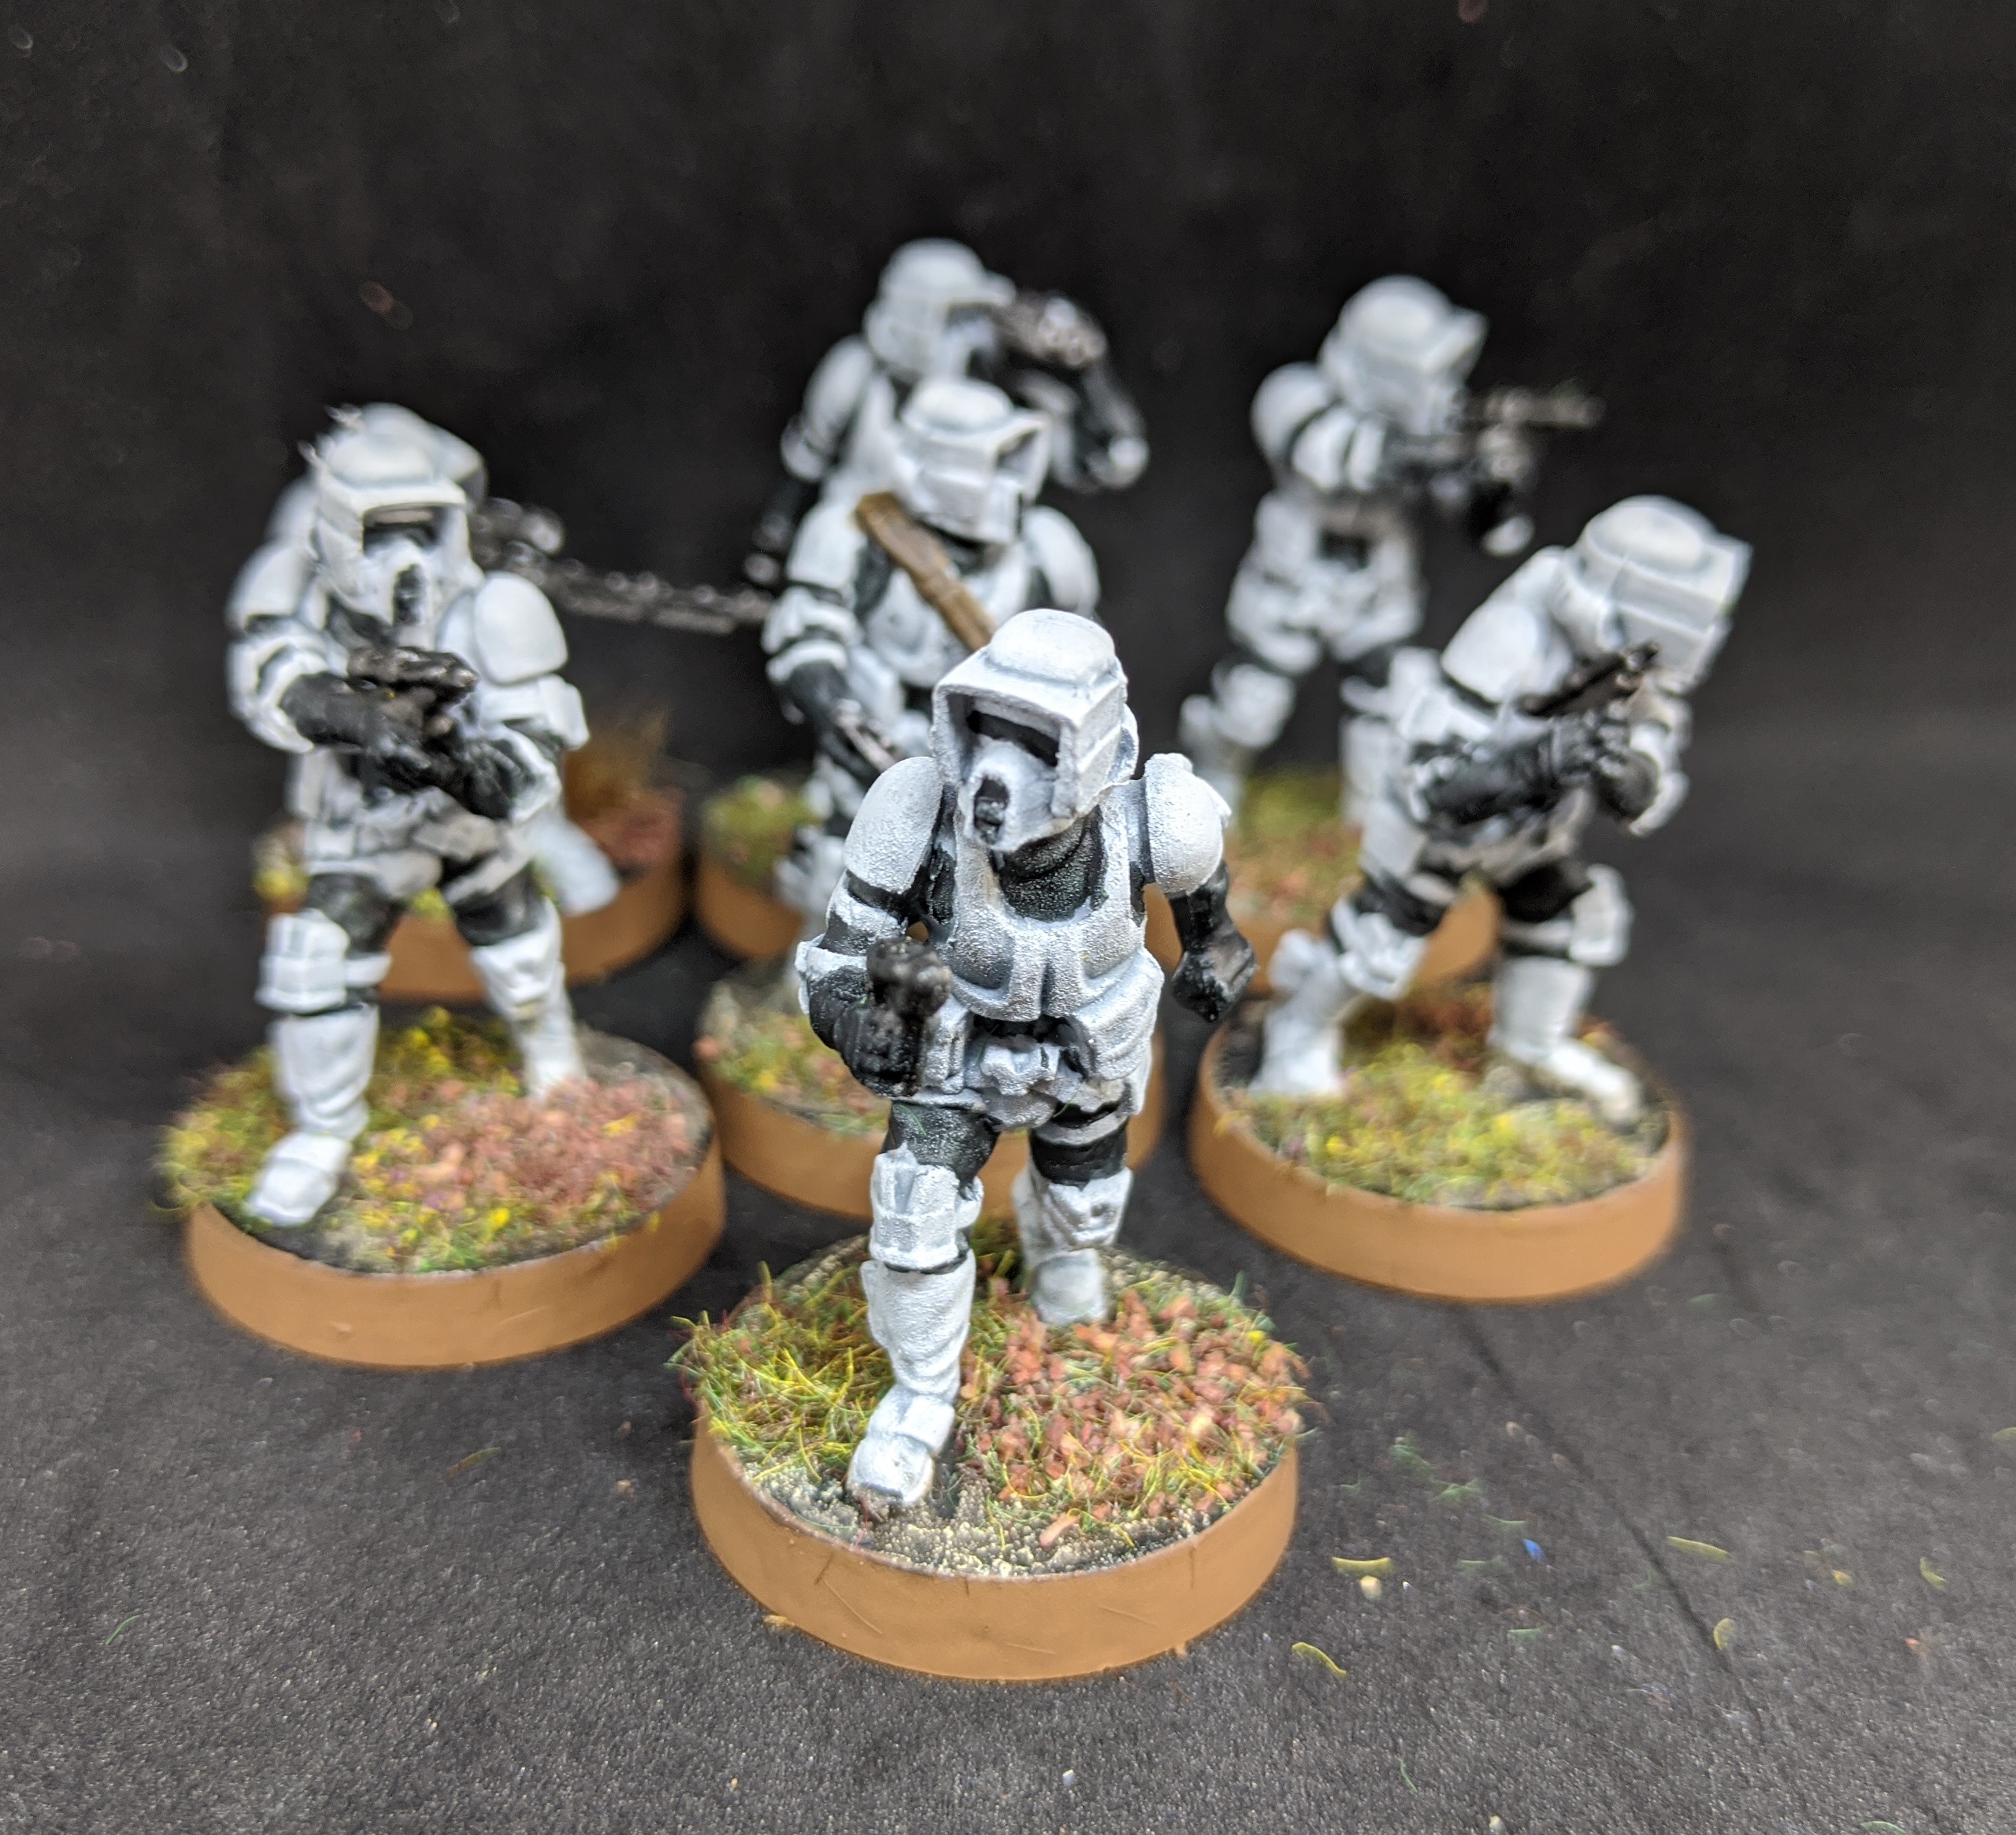
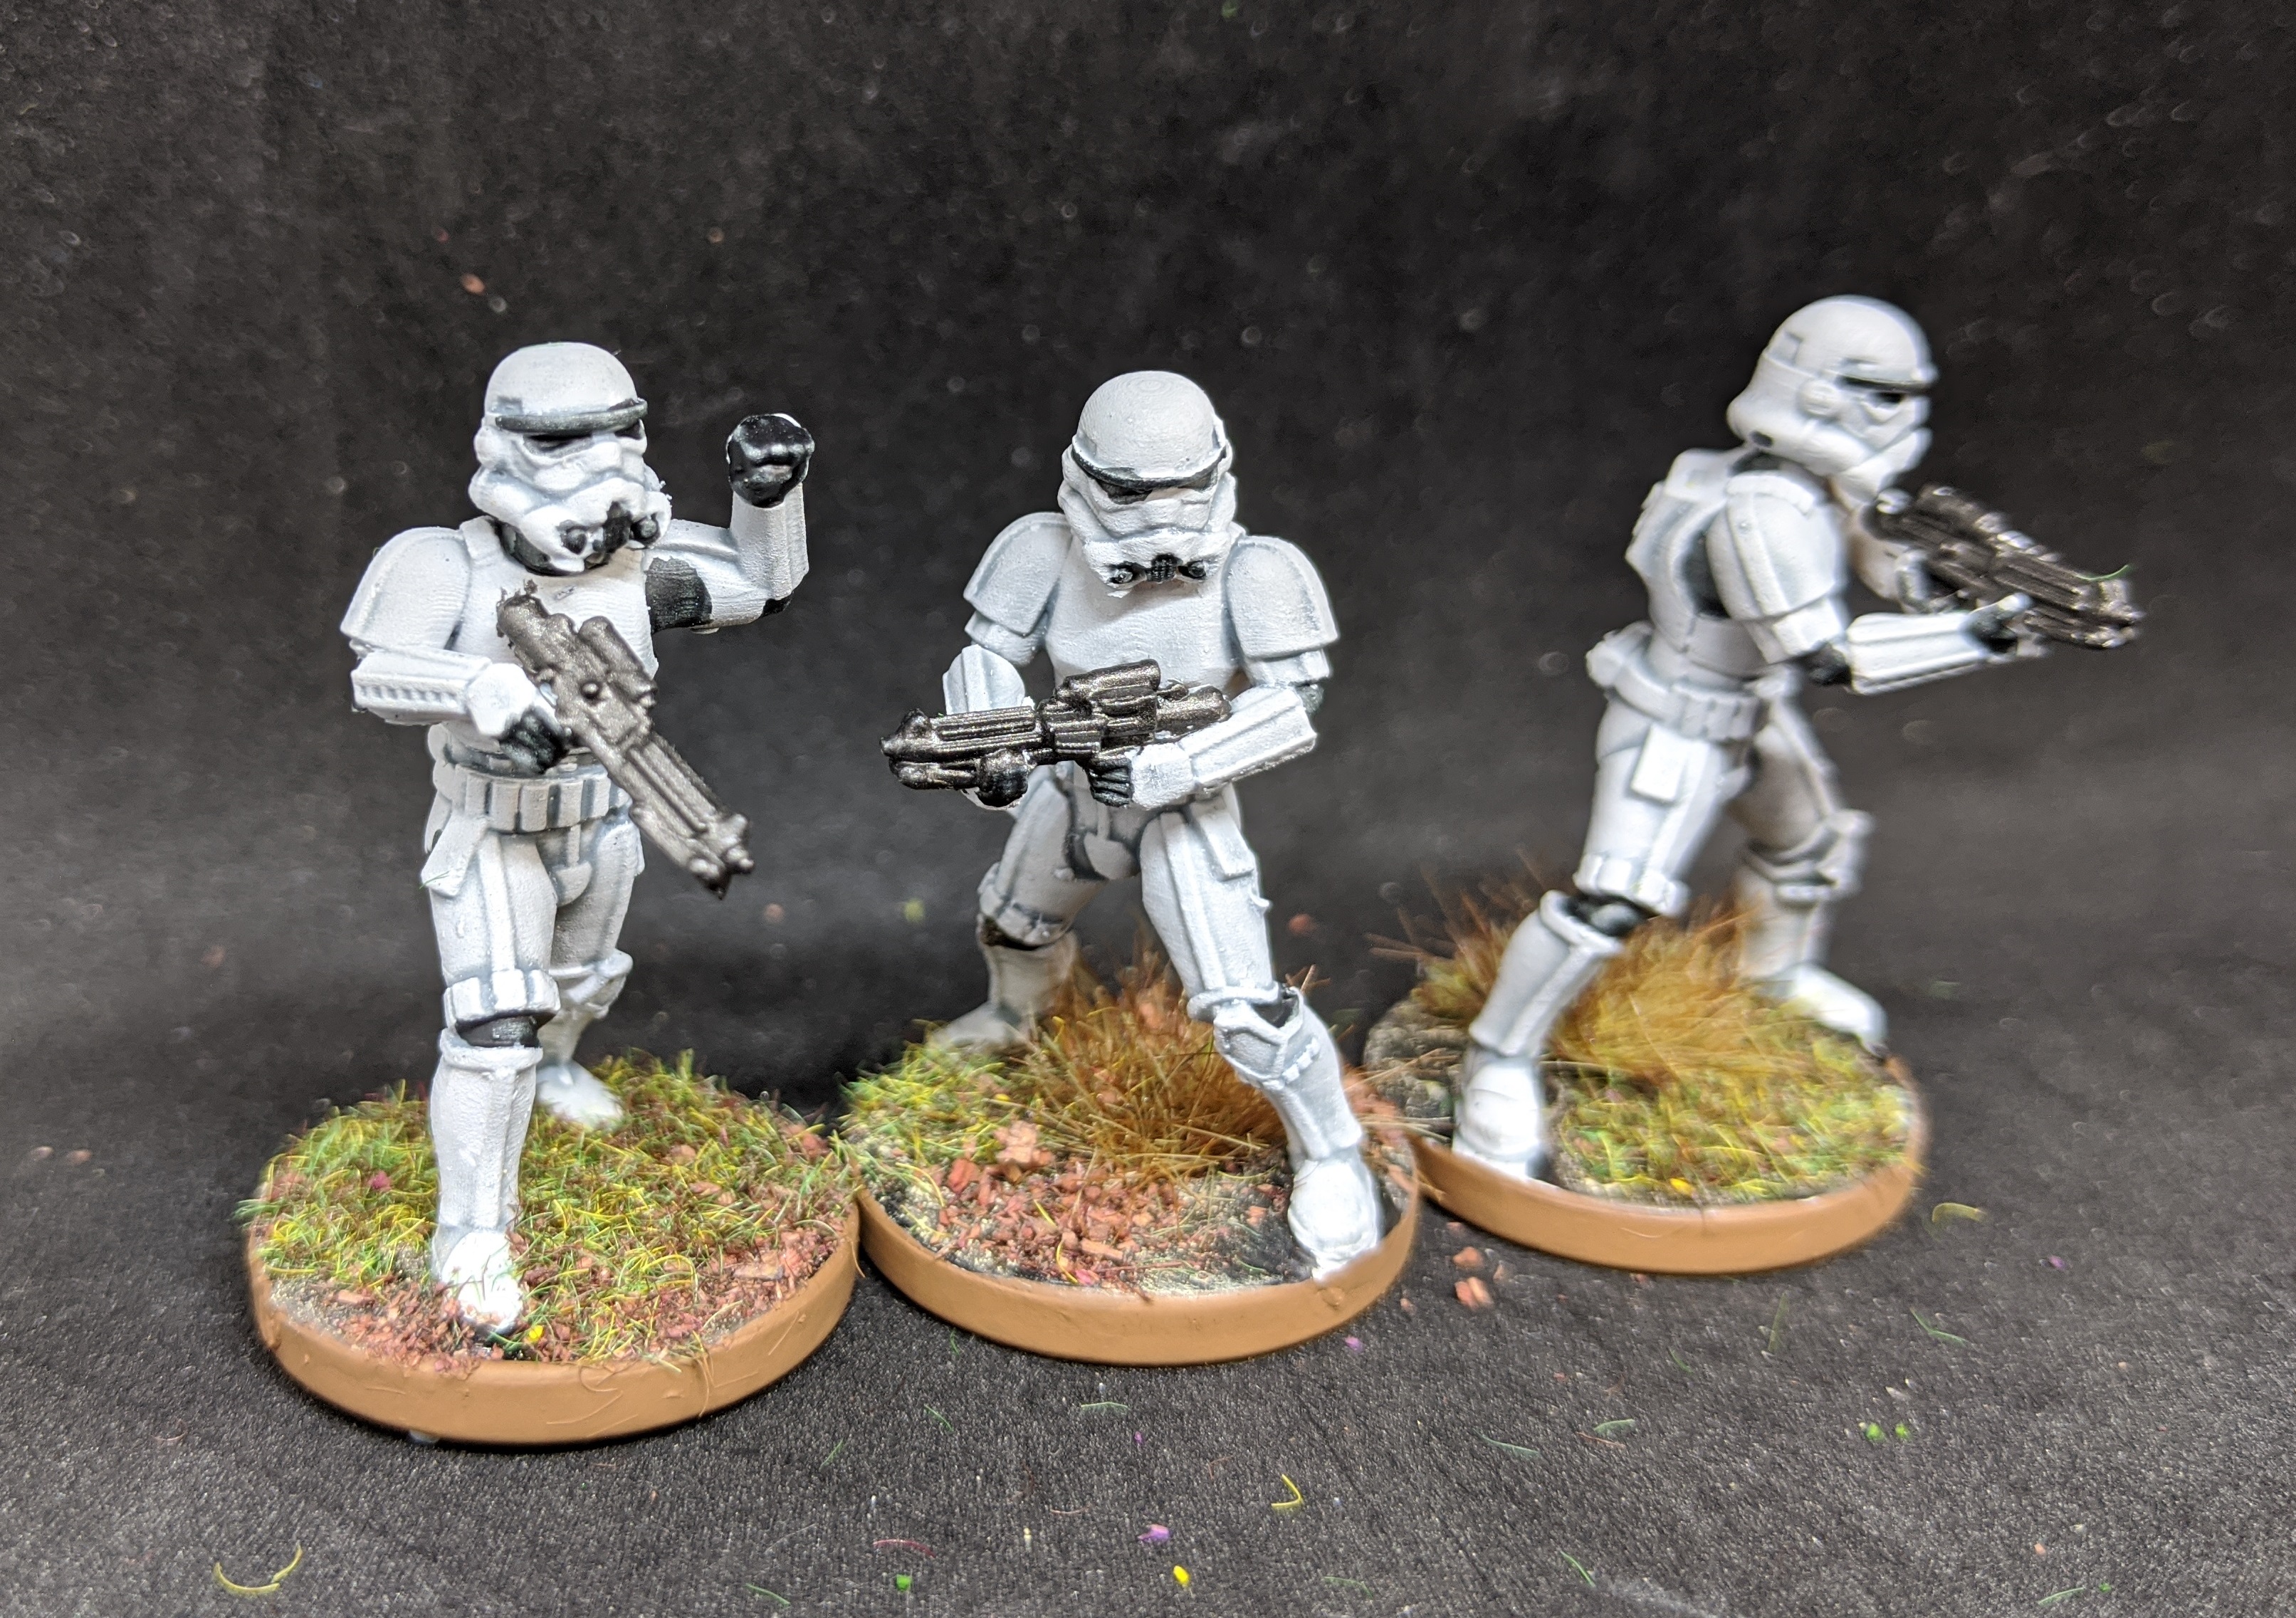
Weapons were picked out in a gun metal and given a wash of contrast Basilicum Grey.

Also 3D printed (files from the Patreon of ‘BigMillerBro’ who specialises in Star Wars Legion compatible models) were my Imperial Officers and Navy Troopers. The officers were painted up from a black undercoat using primarily an Andrea Color German Field Grey paint set I have. Not my best work, but a nice addition to the force.

I really enjoyed doing the Navy Troopers – again they were painted up from a black undercoat using primarily dark greys and washes. With both these and the officers I used a gloss Nuln Oil wash from GW for the leather boots and also in the case of the troopers the signature helmets.

Basing? Well I’ve gone in this initial batch for an Endor style base (I have a Scout Walker I am working on – also a 3D print) and I think this goes well with the Scouts.

AT-ST – file from Dark Fire Designs

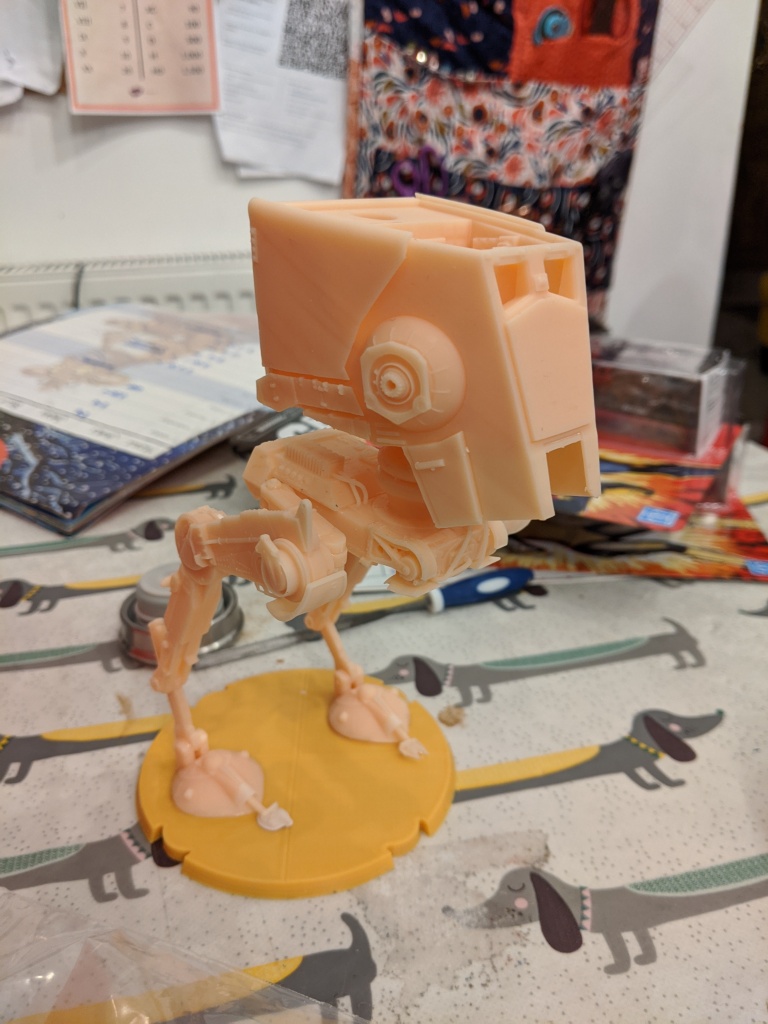
The good thing about 3D printing and having a quick and easy paint scheme is of course if I want to base some of these guys for other environments I can just batch out a few more. I’d like to do some more with an interior basing scheme (imagine running a game in a Star Destroyer or the Death Star and you get the idea).

I’m also working on a 3D printed Imperial Shuttle – but more on that soon…..

Ironblood’s Creature – The Kraken Awakes

Continuing my Action Force in 28mm scale project and expanding ‘The Enemy’ forces of Baron Ironblood I present my version of ‘The Kraken’.

The Kraken in my vintage Action Force collection.

Kraken was initially a mail away figure in the Palitoy Action Force range and in the Battle Action Force comics was discovered frozen in the Arctic by the evil Baron before being reproduced in his labs as part of his army.

The Kraken data file from the Battle Action Force comic

I designed these in Hero Forge and printed them out on my AnyCubic Photon resin printer. I did three designs in Hero Forge, all based on the ‘Dragon-person’ template.

Digital render of one of the designs from my Hero Forge account

I’ve not attempted to do a ‘screen accurate’ version of the original toy, these are more a homage. However I have tried to replicate some of the key features of the figure. Primarily this meant arming my Krakens with some form of trident and trying to replicate the clothing (which to me always looked like some sort of swimming costume).

The prints in the bare resin.

For two of the designs I added backpacks and to maintain the look armed them with a suitably sci-fi looking blasters.

I’m rather pleased with the results – one of the tridents snapped while I was handling the miniature post-print. Rather than re-print I left as-is and I think it works as a variation on the weapon.

I went for a fairly straightforward paint job using primarily Citadel contrast paints, washes and some basic highlighting.

These guys are going straight into my Red Shadows cast for 7TV. The 7TV 1967 Annual contains an ‘official’ profile for the Kraken and I look forward to bringing one or more of these guys to the gaming table soon. Action Force beware!

By your command – Galactic Centurions and Imperious Leader

Spiralling out of painting up some of the ‘not-Cylon’ models from the recent 7TV Argonauts Kickstarter I found myself (as often happens) searching the internet for other similar models.

Over on Thingiverse I found a free 3D file for a ‘Galactic Centurion’ designed by ‘BigMrTongue’ (aka Mike Tongue). I liked the look of this and it got me thinking about building a Cylon army/cast for 7TV.

Over on Patreon I discovered that Mike has a page and offers a whole load of variations on this design with lots of poses and variations in weaponry. A quick click later I was signed up and downloading.

I printed these all on my AnyCubic Photon resin printer and was really pleased with the results (despite the odd misprint due to my missing some supports). In general I was able to get a lot printed in one go and in the end finished with around 30 models in various poses.

My intention was to speed paint these and so I settled on spray cans and contrast paints as the chosen method. Undercoating in grey, I then basecoated using a ‘Poundland’ silver car spray. This resulted in a very bright finish – a good match for the highly shiny Cylons from the original Battlestar Galactica.

Black details were picked out in, well…. black! However using Citadel contrast black allowed me to quickly get these done and had the added bonus of letting the underlying metallic basecoat shine through giving a nice robotic look.

The models included a short ‘skirt’ at the back. While in the original TV series I believe these were also black, I fancied added a bit of colour so these were done using a Contrast Blood Angels red. Again with the very bright silver underneath this ended up looking quite metallic, which was quite pleasing.

I went ‘off-piste’ again in terms of screen accuracy with the weapons, choosing a copper from Vallejo to add additional contrast to the rest of the scheme. This was then dulled down with a Contrast paint wash using Astronomicon Grey (which I have found to be hugely effective as a finish for metallics on many different colours).

The most fiddly bit was left until last – the addition of the famous eye scanner. Just a drop of red in this case.

For some variation (and to indicate an officer class perhaps), I decided to paint a handful of the ‘Centurions’ in a gold livery. I cannot honestly remember if gold Cylons appeared in the original series (I have a feeling they may have been in the re-imagined series later on in the run). These were basecoated using a combination of Humbrol acrylic sprays (these can be easily picked up from model shops and shops such as Boyes and Hobbycraft in the UK and I think are oft overlooked as an option for tabletop gaming hobbyists).

My approach here was to lay down a solid ‘Brass’ base and then to a light top down dusting with ‘Gold’. The remaining steps were as per the standard silver troops.

So what about a leader for these robotic menaces? Well it just so happens that over the past few months I have been providing 3D printing services for a new company called Tangent Miniatures. Tangent produce a lovely range of figures in 28mm scale inspired by popular TV series and films that wonderfully slot into 7TV and complement the range from Crooked Dice. So far Wayne at Tangent has produced galactic hitchikers, space fighter heroes and some dimension hopping adventurers and cops. I have had the pleasure of 3D printing the resin masters for all of these and some ranges that are awaiting release in the new year (January). These include some ‘space heroes’ that would fit in really well as enemies for my Galactic Centurions, and also excitingly a ‘supreme imperious leader’ for the shiny robot men.

I’ve painted up one of the masters for the imperious leader, however I felt like he could use an imposing throne from which to order his legions.

So a couple of coke cans and a dip into the bits box later I have this. While in no way exactly the same of the screen version I think this works really nicely. The base I put on the leader fits exactly into the top of the can and I have not glued this so I can use the figure away from this scenery piece in games.

The paint job on the ‘throne column’ was again kept very simple and achieved entirely through the use of spray cans (the weather being kind to me on enough days to get this completed relatively quickly).

So there we are, a legion of Galactic Centurions and their leader, ready to pursue and hunt down the remaining human fleet.

World War III – a new front opens

Despite waxing lyrical recently about my choice of 20mm scale for a ‘cold war gone hot’ project I got distracted by some shiny things. These things cooincided with the annual black friday sales, the result of which being I now have two parallel projects.

So, I’ve ended up with quite a collection of 15mm (1/100) scale miniatures, the majority of which are from Battlefront’s Team Yankee range. I’ve picked up some British, US and Soviet tanks and vehicles and added to this some infantry (which I am multi-basing for use with Seven Days to the River Rhine by Great Escape Games).

I’ve been concentrating on British armour and Soviet Infantry so far. The British armour has been a joy to build and paint. I have been ploughing through the relatively new British Starter Force box set which is based around a core of Challenger 1 and Chieftain tanks.

The contents of the British Starter Force box

Again concentrating on a mid-80s European theatre I have gone with the standard BAOR (British Army of the Rhine) camo scheme using Army Painter Army Green as the basecoat with an airbrush application of Vallejo Air black. Details are then picked out with a watered down all over wash of Army Painter Dark Tone wash. I then highlight/drybrush up with a Citadel Death Guard green and a final overall light drybrush of Army Painter Brainmatter Biege.

Awaiting a basecoat of Army Painter Army Green spray primer

Tracks are basecoated with a flat earth brown, Strong Tone wash and metallic drybrush.

Waiting in painting line – some British Marksman AA Batteries and various US and Soviet vehicles. There are also some British Infantry Milan Teams ready for detailing.

I have only finished one Chieftain to completion so far (as a test model for the overall scheme); however as I am batch painting I have a lot (including more Chieftains, Challengers, armoured cars and other AFVs all in various stages of completion).

The Soviet Infantry is from Plastic Soldier Company. There are an amazing 141 figures in this set.

I followed a fairly basic scheme for the uniforms. Following an undercoat these were base coated with Vallejo Air Khaki followed by a Strong Tone wash. Webbing was picked out with Death Guard Green, helmets with Russian Green from Coat d’Arms and shoulder boards (very carefully) in red.

I’ve rarely painted 15mm scale miniatures, and I really had to adjust my mindset. Rather than trying to paints loads of mini-masterpieces, at this scale it is really more about the overall effect and how things look at a distance on the gaming table. At all scales I think consistent basing can hide a multitute of painting sins, and this was my goal here.

My 20mm stuff I am continuing with but am going to hold over for more skirmish level gaming. I recently picked up some 1/76 scale Airfix kits that I am going to start work on soon.

Let’s hope I can actually get some of these to the table sometime in 2021.