Two minutes to midnight – 7TV Apocalypse update

In between everything else I have getting on with (to varying levels of success) over the last few weeks I’ve been gradually grinding through the 7TV Apocalpse lead pile.

One of the sets I picked up were the cultists.  My favourite figure from this selection is definately ‘billboard man’.  What could he be advertising though?  Probably not insurance, but maybe something more sinister?

cultists

Having grown up in the eighties I have a certain morbid fascination with nuclear armageddon and in particular the whole area of civil defence and in the termonuclear age, the utter pointlessness of it.  No better is this encapsulated than in the infamous ‘Protect and Survive’ booklet and films of the period.

Protect and Survive

These are widely available to view on YouTube and the booklet itself has recently been republished by the Imperial War Museum.  The iconic branding of the ‘nuclear family’ on the cover of the booklet and as a bumper to the films seems perfectly ironic and fitting for ‘billboard man’.

Now my freehand painting leaves a lot to be desired, but I gave it a go anyway.  I decided to try and paint the majority of the miniature using Citadel contrast paints.  I’m still playing around with finding the best use for these, but am finding them particularly effective on ‘organics’ and ‘clothing’, especially over a white undercoat.

The board itself was painted with a grey contrast paint over white as a base.  I then freehanded on to the best of my ability a rough approximation of the Protect and Survive logo (including the mushroom cload) on the front and the phrase itself on the back.


I’ve still got plenty of more stuff to do on the post-apocalypse lead pile, and am still not really approaching this with any real plan over ‘what looks cool next’.  Next up then (probably) will be a biker gang.  I picked up a couple of sets of these from the Kickstarter, but have also recently built a couple of the now out of production Warlord/WGF Project Z biker gang.  Really impressed the quality and options on this kit and wish I had picked up more while they were still widely available.


Also recently completed (and again another majority ‘contrast job’) is this guy from Mantic’s Walking Dead, who will be added to my pool of generic PA survivors.

2019-08-31 10.57.29

Scratch Built Oil Rig – Part 2 – Refinery and Crane

I’ve managed to get a bit more work on the 28mm scale scratch built Oil Rig.  Having finished off the bulk of the superstructure I’ve now moved on to looking at the main body of the rig.

As previously discussed I have approached this in a module manner.  Each of the 2 foot square tiles now has a removable leg support and ‘concrete boot’, the idea being that the four of them can be arranged in any combination to vary the gaming service as required.  Each of these component parts of the platform will be themed to a specific ‘function’ of the oil rig and in summary these will be bridge/ops centre/crew quarters, helicopter landing pad, loading crane/storage area and refinery.

It’s the latter two that I have been initially concentrating on.

Refinery

For the refinery I have used a modular plastic model kit of a ‘Chemical Plant’.  Manufactured by Tehnolog in Russia, but sold under licence around the world (in the US by Pegasus Hobbies and the UK by Pocketbond) this kit is out of production but you can still find the odd boxed and version on eBay.

chemical_plant_box

I picked up a complete set a few months ago with the original intention of this being used for a post apocalypse tabletop for 7TV.  In the end this fits the bill for ‘the business end’ of the oil rig quite nicely.  Fully hard plastic and stuffed full of components, this is really like a lego kit for wargames scenery builders.  It does have some instructions and suggestions on how to build, but I really just free formed it with all the pipes, valves and tanks available.  This did end up being a bit fiddly, but was a gentle distraction for a couple of hours.  In addition to the core bits and pieces from the kit I added in some extra touches from my bits box, including some 40k scenery bits (in red plastic in the photos) and some platform pieces from the Robogear Starter Set (also produced by Tehnolog).

Rather than build this directly onto the platform I found a separate base for this (an old Warhammer movement tray), with addition of some magnets I’ll be able to use this as part of the rig table or just as a standalone piece elsewhere (meaning it may see the apocalypse after all).

2019-05-10 22.41.38
Refinery sat on modular platform (Zulu for scale!)

For the time being I have kept painting simple, a black undercoat and all over gun metal drybrush.  Various ‘tanks’ have been picked out in red, with ‘valves’ painted gold.  At some point moving forward I will look to weather this up suitably.


Crane and loading area

For this part of the board I wanted a big structure and rather than try and build something completely from scratch I’ve gone down the MDF kit route.  TTCombat do some really good value kits and I’ve gone with their ‘dockside crane’.  Again I’m approaching this from a modular view point with the idea being this can be removed from the rig and used as a separate piece on a different board as required.

The build on this was fairly straightforward, with minimal fuss, although the tolerances were very tight and I have had to do some creative trimming to make all the parts fit.  This was more down to my lack of care and precision rather than any inherent issue with the kit.


I painted this in quite a basic manner blocking out colours roughly and allowing the subsequent weathering to do a lot of the work for me (masking mistakes and dulling down some of the primary colours). Warning stripes were added using an MDF stencil, again from TTCombat.  The stenciled lettering and logos on were ‘painted’ using Gundam paint marker pens.

I wanted to give the crane a look that, although operational, it was no longer cared for or maintained properly.  This involved extensive use of rust effects, including dry brushing of Citadel Ryza Rust, a liberal application of some Modelmates Rust Effects and the use of weathering sprays from Plastic Soldier Company.  The whole model was then sealed using a liberal all over spray of Testors Dullcote.

Platform tiles

I’ve also started to add some colour to the platform tiles themselves.  Again I am keeping this quite basic for the time being.  A base coat of silver was applied using a cheap (and very smelly) can of paint sourced from Poundland and an brush on of Army Painter Quickshade Dark Tone was then applied.  This was again dulled and sealed using Dullcote.  There is some further tidy up and weathering to do here, but that is for another time.

2019-05-13 19.30.37

It’s all starting to come together and although time is rapidly running out,  I’m still on track to debut this at the 7TV campaign day at Dales Wargames on May 26th.


No, not the Goremaw! Revisiting Reaper Miniatures Bones

When Kickstarter first emerged as a ‘thing’ for tabletop games a few years ago Reaper Miniatures launched their Bones range of miniatures on the crowdfunding platform.  It’s fair to say that their campaign was a success raising nearly three and a half million dollars in 2012!  Three additional Kickstarter campaigns have followed all raising huge amounts and following each the majority of the miniatures have found their way into retail.

Bones Kickstarter
A small example of some of the miniatures funded by the first Reaper Bones Kickstarter


In fact when I ran Twisted Pinnacle Games as a online retailer Reaper Bones was one of my core ranges.  It was difficult to get hold of in the UK (Reaper have only within the last year opened a distribution centre over here) and offered a huge range of mainly fantasy miniatures.  This appealed not only to the wargaming crowd who were my core customers but also role-players and collectors.

Reaper-Bones

For those who don’t know, Reaper are a US miniatures company that started back in the 90s and are proudly based in Texas.  Although they have dabbled in rules in the past they are primarily a miniatures company.  The core of their range were 28mm scale metal fantasy miniatures in the classic high fantasy vein.  Rather than rank and file troops the concentration is mainly on characterful individual figures which very much have that Dungeons and Dragons vibe.  That said one of the fantastic things about Reaper is the sheer range of different sculpts, races and figure types in their catalogue and not just restricted to fantasy.  Need a cat person, a brain in a jar, some Victorian civilians or even just some different looking Orcs then their are bound to have what you need.

Brain in a jar
You didn’t know you wanted a brain in a jar until you realised you could have a brain in a jar (with legs)!

So what about Bones? The Bones range which launched in 2012 were initially versions of their existing metal models recast in a white PVC style plastic.  The selling point and marketing for these concentrated on their value and the ability to paint them straight out of the box without primer (more of which later).  While the detail was slightly less crisp than their metal versions, you could not argue with the value.

Reaper Bones - selection
A selection of Reaper Bones Miniatures – (l to r) Werewolf, Gnoll, Ogre

In addition to standard sized figures Reaper were also able to tool and release a number of larger figures including a rather splendid Cthulhu and plenty of Dragons.

Khanjira
Huge dragon miniatures are a hallmark of the range

So needless to say I bought into the first couple of Kickstarters in quite a significant way (this we before I had children and before I dabbled in wargames retailing for a while – i.e. I had the disposable income).  I never did that much with them (I hadn’t got a game in mind for using them with, but was really taken with just paining them up).  I ended selling most of my collection alongside my bought in stock during my retailing years and when post trading and company wind up I was able to get back into the hobby more I often thought about revisiting the range for myself.

Roll on a few years and I happened across this guy on the new UK Reaper Miniatures web store.  The Goremaw!

77579_w_1
Goremaw – Giant Worm

Now, I think this big worm-like fellow is based on some of the classic D&D style fantasy monsters, but I immediately thought – Tremors!  And then of course I thought – 7TV Apocalypse.  There just happens to be a ‘Death Worm’ profile in the game that this chap would be excellent for.

After a quick order to Reaper (it did feel strange not doing this in bulk as a trader), I received the Goremaw and set about putting him together.  The Bones plastic has a tendency to be a bit soft on smaller models, bendy swords and legs can be a problem.  This wasn’t however a problem with my work who was cast in a handful of mostly really chunky pieces of plastic which following a thorough wash in soapy water, I assembled using super glue (polystyrene cement / plastic glue does not work on this material).

Undercoating was achieved using an Army Painter primer spray can.  As I mentioned earlier Bones have been pushed in the past as not needing a primer.  In fact some primers have been noted to not work at all well with the material.  Reaper provide guidance on their website on which primers are most effective and how to use them.  I have never had any problem with Army Painter primer on Bones miniatures.  Wanting to go with a subdued ‘desert type’ palette I put down a layer of ‘British Army Uniform’ brown from the old Bolt Action range which was produced under license by Army Painter.

Goremaw 5

I then applied a top down yellow highlight using a can of Games Workshop Averland Sunset.

Goremaw 6

The idea with this project was to keep things simple, so I used the highlighted brown undercoat as the base coat and blocked out using a limited palette the other base colours on the model.  This really only amounted to a deep pink flesh colour within the maw, a light flesh up the exposed frontage of the model and an ochre/bone for the teeth and horns.

Goremaw 9
Blocking in the base colours
Goremaw 8
Rear view

Then to the dip.  I’ve never been much of a fan of dip in the conventional sense.  I have tried in the past the full Army Painter method, actually submersing figures in Quickshade and shaking them off and always found that I ended up with just a dirty looking miniature.  However I have had a lot of success (particularly when wanting to paint up large batches of figures) in brushing on the shade.  I have found that you can control the flow and thickness of the dip much more effectively using a brush, and used sparingly it can produce an effective result.  I have been using this method to paint up the Space Marines I have been collecting as part of the Warhammer 40k Conquest part work, and have also in the past done a relatively decent job on Star Wars Imperial Assault figures (including the Rancor who was a similar colour palette to my worm).

Long and the short of it was that the old tin of Quickshade Strong tone was dug out and following an argument with a screw driver was open, only to find a mess of thick gloop!  I’d not put the top on properly last time and a thick skin had developed, which although was easy to remove meant the the small amount of shade I had left was thicker than I would have liked.

Goremaw 11
Shading is effective but looks very messy at this point

When using this method the next bit is always the worse bit.  You go from a neatly painted model, albeit only in a limited set of colours with no shading, to a very shiny, dirty looking object.  The key is to hold your nerve, it will get better.

Goremaw 12
It’s shiny!

As the dip dried I soaked up any excess pooling with a brush and then gave it a good day or so to drive thoroughly.  Following this a combination of dry brushing and highlighting was used particularly on the belly and the teeth/horns.  By this stage it is starting to look neater, but is still really shiny (Quickshade is both a shade and a protective varnish after all).  Decent weather meant I was able to get outside and spray some Testers Dullcote and voila a nearly complete Goremaw.  The base was finished off with some dry brushing followed by a green wash to give it a mossy look and the ‘Death Worm’ is ready for the wastelands of the post-apocalypse.

Goremaw 2

I’ve got some ideas about maybe using this as an AI or referee controlled model in a vehicle only multi-player destruction derby scenario.  Having a giant worm burst out of the ground could really bend some fenders out of shape!

Goremaw 4

All in all I really enjoyed building and painting this model, and it reminded me of why I fell in love with the Bones range in the first place – lots of choice, inexpensive and fun to paint.

7TV Apocalypse Vehicles – Tamiya conversion

Having recently taken delivery of both the rules and a huge set of miniatures from the 7TV Apocalypse Kickstarter I decided I should probably finish off some of my incomplete PA projects before diving into any new stuff.

Back at the Wargames Illustrated 7TV day last summer I came away with a 1/48 scale Tamiya kit from the prize pool.  This was a World War II SS-100 aircraft tractor, but I immediately saw the opportunity for some conversion work to make this suitable for the wastelands.

Tamiya SS-100

The build of the basic kit was fairly straightforward and I cut some corners in terms of the detail (for example leaving out the interior and some of the smaller body work bits) to make it both more suitable for conversion and more sturdy as a gaming piece.

Tamiya-conversion-1

Using some of the conversion parts made available by Crooked Dice and a few bits and pieces from the spares box (including some 1:1 scale car body mesh) I gave it a suitably shabby and cobbled together PA look.

I completed the build last year and it has sat on my hobby work bench ever since.  Inspired by the arrival of lots of lovely figures from the Kickstarter I was spurred on to finish painting and weathering it.

Basecoat was a from a spray can (Plastic Soldier Company Olive Drab) with a few suitably muted block colours used for stowage.  The exception being the fuel tanks on both the original kit and the conversion parts which I picked out in red.

Tamiya-conversion-7

Weathering was completed using a thinned down wash of Army Painter Strong Tone wash and chipping was done using a dark brown using the sponge technique (a cross between dry brushing and stippling using a piece of foam).  The gunner was picked out in blacks and greys – the gas mask giving him an almost SAS look.

All in all I’m pretty please with the overall result.  It was quite a quick, but I think effective paint job.  I’m also thinking that this vehicle would go really well with the ‘Mutant Hill Mob’ cast, so I think they are going to move close to the top of my 7TV Apocalypse to-do list.

7TV Mutant Hill Mob

Robogear – the ultimate bits box

A few years ago while hoovering up random bits and pieces on eBay to resell via my old online store I happened across a starter box for a tabletop miniatures game called Robogear.

This was a science fiction game with plastic miniatures and vehicles,  released in the UK by Airfix in the noughties.  As an aside, I’ve since found out that the background to the game is slightly more complicated than simply an attempt by an (at the time) ailing scale model company to grab a piece of Games Workshop’s 40k market.  More on that in a bit.

360_c02b5d0bc9b42f79e1d05701d2e277e4
Airfix version of the Starter Set

The starter set I got hold of contained a lot of half built models and in the end I sold it off for not much more than I bought it for.  Not a hugely interesting story so far I’m sure you’ll agree.

However over the past few years as my gaming and hobby has become (slightly) more focused I got to thinking about how much potential there was in the Robogear starter box for a couple of the projects I have on the go.  In particular the set contained some interesting plastic terrain (in the form of platforms and gantries), that would not only do for Kill Team, but also would slot quite nicely into some of the post-apocalypse scenery I have been building for 7TV.  Similarly the vehicles could be cannibalised for bits for wasteland vehicles, but more specifically many had a 40k Imperial Guard feel to them.

pic770624
Stat card for one of the Starter Set models

So back to ‘the online auction site’ it was.  After a bit of searching around I managed to pick up two nearly completed starter boxes for only a tenner (albeit with the terrain bits missing), as well as complete unopened box for not that much more.

5KDNWOxk
Two for a tenner – bargain!

First thing to say is that the infantry figures are really not very good.  They are pretty large (maybe 1/48 to 1/35 scale) and very basic.  They are multi-part but are built with articulation that really puts them in the category I feel of a mini action figure rather than a wargames miniature.  Some of the hand weapons may get reused, but I suspect these will find themselves either in the back of a drawer or re-sold at some point soon.

Robogear figures
The not great figures

The vehicles on the other hand have a lot of potential.  Stylistically they are a bit ‘confused’.  There are elements of hard science fiction here, but also a touch of the grim dark too, as well as a bit of Battletech.  Various vehicles are included and these can be built in a number of ways – either with tank tracks, mech-style legs (think Astra Millitarum Sentinel) or insectoid (think Zoids!).

Robogear vehicles
Example of some of the part built vehicles (28mm figure for scale)

The weapons are of variable styling and quality and it has to say, again, that some of these look quite toy like.  There is a reason for this however, in the rules for the Robogear game you can either play with ‘virtual combat’ (i.e. rolling dice), or physical combat (yes the weapons actually fire mini missiles in some cases)!  All of this however could be worked out by swapping out bits and pieces from other spare parts in the bits box.  There are also a couple of ‘flyers’ in the box, again these have potential, but maybe not as much as the ground vehicles.

Robogear sprue.jpeg
Example of a complete frame

As I mentioned, only one of the three boxes I acquired contained the scenery components.  Now these do look useful.  Designed to be reconfigurable, they are provided with a ‘clip’ system to hold everything together (but not necessarily permanently).  Looking into the current availability of these terrain kits I discovered more about the background of Robogear itself.  It turns out that Airfix bought the rights in for the system from a Russian company called Tehnolog (similarly in the US the same game and kits were released and marketed by both IMEX and Pegasus Hobbies).

Robogear terrain
Hexagon / Platformer Terrain from the Starter Set


A further search on eBay and I found a trader in Russia selling brand new Robogear kits for a bargain price of about $8 a kit.  I’ve ordered a few of this, with my eyes on the flyers as Imperial Guard air support and the buggy to be added to the wastelands of my post-apocalypse gaming.


Furthermore I also happened at the same time across this beauty of a kit from the same stable.  A modular chemical plant kit that snaps together and will be another fine addition to my stock of terrain pieces for multiple games.  Like a lot of the Tehnolog kits this appears to have been released by another firm for the Western market (in this case Pocketbond).

All in all I can see a huge amount of potential with all these purchases for conversions and kit bashing and can see them working across loads of my existing projects (and maybe spawning a few new ones).

First on the list, a proxy for an Imperial Guard Sentinel and we’ll then see where things go from there….


7TV Pulp Blog (and a whole load of apocalypse)

Today I visited the Robin Wargames Trade show in Nottingham, primarily to pick up my 7TV Apocalypse Kickstarter from Karl at Crooked Dice, but also to have a general ‘mouch’ about while trying not to spend any money.

7TVA2
A big box of goodies collected today

I’ll be doing a quick write up of Robin and an overview of the Apocalypse Kickstarter items in another post shortly, but in the meantime I just wanted to point you the reader in the direction of the 7TV Pulp blog.

7TV Pulp is due for release at UK Games Expo later in the year, and is a unique collaboration between Crooked Dice Design Studio and Edge Hill University.  You can find out more about the game on their new blog, which includes a game design and development diary.

The Pulp version of 7TV is an ode to the cinema serials, crime novels and ‘pulp’ magazines of the 30’s and 40’s; with a serious nod also to the cosmic horror of HP Lovecraft and the Cthulhu Mythos, as well as the cinematic outings of Nazi bashing archaeologists everywhere.

Time-Lost-Heroes
Some of the existing Crooked Dice Pulp-style miniatures – soon to be joined by a whole lot more

I was lucky enough to have Karl show me some of the figure previews for the Pulp range and there are some corkers in there.  With such a wide genre definition, there’s sure to be something for everyone.  I for one am working on a ‘Flash Gordon’ cast that should slot in nicely, that said I have a lot of post-apocalypse to get through in the meantime…..

7TVA1
Lots of post-apocalypse miniatures now in the lead pile

The Survivalist Returns (in 28mm scale)!

A few months ago I waxed lyrical about some inspiration for post-apocalypse gaming and in particular the Survivalist novels of the 1980s by Jerry Ahern.  As fulfilment of the Crooked Dice 7TV Apocalypse Kickstarter gets closer I’ve decided to revisit this irradiated world where men were men, women were women, guns were cool (and overly described repeatedly in the prose) and the red menace was real.


As a reminder this pulpy post-apocalyptic novel series racked up over 20 titles telling tales of the titular Survivalist, John Rourke and his adventures following the nuclear devastation of World War III and a subsequent Russian occupation.  In case you had forgot our hero had the following traits:

  • Ex-CIA operative
  • Weapons expert
  • Survival and wilderness expert
  • Medical doctor
  • Super-sensitive eyesight (so has to wear mirrored shades ALL the time)
  • Motorbike rider (almost exclusively always a Harley Davidson)
  • Smoker (because it was respectable in the 80s)
  • Fluent in multiple languages
  • Irresistible to women
  • His middle name is Thomas (yes really)

This guy is crying out for the tabletop!

thWBL2BYV2

So two things to do.  Find a figure to represent this alpha male in 28mm scale, and stat him up for 7TV.

81HOw6z7WIL._SL1500_
Wargames Factory Male Apocalypse Survivors were repackaged by Warlord Games as part of their Project Z range

Miniature choice first!  Rourke has many weapons of choice, but the most iconic are his ‘twin Detonics Combat Master .45, shoulder holstered pistols’.  The novels are very focused on the exact name, model, calibre and so on of the various weapons being used, in fact arguably more effort is put into the description  of military hardware and material than is expended on characters.  But I digress, the key thing is I had a couple of sprues of the old Wargames Factory Male Apocalypse survivors laying around and a quick snip round with the clippers and plastic glue and I had the vested, shade wearing, pistol wielding post-nuclear survivalist I need.

minijohnrourke

In terms of the stats, I used the excellent fan built Agency Casting Tool for 7TV to produce a suitably matching profile for 7TV.  I based the core profile on the generic Action Hero, but made a few changes to the attacks and special abilities to match the unique range of skill our hero has.  With a star quality of Burst of Action coupled with Blown Clear, Hard, Fight Back and Lucky as base special effects for this profile I felt we were nearly there, I swapped out Lucky for Medic (as previously mentioned Rourke is of course also a fully trained MD, and he’s so damned good he’s no need of luck).

2e-rulebooks1
I used the rules in the 7TV Producer’s Guide to craft myself a hero

The only problem I really came across was how to represent the ‘twin Detonics’.  7TV doesn’t have any rules for dual wielding; the 2 shot ability most pistols have doesn’t really cut it as it simply allows more than one shoot action to be taken a turn.  What I wanted was double the fire power in just one attack.  After some head scratching I decided to swap out the standard pistol from the Action Hero profile with a high powered pistol from the military weapons list.  This gave me a boost to the strike value and still gave me the 2 shots option, but I didn’t really think that it still represented that balletic gun play action I was after.  Rather than invent any rules I think I solved the problem but adding the ‘Deadly’ effect to the attack profile.  This would allow me to chuck in an extra attack dice, so to me gave a nice approximation of the extra punch you might get from firing two pistols at once.

7TV_cast-John-Rourke-The-Survivalist (1)

Of course non of this came cheap.  Following the rules in the 7TV Producers Guide for customising profiles has led to John costing a chunky 15 ratings (points).  The vast majority of stars in 7TV only cost 10.  However as I’m sure you can appreciate our Survivalist has a very unique set of skills and is in effect a one man army, so I’m not too worried about this.

With 7TV Apocalypse due out in March John will be getting some action soon I’m sure.  Might even build him his ride if I can find that Project Z bikers sprue anywhere…..

survivalist-mid-wake
John Thomas Rourke – he always rolls a six

Adventures with Amera Plastic Mouldings and Stone Textured Paint

One of the great pleasures I get from the hobby is the chance to view everything through the hobbyists eyes.  So when I am out shopping (ostensibly for real word stuff) I’ve always got half an eye on what I could use for the latest project on the tabletop.  I’ve written before about my ongoing love of re-purposing toys for gaming and toy shops are a great place to start.  However I never overlook what might be lurking in the local discount store, Poundland or craft supplies shop.

Although I have an airbrush I also make extensive use of spray cans to undercoat and basecoat miniatures and models.  There is a lot to be said for the convenience, particularly of the Army Painter coloured sprays of quickly and effectively getting minis to the table.  That said one of the areas that people often overlook are the basic colours used for undercoating (black, white and grey).  Yes you could shell out a tenner (or more) on some Games Workshop or Army Painter sprays for this, but the basic car primers you can get from places like Halfords or even the pound shop are in most cases just as good or even better (just be careful to avoid the gloss versions).  I’d highly recommend the matt black Halfords own brand cans, they give a really nice flat finish on most surfaces and are good value for the  amount you get).

Anyway, I digress.  On a recent lunchtime wander round my local Boyes store (one of the few places in the UK outside of specialist gaming shops that stock a good supply of Vallejo paints), I happened across these…

0
Rust-oleum Stone Textured Finished Paint

Stone effect aerosol sprays in a variety of colours.  I had a few years ago used one of the these in a dark grey to provide a tarmac like surface to a game board I was building, but like many projects a few years back didn’t see it through to the end.  However having recently bought a Bastion Stronghold (Z2014) from Amera Plastic Mouldings for use as a ‘wasteland’ fortification for post-apocalypse gaming (and potentially a bit of Kill Team / 40k on the side) I had an idea…..

Amera have been on my radar for a while.  They produce a range of vac formed plastic terrain and scenery aimed at both the wargames and scale modelling (dioramas) markets. Their products are good value and in many cases substantial in terms of size.  One of the downsides of using vac-formed plastic however is that the surface details of larger pieces tend to be very flat and lack texture.  If only there was a quick and easy way to apply a textured finish, maybe to emulate concrete or pebble dash to my recently acquired ‘post-apocalypse’ stronghold?

So having  put two and two together I started work.  After the recommended wash in warm soapy water I gave the whole piece a black undercoat.  After leaving this to dry I applied the first coat of stone effect.  I had chosen ‘bleached stone’ as my preferred colour of sprays as I though it would match an arid PA wasteland type setting.

First thing to note on the stone effects aerosol is that it is under quite high pressure and comes out very forcefully.  It became quite apparent early on that this meant I was going to have to be very patient, do a number of thin coats and wait for each to dry properly.  Repeated application of layers on a surface that was not yet dry just ended up moving the stone effect paint already laid down around.

What also became clear was that the black undercoat was not working.  The light ‘desert yellow’ / ‘skeleton bone’ like colour of the spray was being overpowered by the dark base.  To rectify this, once the first thin layer was applied and was dry (after about 15 minutes) I gave the whole model a full all over spray of Citadel Averland Sunset (a darkish yellow).  Building subsequent layers over this was much more effective.

Once I’d completed about 4 or 5 coats using the stone effect I had a good covering and a good scale approximation of either pebble dashed concrete or sandstone.

11
A couple of coats in and the effect was starting to look better

Where to take it from here?  I knew I definitely wanted to weather this down, especially as it was intended to be a wastelands style outpost, but simply dry brushing a highlight over the stone effect would perhaps make it too light.  I could of course have left it there, the effect was good enough for ‘basic tabletop standard’, but I was keen to take it further.

I also wanted to ensure that the stone effect paint was protected, so rolled the weathering and protection into one by painting on Army Painter Quickshade Strong Tone.  I’m a big fan of Quickshade; not the dipping method, rather painting in the same way as a shade or wash.  Normally with miniatures following an initial drying period the shade ‘pulls back’ into the recesses of the model and you can ‘dab’ up any excess with a brush.  With this scenery piece there weren’t really any recesses into which to recede so I had to work hard not to show brush strokes in the finished effect.  I achieved this using swirling motions with a cheap large brush.

At this stage, to be honest, I wasn’t very happy, it looked like I had dulled down the stone effect too much and the natural gloss of the Quickshade kind of made things worse (albeit I knew I was going to have to dull this down with a top coat).  A quick dry brush back up of Army Painter Skeleton Bone seemed to retrieve the situation, but I was now left with a much darker piece than I was originally intending.

I was on the verge of going back to the drawing board, when I thought about maybe rather than weathering this up as an arid desert stronghold, I could shift my post-apocalyptic mindset more towards a ‘nature reclaiming the landscape’ scenario.  To that end I liberally applied some green washes and made use of an old bottle of Modelmates mould effect I had.

14
Midway into the weathering process

With the addition of some flock, tufts and overgrowth I was much happier with the final result.  The metal supports and door were painted silver and then (probably overly) weathered up using again a Modelmates rust effect.  Finally the whole thing was sealed with a couple of thin coats of Testors Dullcote.

All in all I’m pretty pleased with the outcome.  I’d highly recommend Amera Plastic Mouldings as a cost effective and striking alternative to other options for tabletop scenery.  Using the textured spray paint added that extra level of detail, but required some patience.  As they say, you learn from your mistakes.

This finished piece will hopefully be finding it’s way into a game of 7TV Apocalypse soon.

20

Road Warriors and Freeway Fighters

Post Apocalypse (PA) is all the rage nowadays. However the overarching theme and context no longer tends to be the aftermath of global conflict or nuclear armageddon, but the encroachment of the walking dead or the dystopian future nightmares of settings first originated by the likes of Orwell and entrenched in popular culture by the likes of The Handmaids Tale.

This kind of speculative fiction tends to be reflective of current social and geo-political conditions. From a tabletop gaming perspective while many of these themes and settings are future based, you can easily identify the time period in which they originated and were written. However trends have a way of coming back.

13-Post-Apocalyptic-Movies

Recently we have seen an upturn in the emergence of the traditional post-nuclear PA settings, particularly that wasteland populated by road warriors and freeway fighters inspired by a certain style of movies from the early eighties and starting of course with Mad Max. Part of this can be explained by the cycle of nostalgia that appears to work on 30 year intervals. Recent games and rulesets like Gaslands, Devils Run Route 666 and the upcoming 7TV Apocalypse capture this feel. If you want to roll back to the steps leading up to armageddon there is a renewed interest in Cold War Gone Hot and World War III with the likes of Team Yankee and the upcoming Battlegroup NORTHAG.

world-war-3

My current favourite set of rules are 7TV by Crooked Dice Game Design Studio. A great and most importantly fun game that effectively allows your to recreate TV shows (and films) on your tabletop with tongue usually firmly in cheek. In fact the game is effectively a game about making a TV series. You dont have armies or warbands, you put together a cast containing stars, co-stars and extras. You spend ‘plot points’ to take actions, the card driven event mechanic allows things such as continuity mistakes, special effects mistakes and issues with difficult stars to affect gameplay. Now in its second edition the game is primarily focussed on the spy-fy genre (think Bond, Gerry Anderson, the ITC action series of the 60s), is figure agnostic but is supported by a great range of 28mm scale miniatures available directly from Crooked Dice.

7TV is branching out soon into the Post Apocalypse, with a standalone game that takes the core mechanics of second edition and tweaks the flavour and setting. Most notably the existing vehicle rules have been expanded to accomodate those Road Warrior type scenarios. The full game is due to hit Kickstarter this Autumn, but I had the opportunity back in July to attend a play test / campaign day to try out these rules.

2018-06-30 15.12.02

One of the coolest things about this sort of thing from a hobbyists point of view is the creativity that it allows for things like conversions and sourcing figures. For the play test day I had to put together a cast and include a suitably post-apocalypsed up vehicle. I went for a ‘big rig’ approach and with a nod to 7TVs cult tv background a cast based around Garth Knight and his Goliath truck from Knightrider (imaging after the fall of society Garthe would be a magnet for scavengers and marauders).

2018-06-23 15.05.32

Since then I’ve been bitten hard by the bug and have spent more time sourcing vehicles, bits, conversion parts and miniatures. This blog series will cover this project in detail as I prepare, strap on my survivalist gear, rev up the V8, scavenge the gasoline and face the white line nightmare of the wastelands.

Post-Apocalypse Terrain Build (with biscuit tins)

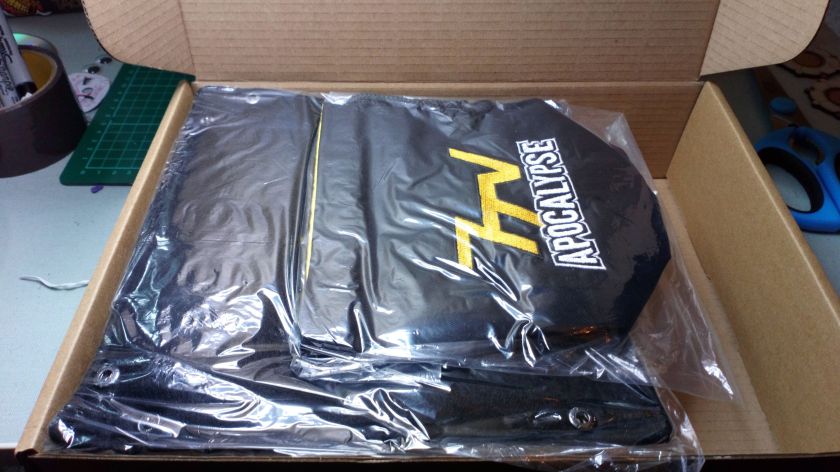
I recently had the pleasure of attending the Wargames Illustrated 7TV Apocalypse Day held in the wonderful surroundings of Wargames Foundry on the outskirts of Newark.
The day was all about having fun testing out the new 7TV variant rules for gaming in a wide variety of post-apocalypse settings.  Although aimed at a wide variety of sub-genres within the PA setting, one of the key additions to the core game was expanded vehicle and vehicle combat rules.

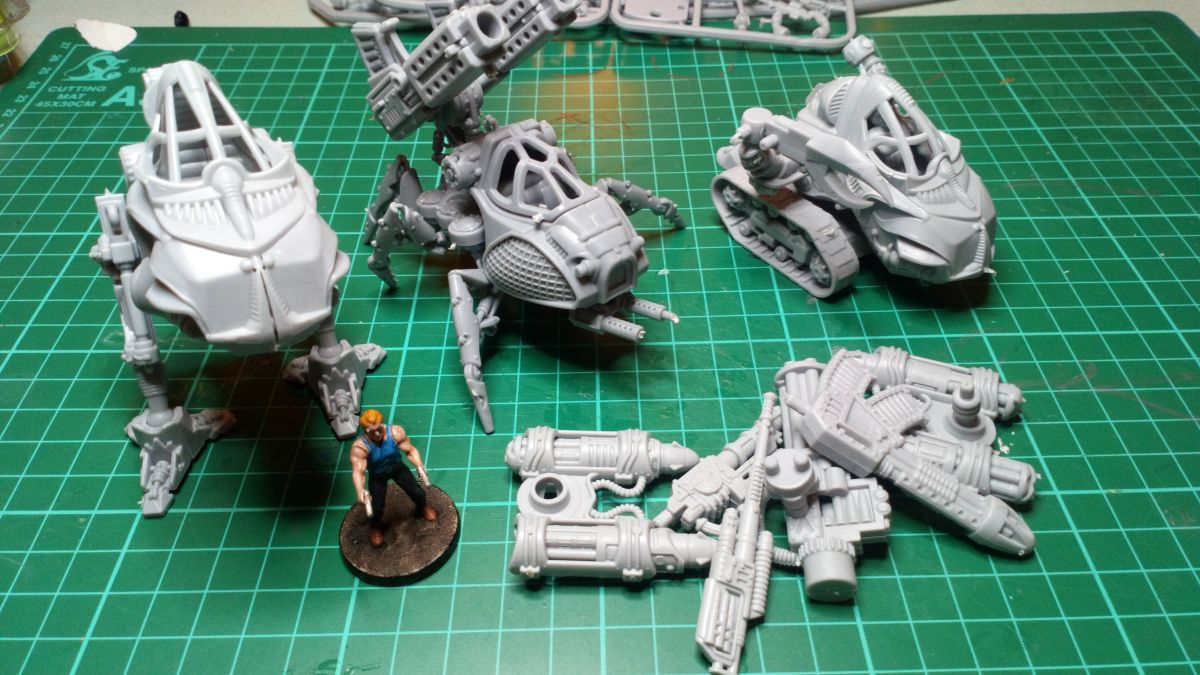
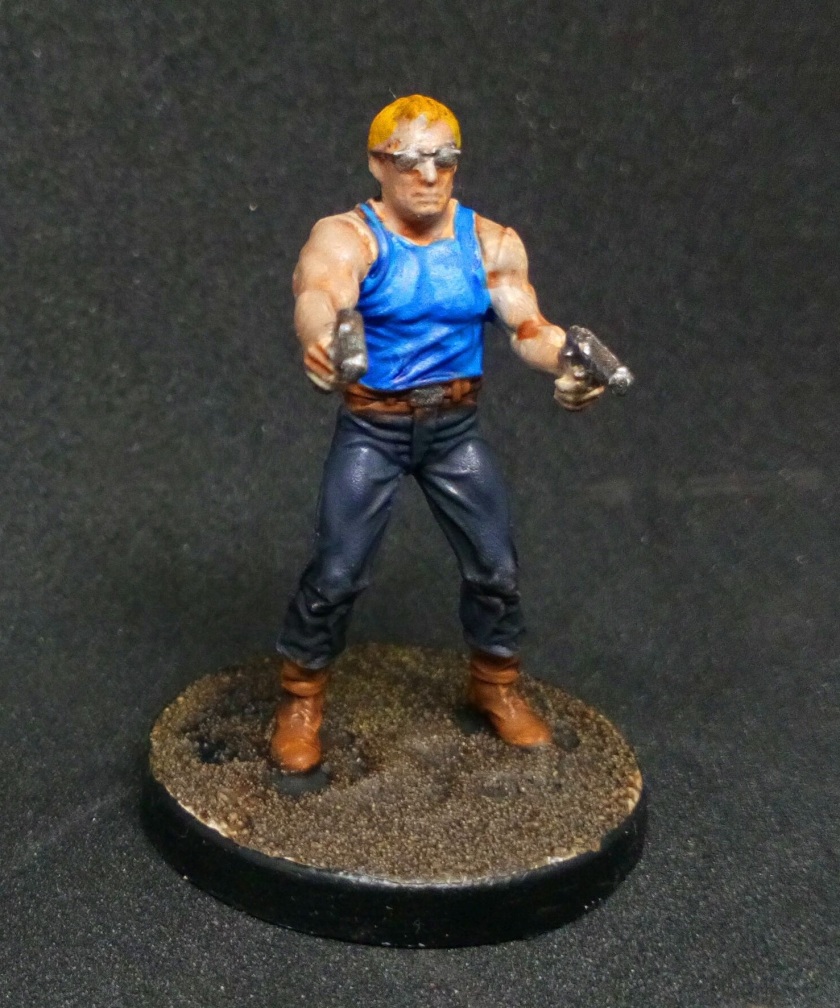
Therefore preparation for the day included building a suitable vehicle to carry your cast and fight it out with.

Some excellent terrain and scenery was provided on the day, but coming back I had the real desire to knock together something of my own.

I’d been hoarding some bits and pieces recently and what better to fight over in the ‘white line nightmare’ of the future than the precious gasoline.

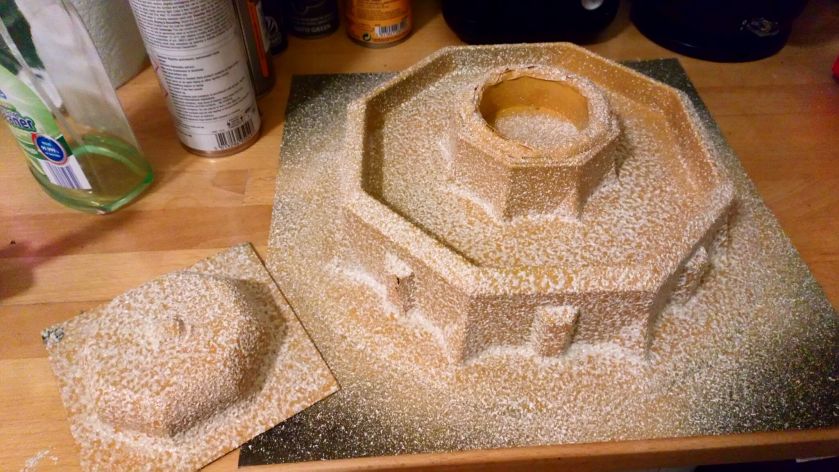
So behold the start of the ‘biscuit tin oil refinery’…

37019438_10156628322805555_110758552204738560_o-770

The fundamentals of this build are biscuit tins.  First thing before anything else could be started then was to eat all the biscuits. An arduous task, but one I achieved with bravery and resolve.

Many years ago I backed the first Mantic Deadzone Kickstarter, I never really got into the game and off loaded most of it, apart from the excellent Battlezones scenery bits and pieces.  To dress up the basic tins which would act as the silo/tank I used some of the Battlezones ladders and a few other bits and pieces.

To provide the upright struts around the tank (and to make it look less biscuit tin like) I used off cut pieces of plastic sprues.

To provide a base I used some ‘magazine dividers’ which are effectively quite thick plasticard.

The plasticard base was trimmed to make it look less like a piece of stationary, and then marked out with areas where paths and pools of ‘toxic waste’ would be placed.

A mix of modelling sand and PVA was whipped up and slopped on (technical term), leaving space for the marked out areas.

Taking advantage of the very un-British summer this was left out in the blazing heat for a while to set.

I wanted to go with a downbeat weathered look and knew I wanted it to look rusty and abandoned.  First base colour then was Army Painter Chaotic Red to provide that underlying feel.


Light sprays of Russian Green were then used to add the primary hues, leaving the dark red showing underneath.

2018-07-1416.34.16_preview.jpeg

After having left it to dry for a while I then scuffed up key areas using a kitchen scouring pad to scratch off layers of paint to try and reveal the underlying red (and in some cases original biscuit tin colours).


I used (the now sadly out of production) Modelmates paint on rust effects to properly weather it up, concentrating on scuffed areas,  the areas where the two original tins met (rather than hiding the join I thought I’d make use of it.  I also concentrated on the areas where the ‘pipes’ joined the base of the silo.  In addition the ladders were rusted up in key areas.


A covering of Plastic Soldier Company Dirt Brown weathering spray was then used all over and after a few minutes was smeared and sponged using some old blister pack foam.

The foam was then broken out again to use the ‘sponging chipping’ technique using a dark brown paint.

Having completed the bulk of the paint work on the silo itself, I set about the base.  A generous coat of brown artists acrylic paint was applied followed by an initial dry brush.  This was then followed up by painting on some Army Painter Strong Tone dip.

5b55c61d4adb4-5b55c61d4adf02018-07-142017.01.55_preview.jpeg.jpg-770

Following (the faster than usual due to the summer heat) drying time of the Quickshade I then did a  lighter brown drybrushe followed by a light dusting of Army Painter Skeleton Bone.

Wasteland tufts from Army Painter were used to add detail (especially around the edges of the structure).

I’d previously left some gaps in the original sand-PVA mix on the base board with the intention of using these as pools of some sort.  In fitting with the wasteland setting these became toxic waste deposits, so I finally found a use for that pot of Citadel Nurgle’s Rot technical paint I’ve had lying around for years.

The space I had left for pathways was painted dark grey and then roughly stipled with a lighter grey to give the impreseion of gravel or worn tarmac.

Pipe work and barrels were picked out with Foundry Blackened Barrel (my absolute favourite metallic paint – ideal for guns – as it says on the tin!).  A bit more ‘toxic sludge’ was added to the top of one of the barrels.

2018-07-1608.39.30_preview.jpeg

Finally I dived into the bits box of decals and applied some warning signs in key locations and chose the deliberately ominous ’13’ for the silo’s primary identification!

2018-07-1608.38.28_preview.jpeg2018-07-1608.39.07_preview.jpeg

And that about does it, all that remains is to seal down the decals and apply a bit of weathering to them.

I’ll be trying something similar again (this time with laundry pod containers) in preparation for a table on which to play 7TV Apocalypse!

I originally published this article as a Project Blog using the new functionality on Beasts of War.  I’d highly recommend folk check this community and feature out.  It’s a great way to share ideas and get feedback on any hobby related activities.  (To access the projects functionality you will need to sign up as a ‘backstage member’, there is a free 7 day trial if you want to try it out).