7TV Star Wars Day and Partizan 2021

I’m pretty late to the party with both of these, but over the last month or so I have actually attended some real events with real people.

Star Wars 7TV Day, 18th September 2021 @ Board in Brum

First up back in September was a visit to Board in Brum in Walsall for a day of gaming in a galaxy far far away. Using the 7TV rules, Star Wars was the order of the day. This was my first time playing 7TV since the participation game I ran at Hammerhead back in March 2020. Much fun was had, all three games were lost (of course) and it was just great to be out there rolling dice with folk again.

Games in progress at Board in Brum

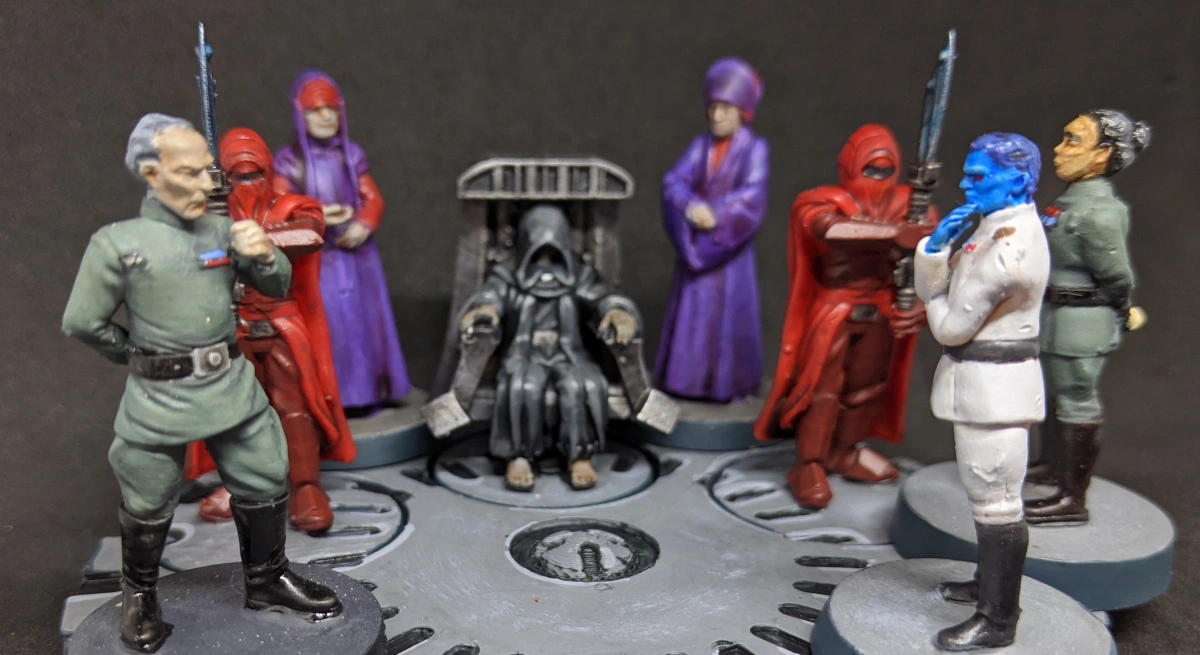
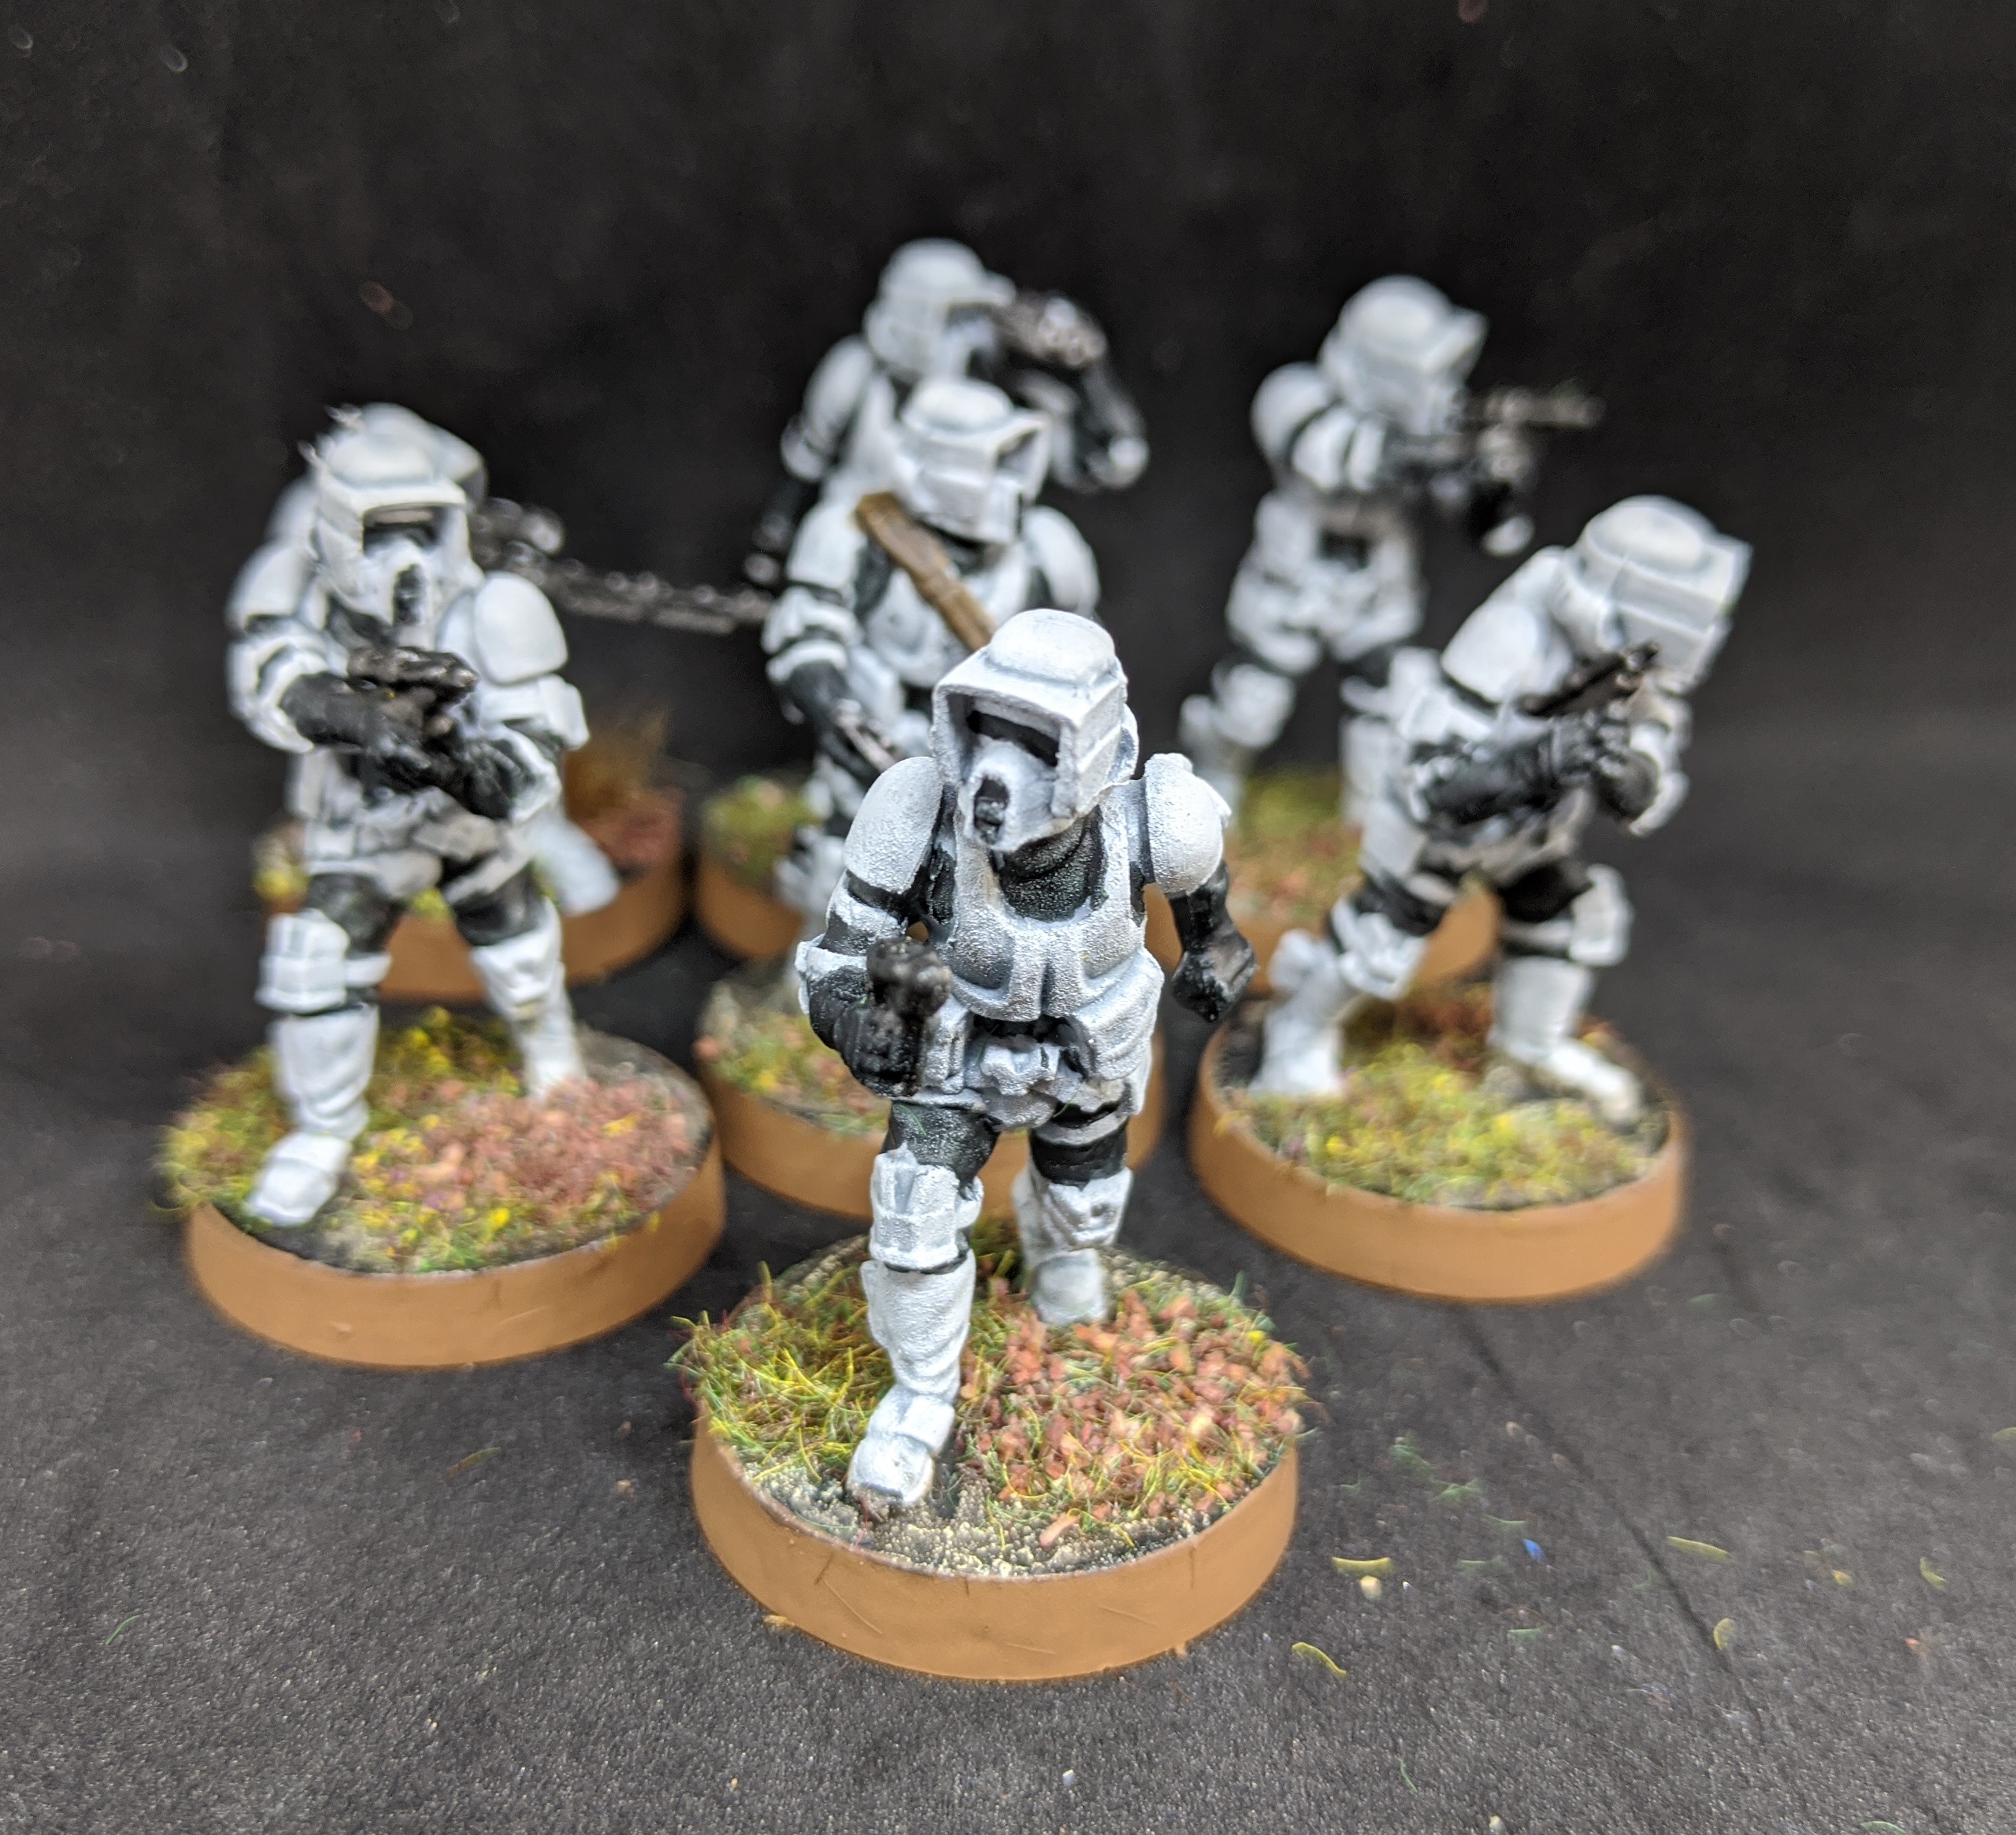
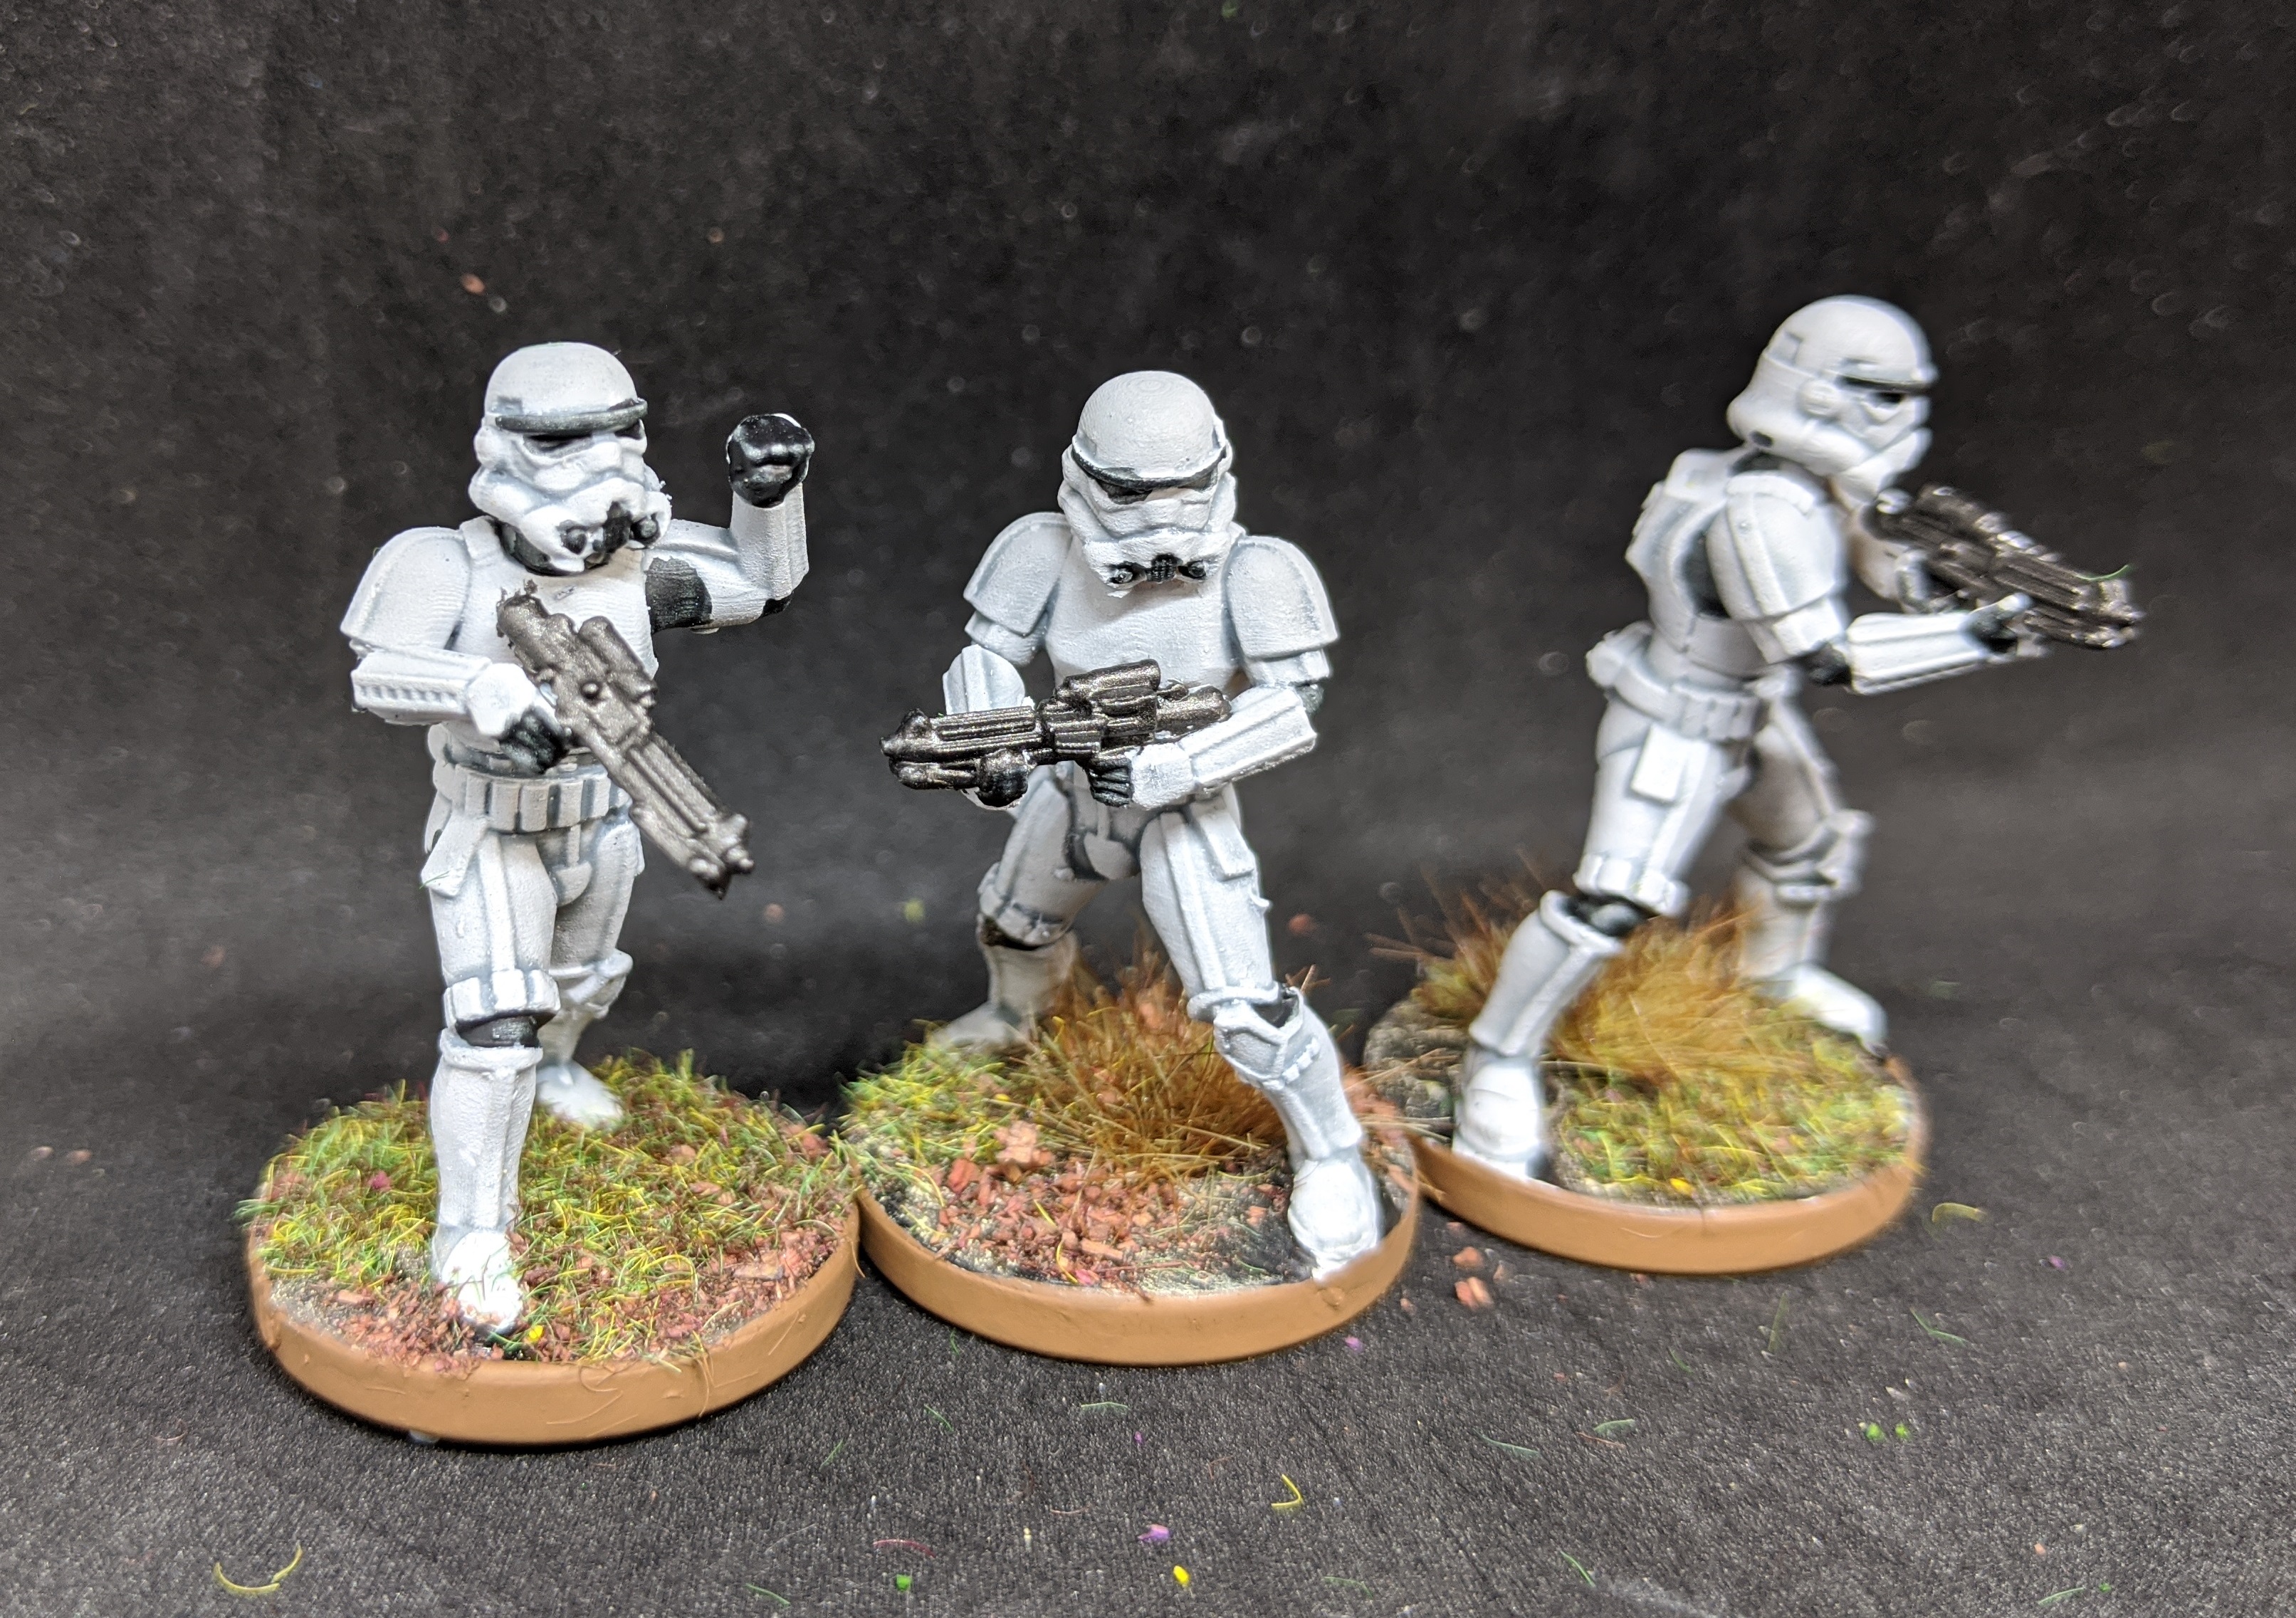
I’m terrible at remembering the detail of games, other than to start with I had my first ever match up with my good buddy Wayne (of Tangent Miniatures fame). My force was mainly 3D printed and based around a post Return of the Jedi ‘Imperial Remnant’ faction. Most of the models were from SkullForge Studios, with some coming from Miller Bros. Sculpting and Design and a couple of actual ‘Legion’ plastic minis thrown in too.

Wayne’s bovine and cheese based cast (as in the dairy product not the game approach) were too much for my ragtag band. Some pictures of the glorious defeat below (including some of the Imperial Terrain scenery I had printed and painted for the event). Note Obi Wan ‘Cow-nobi’ in action!

My second game was against my regular 7TV nemesis Keiron, who had pulled together a really effective cast based on the most recent Star Wars trilogy. Played on a rather splendid Hoth based table with a vintage Kenner AT-AT toy as a centre piece, my cast (led by Grand Moff Hertzog) valiantly tried to complete the mission objectives, but were rather humbled by the new generation of Rey, Finn and a very pesky BB-8 who managed to fly across the board and steal the main episode objective on the first turn!

After an extended lunch break (lots of catching up and chat), my final game of the day was against Simon C (head honcho at Board in Brum). Simon and I had not played each other before despite being at many of the same events over the last few years, so it was great to finally get a game together.

The scenario laid down in this final game was the culmination of a narrative that ran through the day which saw the oppossing casts trying to locate a lost fleet of ships. The aim of this finale was to activate (or deactivate) a number of shield generators in the centre line of the table. This was an Imperial on Imperial engagement and despite actually getting to at least one of the objectives I ended up defeated (primarily because all of my cast were wiped out by the surprisingly and out of character accurate shooting of Simon’s Stormtoopers).

A rather nice Scariff setup at Board in Brum (I didn’t get to play on this one though).

All in all an excellent day playing a favourite game in a favourite setting with some splendid opponents. A big thanks to Simon for hosting and Mike Strong for organising the games and storyline for the day.

The next 7TV event I am attending I am also arranging and this will be at Dales Wargames at Darley Dale near Matlock on Sunday 21st November. It’s the (pandemic) delayed 7TV Apocalypse Event, White Line Fever. Following that there is another event at Board in Brum in January which will be 7TV Fantasy oriented.

Partizan on the Ground, 10th October 2021 @ Newark Showground

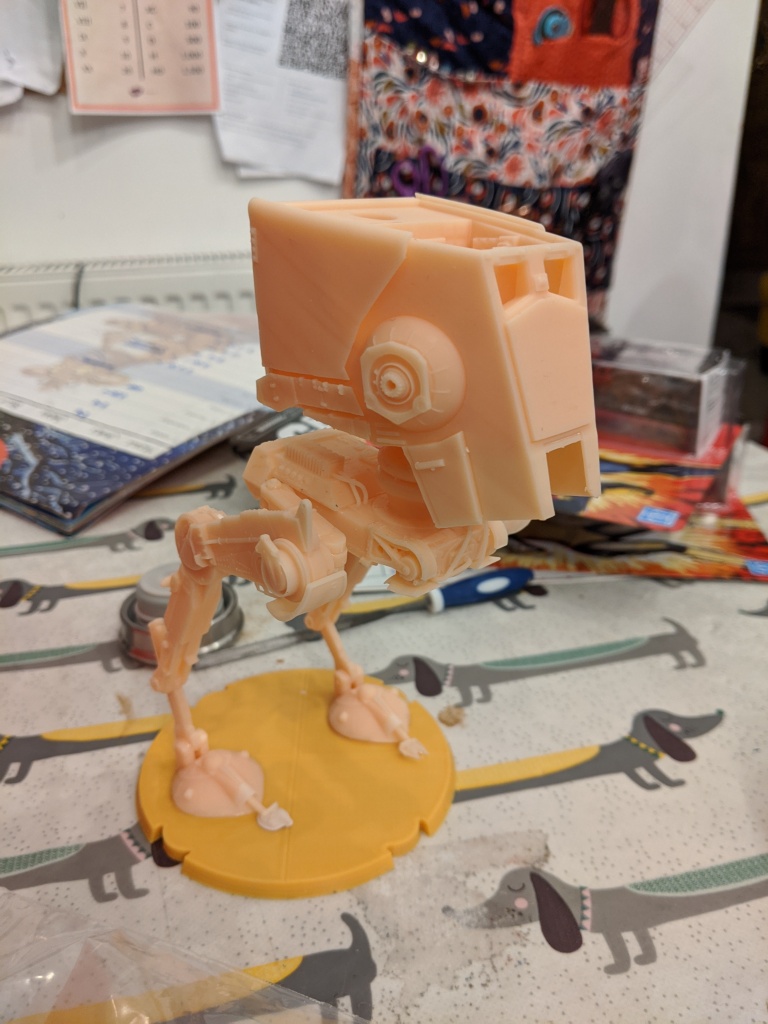
The other weekend I attended my first show for about 18 months, helping out Wayne at Tangent Miniatures on his trade stand (and also selling some licensed 3D prints).

This was my first time at Partizan (though I had been to the venue previously for Hammerhead) and it was also my first time trading at a show since I wound up Twisted Pinnacle Games a few years ago.

Tangent’s ever growing display case of metal miniatures.

As one of the first shows after the extended pandemic closure of such things it was very well attended with people obviously really keen to get back into the swing of both playing games and spending money (which was great for us).

A selection of the 3D prints I was selling on the day (including designs from BMT3D and Monstrous Encounters)

All in all a very enjoyable day in good company with the added bonus of selling some toys. I was also very good and only bought a couple of spray cans (from the Colour Forge range who had a stand next to us). More on this newish range in a future article.

Mike Tongue’s (BMT3D) Pen Top Droids were especially popular on the day.

Next up for Tangent is the big one at Salute in London’s Docklands in November. I shall be there helping out again, though not sure I’ll be able to be so controlled when it comes to the spending this time!

Star Wars Legion Imperial Shuttle 3D Print

There are many iconic spaceships in the Star Wars universe. One of my favourites has always been the Imperial (Lambda Class) Shuttle, originally featured in Return of the Jedi.

In part this is because it is a clean classic design, but primarily it is because I have a soft spot for the original toy version. Now I never had this, but I do distictly remember the TV ad (probably because this was one of the last things to be released in the original toy line).

Any how, I have wanted a centrepiece model for Star Wars gaming for a now while and some time ago came across a set of STL files on Thingiverse. The issue here was that I wanted to do this Legion scale so from the off this was going to be a long project in terms of print time.

The model as available for download would not fit on my print bed when scaled up to the size I wanted (and I wasn’t keen on the suggested way of splitting the file on Thingiverse). I therefore spent some time ‘re-cutting’ the model in Meshmixer in order to come up with parts that would both scale up and fit on the print bed. From a scaling perspective I dropped a Stormtrooper model into the slicer alongside the cockpit to try and get an approximate scaling factor. I know I am bound to be asked at some point what the scaling was, but to be honest I cannot remember I’m afraid.

Scaled against a Stormtrooper model from Skull Forge Studios – for info the build size of my printer is 300mm by 300mm

In the end I cut the model into seven parts – main hull, cockpit, fin and then each wing split in two.

How the cockpit section looked before removal from the print bed. I used eSun PLA+ filament.

The printing on this took a VERY long time. My Creality CR-10S FDM printer has a relatively large build area and even with the model split as I did I totalled the time at approximately 22 days!

Once printing was completely I needed a way of adequetly assembling the model. I’m no expert in 3D modelling, so when cutting the model up I did this very simply with ‘flat cuts’ – I’m sure someone more skilled would have been able to create pegs and or plugs to align the model parts. I went somewhat old school here however and got the hobby drill and a few wooden kebab skewers out in order to do some traditional pinning.

Green stuff was used to gap fill and the whole model was given a good going over with sandpaper to smooth out any layer lines from the printing process.

Sanding was completed during and after assembly of the individual parts.

A comment on the 3D model itself at this point. This had been designed to have foldable wings, and I was keen to maintain this feature. However the truth of the matter is that as a tabletop ‘scenery’ piece it would be for the most part in landing configuration with wings folded up. The kebab skewers were used again this time thread through the model to provide the ‘axle’ for the folding mechanism. Due to some variance in the tolerances of the print I did have to realign some of the holes in the wings in order to get these to fit.

In addition, there was no means of holding the wings in this position as part of the 3D model itself, so again the drill and some cut down kebab skewers were the answer to the problem.

The 3D design also missed a couple of features of the original ship. While I could live without the wing cannons, I really wanted to do something to add in a landing gear and ramp. There is something very iconic about the scenes in the film where first Vader and later on when the Emperor emerges from the shuttle.

After studying some reference photos I realised that the landing gear of the shuttle comprised of two legs mounted mid way down the hull. The key here from a modelling perspective was finding something that I could get it to balance on while keeping the shuttle stable as gaming piece on the tabletop.

A brief scan of the bits box resulted in almost the perfect parts for this. Originally from the Mantic Deadzone scenery set these small ‘stumps’ (originally the base of some sort of cannon) were perfect. I then positioned these in such a way that the shuttle with wings folded up would balance perfectly.

A perfect bits box find
The painted landing gear – I trimmed off the nub on the top prior to fixing these to the model and then highlighted

At the same time I found a similar suitable piece from my spares box, again part of a Mantic scenery kit. I was keen that this could be opened and closed and after a quick visit to my daughters Lego collection I ‘borrowed’ a few bits to fashion a hinge. A small square base was then used to hide the visible Lego.

I actually added the landing gear and ramp after I had begun the painting of the model, but for the purposes of narrative I’ll cover the painting process now. The assembled model was given a once over of grey Halfords car primer with the intention that I then airbrush on successively lighter shades of grey.

Undercaoted shuttle (with Star Wars Legion Emperor’s Royal Guard)

It soon became apparent that this would take way too long. The undercoat colour was close enough to what I was aiming for, so I simply stuck with this while I picked out some of the panels with a darker grey. I tied the whole thing together with an overall drybrush of light grey, concentrating particularly on edge highlights. The cockpit was painted black and then given a coat of Games Workshop Nuln Oil gloss wash to give it a shiny appearence. The images below also show the ramp attached and in place.

The engines were painted white and then given a blue contrast coat, followed by an off-white drybrush highlight.

The final touch was to add a few subtle decals (the Galactic Empire was never much for strident liveries). I happened to have a couple of left over Imperial symbols from a Bandai AT-ST kit I had built a few years ago. I placed a couple of these on the cockpick as well as on the main fin.

And there we have it, probably one of the longest hobby projects I have ever done from start to finish and another reminder that while 3D printing is an excellent addition to the tabletop hobby it comes with a signficiant requirement for patience. At some point soon I intend to setup the shuttle with some of my recently painted Star Wars miniatures in order to take some additional photos, but for the time being I am calling this project done.

I have to say that one of the most enjoyable bits of this project for me was the additional kitbashing on top of the 3D printed model and this is something I have taken to the extreme in my next big spaceship project, more of which soon….

Star Wars 3D Printing – At the Court of Emperor Palpatine

The 3D printers have been running hot recently outputing a whole host of Star Wars miniatures. I am concentrating mainly on building an Imperial force at the moment and have turned my attention away from the troops to the top brass.

(I have, as usual, included links to where I have obtained these models, but to make things a bit clearer have also included a useful table at the end of the article summarising what came from where.)

First: the big boss man, Emperor Sheev Palpatine. This model complete with diorama base and guards is from the Patreon of Madox.

Not sure about the bare feet, but otherwise a lovely miniature to print and paint.

It is part of the welcome pack that becomes available when you sign up. The three figures were printed in resin on my AnyCubic Photon, with the base done in filament on my Creality CR-10S FDM printer.

The Royal Guard are highly stylised compared to their on screen counterparts (and the official Legion models). Not that pleased with the paint job on these, but the beauty of 3D printing is that I can just try again following a re-print.

Next up a model from Skull Forge Studios, which I actually purchased and painted a few months ago, but dug out again for this article. Sold as the ‘Authority Grand Duke’, this is my take on Grand Moff Tarkin.

Since I painted up the Grand Moff I have realised that his rank badge isn’t quite right, but hey ho, still looks the part).

Like my other Imperial officers this paint scheme was primarily based on a German Field Grey paint set I have from Andrea Color.

I’ve recently been getting my Star Wars fix, post -Mandalorian by binge watching (for the first time), the animated Rebels series on Disney+. I tried watching ‘The Clone Wars’ a few years ago and couldn’t get into it, but I absolutely loved Rebels. Two of the key Imperial villains in the last two series are Governor Pryce and Grand Admiral Thrawn.

Pryce is based on a female Imperial officer figure available from the Patreon of BigMillerBro, while I found the Thrawn miniature files free to download from Thingiverse.

Thrawn’s all white uniform was made slightly easier through the use of contrast paints. (Interesting the version of this model I downloaded from Thingiverse no longer appears to be on the site; however if you search for ‘Thrawn’ it looks like there are a few alternatives available.)

Next we have two of the Emperor’s advisors who appear briefly in Return of the Jedi. Like Thrawn these were free downloads from Thingiverse (designed by McAnultyMiniatures – well worth checking out – there are even Ewoks!).

Last but not least is the only model I have completed as part of this batch that is not 3D printed. The standing version of Palpatine is the actual Star Wars Legion model (albeit with the base swapped out for a 3D printed base I also purchased from the Madox Gumroad store).

MODELFILE AVAILABLE FROM
Emperor Palpatine Throne Room DioramaMadox 3D Design Patreon
Grand Moff TarkinSkull Forge Studios Gumroad store
Governor PryceBigMillerBro Patreon
Grand Admiral ThrawnThingiverse (free download) – no longer available.
Emperor’s AdvisorsThingiverse (free download)
Emperor PalpatineStar Wars Legion miniature by Fantasy Flight Games – available from you friendly local games store
Scenic basesMadox 3D Design Gumroad store

Imperial Entanglements – Rebuilding my (Star Wars) Legion

A few years ago I got heavily into Star Wars Legion, but then relatively quickly sold the collection I had built up. This was partly due to a lack of gaming opportunities, but primarily because I needed the cash. However recently my Star Wars enthusiasm has been stoked again by the Mandalorian TV series and I have found myself wanting to ‘hobby Star Wars hard’!

Two big things have changed in my world since my last foray into the tabletop of a galaxy far, far away. These things are Games Workshop’s Citadel Contrast Paints and 3D printing. With the former I am no longer averse to painting lots of white Stormtooper armour and the latter (combined with the availability of designs online) means I have a lot more options available in terms of scenery and vehicles.

Base coat – contrast – highlight – Contrast paint actually making white fun!

Game-wise I am yet to decide whether to give Legion itself a try again (this would require investing in a new core set), but what I do know I want to do is give the 7TV version of Star Wars ago.

Published a few years ago and still available (for free) from the Crooked Dice Game Design Studio website this is a ‘programme guide’ of profiles and gadget cards based on the 7TV second edition rules. These profiles are based on the original trilogy and being 7TV I am fully intending to expand on some of these and add in some support the Mandalorian cast and potentially other characters.

So far I have been concentrating on the bad guys. My Stormtroopers are 3D files from Dark Fire Designs (printed in resin on my AnyCubic Photon) and mix in well with a box of Legion Scout Troopers I recently aquired.

A mix of Star Wars Legion plastics (Scouts) and 3D printed models (everything else)

The recipe for painting these guys was to start with a white undercoat (in this case GW Corax White from a can), slap down some contrast Apothecary White, dry brush highlights in Corax again and then fill in the under armour gaps with contrast Black Templar.

Weapons were picked out in a gun metal and given a wash of contrast Basilicum Grey.

Also 3D printed (files from the Patreon of ‘BigMillerBro’ who specialises in Star Wars Legion compatible models) were my Imperial Officers and Navy Troopers. The officers were painted up from a black undercoat using primarily an Andrea Color German Field Grey paint set I have. Not my best work, but a nice addition to the force.

I really enjoyed doing the Navy Troopers – again they were painted up from a black undercoat using primarily dark greys and washes. With both these and the officers I used a gloss Nuln Oil wash from GW for the leather boots and also in the case of the troopers the signature helmets.

Basing? Well I’ve gone in this initial batch for an Endor style base (I have a Scout Walker I am working on – also a 3D print) and I think this goes well with the Scouts.

AT-ST – file from Dark Fire Designs

The good thing about 3D printing and having a quick and easy paint scheme is of course if I want to base some of these guys for other environments I can just batch out a few more. I’d like to do some more with an interior basing scheme (imagine running a game in a Star Destroyer or the Death Star and you get the idea).

I’m also working on a 3D printed Imperial Shuttle – but more on that soon…..

Revisiting Star Wars Legion

Earlier in the year I got really invested in Legion, the tabletop miniatures game in the Star Wars universe, published by Fantasy Flight Games. Having spent some time assembling and painting minis, I immediately got distracted (as all good hobby butterflys do) by terrain and re-utilising old toys for the tabletop.  A couple of vintage Kenner / Palitory AT-ATs were purchased from eBay (and then resold as I say sense), as were some Rebel Transports, a U-Wing and various other bits and pieces.

Then as often happens I just didn’t get to play the game.  I had a learning game with my good friend and gaming compadre, Mr.Hawkins, back in the Spring and then nothing.  This was partly due to the distraction of other shiny things, and partly because my best chance of getting a game was at my local club.  Due to other commitments I wasn’t able to get down and I missed most of the monthly meetings over the summer.

However this last Sunday I was finally able to Legion to the tabletop for a couple of games at Matlock and Dales WRG (at the request of another member who similarly had sat on the game for quite a while without actually playing).

I’m no good at reviews, but will say this (and have said so before); it’s a good game.  A very good game.  Bearing striking similarities to other Star Wars games in the Fantasy Flight catalogue (lots of tokens and cards, custom dice, the ‘surge’ mechanic), it seems to have ironed out some of the inconsistencies and clunkiness of games like Armada and Imperial Assault.  Adding to the mix an alternative unit activation mechanic and innovative and intuitive command and control element, this puts it above many similar games I have had experience of in the past. My opponent and I did get quite a few things wrong in the early rounds, but this wasn’t really noticed and didn’t interupt the cinematic flow of the game (I was making a lot of ‘pew pew’ sound effects in my head).

In getting ready for the game I wanted to just share a couple of hints and tips, both on the painting and army construction side of things.

While I had got at least a basecoat down on most of my miniatures (the contents of two core boxes and a handful of expansions), there were a few I had not yet touched.  It wouldn’t be realistic to get everthing done in time for the game (real life is quite hectic at the moment), but I at least wanted to be avoid playing with any completely unpainted models.

Therefore I concentrated on detailing up all the Imperial Stormtroopers I had previously undercoated white, adding in some basic detail and making them tabletop ready (with the intention of going back and finishing them off to a higher standard later).  Here, the humble toothpick was my friend.  Rather than rely on a brush and a steady hand to pick out the black details on helmets and armour and to minimise the chances of despoling that trademark white with any overbrushing I found toothpicks gave me the control and steadyness I needed (but maybe not the patience!).  This was particularly useful when doing helmet eye lenses and something I will try out for painting eyes in general moving forward.

legion 2
Small detail on the Stormtroopers applied using a toothpick. Note Revell TIE Fighter model kit as scenery (yes I know wrong era, but it does have working sound!)

My next job was to paint up the only fully unpainted squad I had not yet tackled, the Rebel Fleet Troopers.  These are the guys who valiantly get slaughtered by Darth Vader at the begining of the very first Star Wars film (and of course we now know this fight continued on from the end of Rogue One).  As figures go, I think these are some of the nicest that have been released so far.  Very characterful sculpts and true to the films.  I’d picked these guys up at UK Games Expo back in June, assembled them and then, well, got distracted…

Rebel Fleet Troopers (Star Wars)
While they didn’t do too well on screen, they were pretty rock solid on the tabletop!

Taking a very methodical approach I blocked out each colour (having applied a grey undercoat).  Following a production line approach of doing all of one colour across the squad before returning to the first and adding the next hue I was able to get these guys done in only a couple of hours.  I left the dark grey undercoat showing through for the mainly black coloured vests and let Army Painter washes do the rest.

The squad leader is based on Captain Antilles from the film and follows a different scheme.  The intention with these is that I will go back and do some proper basing and highlighting at a later date.

antilles
“If this is a consular ship, where is the ambassador?”

I have to say I’m not a huge fan of painting armies or even squads (I much prefer to do more individual character models): however the fact I was actually going to able to field these in a game was a real motivator.

The Rebel Fleet Troopers proved to be a really solid choice in play (and are my new favourites), having almost taken down Vader in the first game.  Some form of sweet revenge for their on screen performance perhaps?

Using Tabletop Admiral
Preparation and list building using Tabletop Admiral

I also just wanted to give a quick mention to the Tabletop Admiral online army building application for Legion.  I used this to quickly knock up the forces the night before the game allowing me to sort out cards, tokens and minis quickly beforehand and enabling us to setup quickly on the day.  If you are a player of Imperial Assault or Runewars this also might be of interest to you.

Sandstorm Palace
My next distraction – Star Wars style buildings in MDF. Please note that no Play Doh was required for construction!


Using Toys and Scale Models for Star Wars Legion

I resisted for a long time….

The lure of the dark side was too much though and a few weeks ago I dived into Star Wars Legion, purchasing the core set, the AT-ST and the Airspeeder expansions.

I’ve not had a chance to play the game yet, but I’m aiming to get one in at our next club meeting in Matlock in May.

Then I got distracted…..

By toys….. (actual toys).

More specifically toys and model kits that I could use on the table top to enhance my games of Legion. Inspired in part by the excellent coverage and similar ideas raised on Beasts of War I started scouring the popular auction site.

First off, let’s cover model kits…

So the elephant in the room then: scale. Legion figures are chunky (controversially so, but that is a discussion for another time). At best guess I’d go for 32 to 35mm or in model kit speak about 1:48. The two best sources for scale model kits at present are Bandai and Revell.

Bandai kits are high quality, usually pre-coloured, snap-fit and relatively inexpensive. However they are not that easy to get hold of. Bandai hold the Star Wars license in the far east only, so even via eBay you are looking at potential a long wait and customs charges if you are unlucky.


Scale wise they vary – most star fighter kits are 1:72 (too small), but they do one or two kits in 1:48 which are pretty spot on (ironically the two vehicles that are available anyway for Legion – the AT-ST and the Airspeeder).

2018-04-14 07.57.24
Bandai 1/48 (left) FFG Legion (right)

Revell on the other hand are much easier to get hold of (even on the ever more sparse high streets of the UK). However here’s the catch, the scales are really all over the place! 1:106, 1:44, 1:50, 1:78 to name but a few.  That said there are a few gems in the current range that fit really nicely on a Legion tabletop.

26734009_10156142956545555_4493213564027099180_n
Revell 1/44 A-Wings

The A-wings above are 1:44 scale, easy assemble and pre-coloured (they also come with added light and sound effects).


Also pretty spot on in terms of scale is the First Order Special Forces TIE fighter.

DSC_2875
Revell 1/50 Build and Play Special Forces TIE Fighter

A word of warning on this one though. Revell do two different versions, this is the 1:50 scale ‘build and play’ kit; there is also a larger 1:35 kit.  Obvious problem with these?  They aren’t classic trilogy era; but you know for a bit of flavour on the tabletop I can over look that!

CFBAC93106FE1F54816617D5BEAA47B9

So that’s model kits.  Next up toys…….