Although most of my Action Force in 28mm scale project is based around the Red Shadows as the primary protagonists, I do occasionally dip into the world of their successors, Cobra.
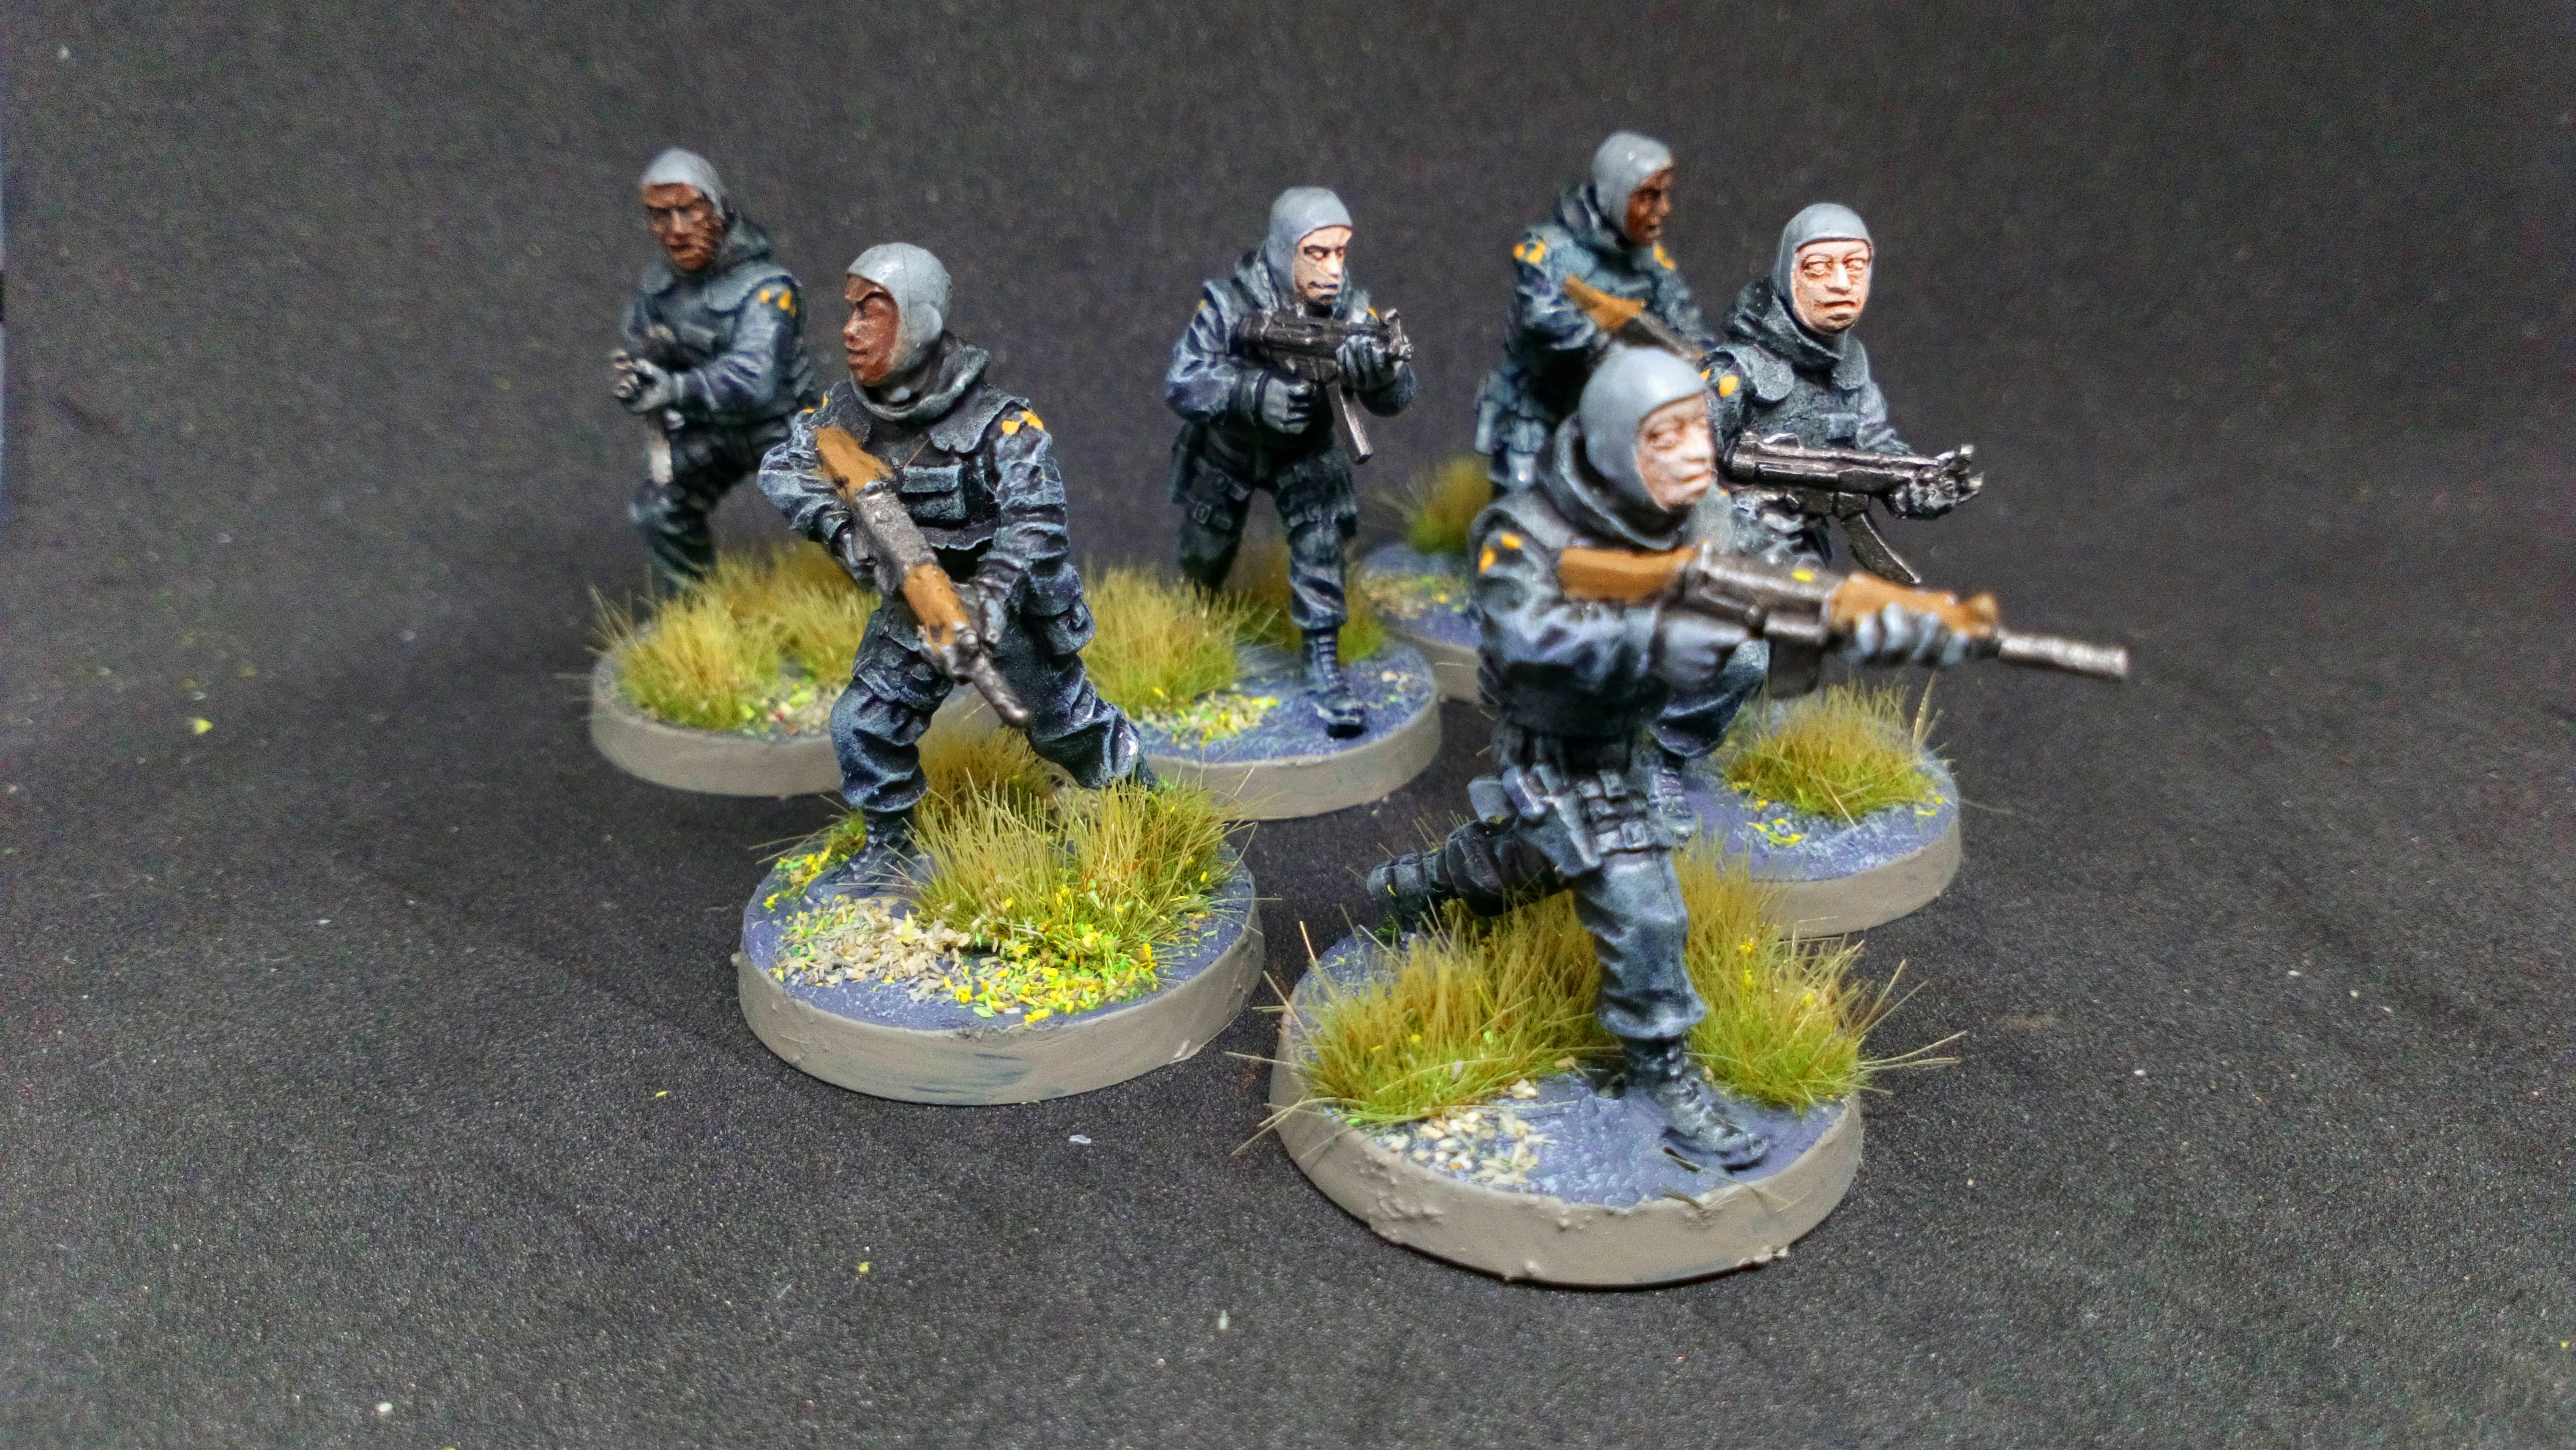
I’ve recently been kitbashing some Cobra infantry using various bits and pieces from my sprue mountain. The bodies and legs for these guys have all come from Warlord Games World War II US Infantry. The arms are are mixture of the same US infantry and the old Wargames Factory apocalypse survivors and biker sprues. These are also where most of the weapons were sourced from.
Cobra Troopers
The heads are all I have left from a set of specially produced GI Joe bits – two in the style of Cobra Troopers, the remaining two representing Cobra Vipers. The backpacks are from the same source.
Vipers
These are very much ‘inspired by’ conversions rather than an attempt to accurately model the old toys or cartoon and comics characters.
Vipers
Transport for these foot troopers is a 1:48 scale Tamiya model of a modern Japanese Defence Force Light Armoured Vehicle.
I built this a couple of years ago and it has been waiting on the painting table for quite some time. The transfers are in fact stickers from a small GI Joe toy.
The paint job on this was a basic blue block colour (applied by spray can) with detail added using an Army Painter wash. The kit as built was unmodified (although I didn’t bother with the interior detail – there is an upainted driver in there though!)
I set about printing this with the idea of using it as a centrepiece for 28mm scale gaming (more specifically 7TV). By doing some back of the envelope calculations I worked out that I would need to scale the files up in order to meet my favoured 1/48 vehicle scale for gaming.
So then the printing began……and it took a very long time indeed.
Back in March I was keeping a log of how much time the individual print jobs were taking. I soon gave up adding this up, but lets say we are talking about well over 100 hours worth of printing at least.
As per usual for scenery and vehicles I printed this using my FDM printer, a CR-10S by Creality. I originally chose this printer for the larger than standard print bed size and this was very useful when printing out this model.
I did use my resin printer for some of the smaller parts like thrusters and cargo pod feet.
The print quality (and tolerances) I am getting at the moment are really good, which helped significantly with this model as it did require quite a bit of fitting and assembly. The one weak point was the landing gear which have snapped numerous times and have been continually super glued back together.
At this point I started to think about painting and colour schemes. Rather than paint up in the traditional TV series colours I decided to merge this with one of my other ongoing projects – Action Force in 28mm scale. At this point I need to take a slight diversion, promoted by this project I have recently got into collecting the original toy line of 3.75″ (1/18) scale action figures and vehicle sets. One of the vehicles I have recently aquired is the Space Force Cosmic Cruiser. It is this that I decided to base the Eagle paint scheme on.
An original Palitoy Cosmic Cruiser Action Force toy.
Due to the current long summer hours and (occasional) decent days of British summer weather I switched my airbrushing to outside. This has been aided by the aquisition of a new mini-compressor. The completed model after getting an all over undercoat of black from a spray can was ready for airbrushing.
The outdoor painting setup
The main body and cockpit were given coats of progressively slightly lighter coats of grey.
The four ‘legs’ of the craft were then completed using the same technique with blue.
Finally the engines were also airbrushed using a base gun metal followed by a silver highlight. All paints were from the Vallejo Game Air or Model Air ranges.
I switched back to traditional brushwork for the orange of the frame. This was mainly because I would have struggled to effectively mask the model for airbrushing on top of the work I had already done.
I went to my stash of decals and transfers to add some detail (including some small reporduction Action Force logo toy vehicle stickers). The one thing I wasn’t able to source was the Space Force specific logo. While in the past for miniatures I have hand painted this I wasn’t confident I’d be able to do a good job of this freehand at this scale. I may subsequently add something to the nose cone of the ship if I can figure out printing on decal paper on my Inkjet printer.
The final stage was weathering, and as per usual I feel I may have gone a little overboard here. I used a mix of Plastic Soldier Company and Modelmates weathering spray cans for this, plus a sponge chipping technique using a dark brown paint. I do think the engines came out looking pretty good.
All in all I am really please with the result and I look forward at some point in the future (when face-to-face gaming can resume in earnest) using this in a game of 7TV. Perhaps as part of a Space Force versus The Argonauts game (the latter of which I am eagerly awaiting delivery from the most recent Crooked Dice Game Design Studio Kickstarter).
In the meantime here is a selection of images showing a Space Force Eagle Transporter being prepared for a mission by Action Force personel. All figures are from Gripping Beast and are heavily inspired by the original action figure line.
The 3D printing aspect of my hobby is both a source of great joy and great frustration. I started off last year with no experience at all and ended the year with two 3D printers, an even bigger pile of unpainted models and a new level of zen-like patience I would never have though possible.
For all the great stuff that I’ve been able to do there are times when I just want to throw the damn things out of the window. I made the decision last summer to invest in a resin printer (Anycubic Photon S). This has been utterly fantastic (so far) – the quality that I have been able to get at home printing out miniatures is in my opinion a game changer for the industry moving forward.
Anycubic Photon S – my new favourite
As an aside it has been interesting to note how the industry is starting to adapt to this new technology. Patreon seems to be a very popular route for digital sculptors for tabletop games. I have gone down the rabbit hole a bit with this recently and backed some amazing creators, many of which are pumping out quality designs for print at a heck of a rate. In fact some of the ‘traditional’ miniatures companies are also seeing the value in this – I’ve recently subscribed to both Titan Forge Miniatures and Bombshell Miniatures patreon campaigns.
So the older (larger) FDM printer (Creality CR-10S) has now been put purely on scenery and vehicle printing duty and is still doing a good job. However (and back on the subject of frustration) I have had a lot of breakdowns recently, much of which I am putting down to the hammer I have been putting it through. I have noticed an unspoken law that seems to dictate that only one of my printers can be working at any one time!
I’ve been getting some beautiful results from the Photon. These retro sci fi bits will be added to my ‘Flash Gordon’ project
Moaning aside I have recently been working on some airship models I have printed. These are nominally for use in games of 7TV Pulp (I fancy doing an inter-war sky pirates type thing), but these would also be useful for steampunk or even fantasy type games. In fact the two models I have picked up were really designed for the latter (think Age of Sigmar’s ‘air dwarves’ or Dungeons and Dragons Eberron setting).
‘Warhammer Steampunk Air Dwarves’ (probably not their actual name)
The first vessel was obtained from Dark Realms via their Patreon campaign and was made available to patrons during October last year. This was printed almost exclusively on the FDM printer with some of the smaller parts being done in resin.
Blimp front
Blimp rear
Blimp rear – showing I had to switch filament part way through the print.
The print time on this was long, probably 80 plus hours in total. The model went together OK once printed. I was a bit over aggressive on some of my support settings and there was a bit of warping on some bottom layers leading to some slight deformities in detail (note the top of the doors). That said, as a gaming model I am pretty pleased with how this came out.
All the main components
The deck was printed in two parts
The connector to the blimp was resin printed.
The two halves of the blimp connected.
Another view of the connector piece in resin.
The two main sub-assemblies prior to painting.
I didn’t spend too much time cleaning the model up (I’d probably invest some more time on sanding and smoothing out the layer lines if I did this again). However I did use a heat gun to remove some of the wispier bits of plastic filament that are often left over after a print.
In addition to the blimp connector, the rudder and wheel (not shown) were also resin printed.
The blimp and ship parts of the model were assembled seperately and undercoated in black primer.
For the blimp a simple block colour paint job was applied. The body of the ship was painted primarily with diffferent brown shades from the Citadel contrast range. This worked really well on the wood grain panels that make up most of this part of the model.
Basic block colours applied.
Ready for Quickshade.
It was a case of painting on some Army Painter Quickshade Dark Tone. I went very heavy with this, partly to give it a really dirty ‘steampunk’ luck and partly to smooth out some of the surfaces.
When using Quickshade this bit is always messy, you have to wait until the subsequent stages to see the benefits.
Once dry (after 24 hours) this was tidied up, specifically successivly lighter shades of grey were applied to the canvas parts of the blimp and the metal work was rehighlighted and some rust effects applied.
I applied a mix of decals (I have gone for an Imperial German / Great War style), and then painted up the port holes using a white base over which I applied a blue contrast paint.
The base was supplied as a file with the rest of the model, so this was printed and then painted and adorned in such a way as to try and hide it as much as possible to give the illusion of flight.
Blimp, ship body and base were all then put together. Despite a desire to try and magnetise the blimp connector to the deck this wasn’t possible due to the weight of the components. Therefore a bit of drilling and pinning was done to hold the whole thing in place.
I’m really pleased with the finished result, despite the fact that it has been pointed out to me that the design shares some similarities with the ‘Pinky Ponk’ of In the Night Garden fame.
Possible inspiration?
I mentioned at the begining of this article that I was working on a second airship model. This one is from Titan Forge Miniatures and I will cover this in a separate blog.
The Titan Forge airship, work in progress.
I’ve also been alerted to the fact that there is a Kickstarter launching soon for 3D print designs for fantasy airships called Skies of Sordane and this is certainly something I may just get involved in….
As is often the case this little hobby activity was in no way planned. Having bought a few cheap Heroclix figures from eBay in order to try out a new set of rules, I found the following in the booster packs I was opening….
The original model (minus base)
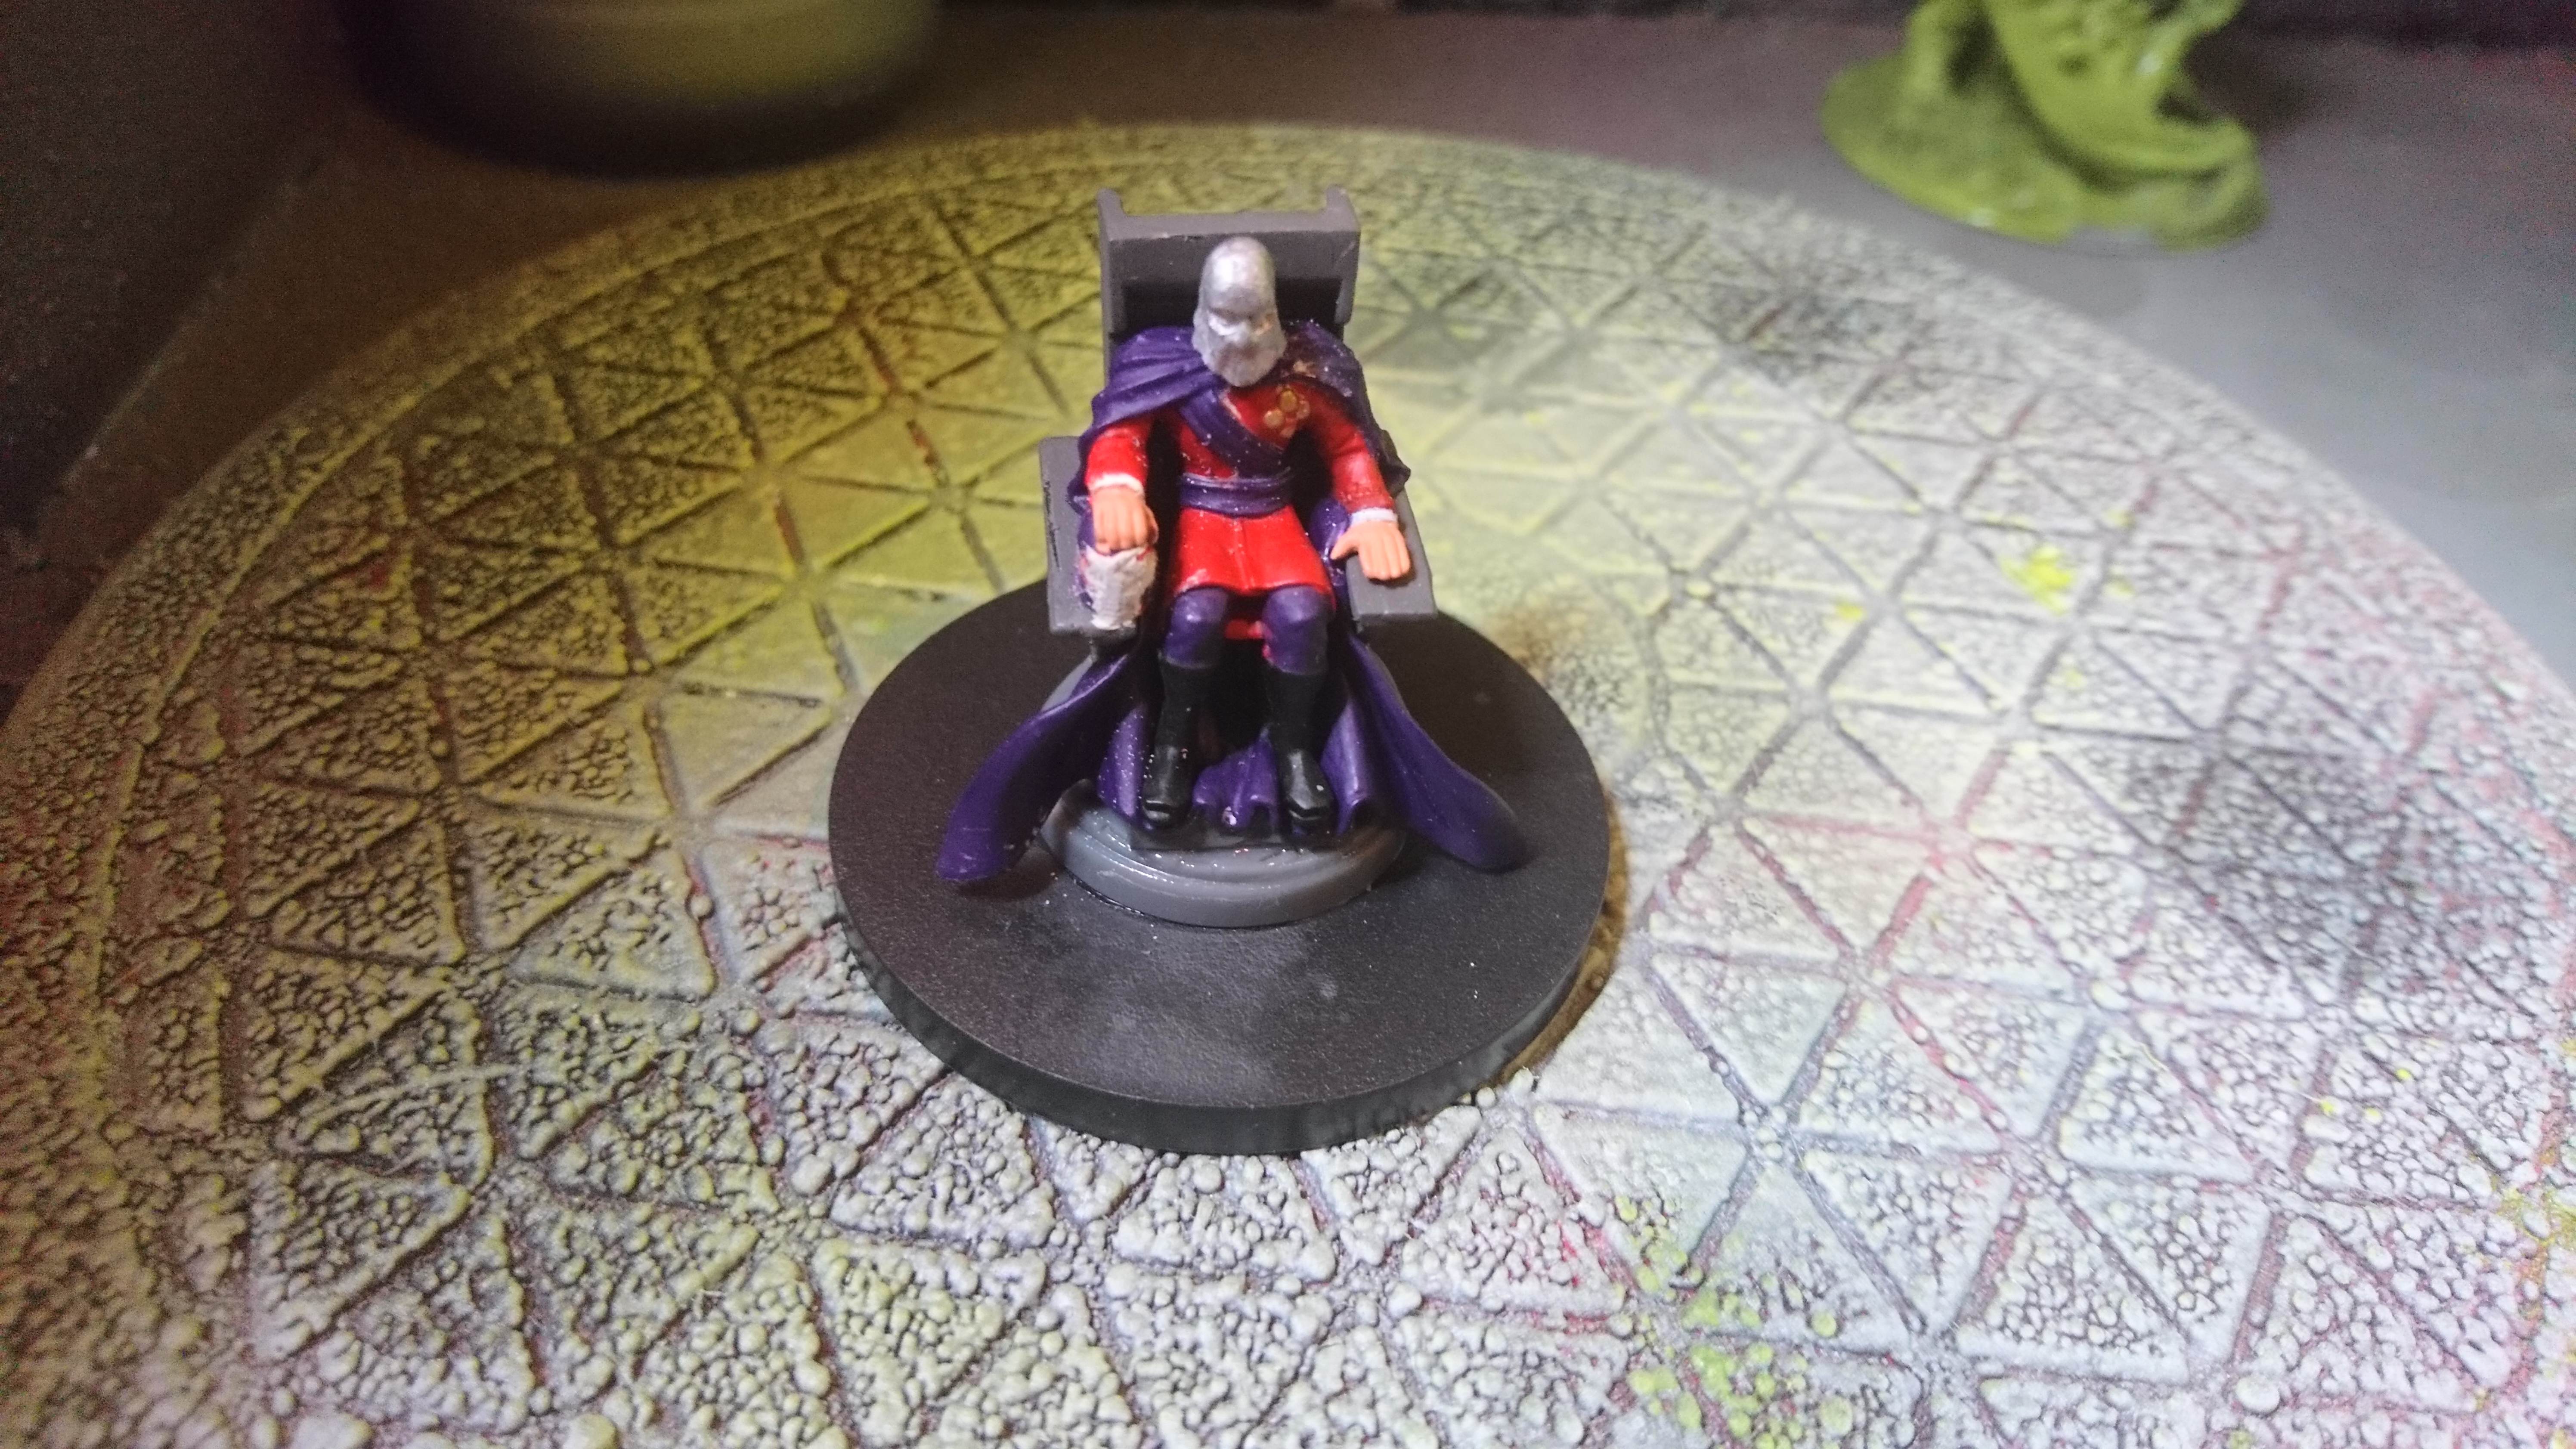
Now I am not a massive Marvel or superhero comics chap, but I do know that this is Magneto, nemesis of the X-Men. However my immediate thought was, with a bit of work that could easily be Cobra Commander seated in his throne room.
Cobra Commander – arch enemy of GI Joe (or Action Force, if like me you grew up in the UK)
So, first up basing. This looked to be a flying model so rather than being directly attached to the usual Heroclix chunky base, all I had to remove and replace was the clear plastic around the bottom of the model.
In my bits box I knew I had a hooded Cobra Commander head (sourced from a limited run of private commission GI Joe miniatures). So one quick snip and a touch of superglue later and the king snake himself was pretty much done (at least in terms of modelling).
Ready for painting.
Now the only problem I had with making this a convincing conversation was the facts that the original bare headed figure has his hand placed on a helmet. As it happens the choice of going with the ‘hooded’ version of Cobra Commander proved fortuitous. With a bit of filler I could convert the helmet in hand into his alternate head wear. In fact even better I could go with the ‘Action Force’ version of the Commander and model the helmet as his previous ‘Baron Ironblood’ persona.
(For those readers not familiar with the British Action Force mythology, Cobra was born out of the ashes of the Red Shadows organisation, with Cobra Commander previously being the head of that organisation, the fearsome Baron Ironblood. You can read more about my Action Force project and Baron Ironblood in my past blog posts.)
Baron Ironblood is reborn as Cobra Commander (from the pages of Battle Action Force comic).
Next step, painting. I gave the pre-painted figure a covering with a white primer applied with the airbrush. Then it was down to a combination of Citadel Contrast and ‘traditional paints’ to finish things off. All in all a quick but effective conversion, which will probably see some action on the tabletop in games of 7TV at some point in the future.
The Commander will see you now.
What this has reminded me is that while some of the pre-paints on Heroclix models can be a bit ropey, there are often some good sculpts hiding underneath. Heroclix can be incredibly cheap to pick up and the vast array of characters means that these can be a really good source for conversions (whether you choose to re-paint them or not).
Have throne – will travel
Thing is this all started off with a desire to do some super hero hobby and gaming. I still plan on pursuing this (especially in light of the theme of this years Wargames Illustrated 7TV Day). Well these turned up recently (I ordered them, but has kind of forgotten about them)….new unpainted X-Men Heroclix, including of course a certain Magneto….
The Action Force project continues. I’ve recently arranged to run a participation game of 7TV at an upcoming show in 2020, and am going to run an Action Force scenario. This is likely to be an assault on the Baron’s secret base by our brave heroes.
Footage from a previous episode. Z Force troops led by SAS Force’s Eagle face off against the Black Major (7TV).
I’ve already got ideas around the setup and my recently completed submarine will be making an appearence. Therefore an amphibious assault on a port seems like a great idea. As such I need a way to deliver my forces to the combat zone.
Enter the Action Force hovercraft.
AF Hovercraft data file from the pages of IPC’s Battle Action Force comic
More commonly known as the G.I.Joe Killer W.H.A.L.E this was a toy that was released originally in the third wave of releases by Palitoy in the mid-1980s. By this stage the range was almost exclusively repackaged G.I.Joe figures and vehicles. The background (supported by the weekly Battle Action Force comic) had shifted to a combined Action Force team facing off against the forces of Cobra.
Now at the time I loved this change, but in retrospect my heart always lay with the original Baron Ironblood and the Red Shadows setup. Subsequently this is where the focus of my 28mm scale Action Force wargaming has been.
Cover art from the amazing Palitoy Collector’s Guide available from BloodfortheBaron.com
However, never one to let ‘canon’ get in the way of a good gaming project I’ve decided to model my hovercraft, rather than as a combined Action Force vehicle, as if it were part of the Q Force armoury. As a reminder the original Action Force organisation was split into four arms; Z Force (the infantry backbone), SAS Force (special ops), Space Force (does what it says on the tin) and Q Force (the naval team).
Q Force (like Space Force), never got quite as much love as their land based cousins, so the toy range wasn’t quite as wide in terms of figures or indeed vehicles. What there was though was great. The vehicle sets were original and designed by Palitoy (i.e. they were not G.I.Joe repaints).
Wanting the hovercraft to feel like part of Q Force means looking at an alternative to the quite dull green original scheme. So we are looking primarily at greys and blues with red and yellow accents.
All this talk of colour schemes is very good, but first of course I needed a model. Enter Thingiverse and the world of 3D printing. Having located an amazing model I set this going on my 3D printer and a mere 45 hours later I had the following:
Underneath all that stringing is a rather nice print. Stringling easily removed with clippers and a heat gun (and since eliminated by some mucking about with settings)
Interestingly this model was originally scaled as per the original toy, which was huge (and always coveted by me as a boy). In order to scale this for 28mm gaming I reduced the print size by 45%.
A cleaned up model (sanded and supports removed) prior to undercoat
Clean up was a challenge particularly removing the generated supports on the propellors. I basically had to break these and manually rebuild them (with the addition of some plasticard and plastic filler). The plan is to print two more in the future, and I think I will try printing without supports next time and see what happens.
Patching up the props! I’ve since worked out some less destructive support settings.
The model was undercoated using a light grey Halfords car primer. I went quite close and thick with this in order to compensate for some of the layer lines that are an artefact of this type of 3D printing. In combination with a pre-undercoat sanding the finish turned out quite smooth.
Post clean up and priming
Halfords grey primer is my current ‘go to’ spray can undercoat
So back to the colour scheme and working out a Q Force style livery. I wanted to keep the main body of the craft a traditional naval style grey so went at this with the airbrush using three successively light coats. Once this was dry it was time to block out some colours. It was all brush work from this point on.
The skirt was done using the black Citadel contrast paint, which I think over the grey gives a good ‘rubberised’ look. In fact I’d go as far as saying the slightly visible layer lines actually helped in achieving this effect.
Post airbrushing (various Vallejo Colour Air greys) and the still wet Citadel black contrast paint applied to the skirt
Following this I chose various points of interest to block out in a limted colour palette of yellow, blue and red (all Citadel base paints). To be true to the toys I probably should have continued the block colouring on the weapons and props, but I went for a more ‘realistic’ dark metallic colour for these (Foundry Blackened Barrel C). The windows were done using the Space Wolves grey Citadel contrast paint.
Block colours applied
Next up, markings. Luckily the original stickers for many of the original toys are still available. A quick visit to Vintage Star Wars Collectibles set me up with a reproduction sticker sheet for the Q Force Swordfish. I applied these stickers direct to the model and sealed them using a gloss varnish.
Reproduction Action Force toy stickers.
Finally the model was finished off with a few basic highlights and a matt top coat. I had considered a final weathering step, however something about the finish with the primary colours and the similarity to the toy range stayed my hand.
The finished model with stickers applied.
All in all I am pretty pleased with the outcome. Since I completed this project I have further refined some of my 3D printer settings, which should reduce damage when removing supports and ease the clean up prior to printing should I attempt a similar model in future.
Final touches will be to add some Q Force personel. I have some Crooked Dice frogmen that will fit the bill well. In the meantime I have to stick with ferrying the SAS boys around…
SAS force troopers (Crooked Dice 7TV X-Commandos with head swaps).
With the recent completion of the 7TV Pulp Sci Fi miniatures Kickstarter I have a load more reinforcements coming over the next few months. (For the record the 1980 version of Flash Gordon is my all time favourite and probably most watched film of all time).
In the meantime I’ve been thinking about how to expand the legions of Mongo to include some themed vehicles to my selection of troops and personalities.
A while ago I picked up a Heroclix model of ‘Brainiacs Skullship’. You can see the original below. This was ostensibly in order to model a Roboskull for my Action Force project, but in the end I never quite got round to that. However as a model it has a certain ‘pulp appeal’ and so I set about repainting this in some suitably Ming-like colours.
The ‘out of the box’ model
The model was first removed from it’s Heroclix base using a hobby saw (and a bit of blunt force).
A basecoat of red primer was applied with the airbrush and a couple of progressively lighter reds (all Vallejo Game Air) were applied as highlights. The clear plastic green panels were masked so that they could be left in place.
Detail was picked out in gold and black lining was done with Tamiya panel line wash.
All I am quite pleased with the result. I think it has a aesthetic that matches the style of the Flash Gordon movie well. I have another one sat on my shelf that I think I am going to do something similar with, but maybe in the black and gold of Klytus’s Imperial Secret Police.
Having spent my holiday hobby time back in the summer building the kit (which can be broken down into various sections and therefore configured in a number of ways), I recently went back and finished the painting. It’s worth noting that the model could double as many different sorts of sub on the table top from World War 2 U boats to more modern types. One of the sections contains a set of missle tubes (which you would probably drop if using this for WW2), likewise the section which mounts a deck gun is probably specific to an earlier era boat.
I wanted to maintain the generic nature and usability of the model across different time periods and games in the way I painted it too. A black undercoat was applied using matt black primer from a spray can, followed by a dark grey spray and this was then sealed using a top coat spray (the currently incredibly hard to find in the UK Testors Dullcote).
Next up were decals. Again I wanted to keep it generic, but the more I looked at the painted model the more I felt it deserved some extra treatment with the decals in order to break up the monotony of black. I’ve got lots of decal sheets left over from my long since departed Dust Tactics collection, many of which were generic warning signs and symbols, which would do nicely to a certain degree. However I then came across a set of Soviet decals for Dust with some nice big red stars that would really stand out. These were applied over a gloss varnish and then sealed again with the same before another dullcote layer.
The final step was to apply some airbrush highlighting using some lighter grey from the Vallejo Air range. (I’ve purposely left the deck gun off at the moment as I wasn’t happy with the build, I’m planning on maybe looking to 3D printing for a replacement.)
At some point in the future I will go back and add some weathering, but at present I’m happy to get this to the table.
I’ve said it before, but it is worth reiterating – patience is a virtue, especially when it comes to 3D printing. Over the last few months I’ve made some great inroads into ‘dialling my settings in’ and getting some great results for scenery pieces and larger models. I’ve done something I’ve never done before – stripping electrics and re-wiring when a key component broke and I’ve also discovered some fantastic digital sculptors pushing their wares on Patreon.
Dock side scenery piece by Hayland Terrain
So a reminder, I am running a Creality CR-10S which is a larger bed (meaning larger print sizes) FDM printer. FDM stands for Fused Deposition Modeling, this is the most traditional style of 3D printer on the market and basically works by layering down melted plastic filament to build up a model. The material I am using is PLA – this is an odourless plastic based on corn starch (so biodegrable). Having played around with different brands (which does make a difference) I have settled on eSun PLA+ (in a rather splendid yellow). PLA+ seems to be a slightly more dense version of PLA (possible with extra additives) and I have found it produces stronger models that are easier to work with both in terms of modelling and painting post-printing.
One of the key challenges with printing miniatures in particular is getting the ‘supports’ right. Supports are the removable parts of the print, which you’ve guessed it, support parts of the model which overhang and would otherwise have to print in mid-air (as a famous guide book once said – this is of course impossible). There are plenty of miniature designs out there in the 3D printing universe which have been specially designed to print without supports (more on these in a bit). The real issue when you are using them is to get them so they provide enough ‘support’ for the model while also being relatively easy to remove without snapping off those important bits that should remain in place.
Supports can be tricky to remove
Supports visible from the rear of this model
It can be a messy job
When taking this into account there are all sorts of different variables and pieces of advice out there. Most of these relate to how you process the STL file prior to printing in your ‘slicing software’, but many also relate to the physical setup of your machine, brand and even colour of filament used and so on. Lots of trial and error, lots of visiting Facebook groups, checking YouTube and reading forums – so again patience is a virtue. For information I am using a piece of software called Cura to process (slice) the files before printing. Learning and tweaking the settings in here is all part of the fun!
In the end I have got this about right I think and some of the results I am getting for larger miniatures both with and without supports are really pleasing.
But where I am getting the files from to print? Thingiverse is a great resource – a community of designers and printers and a place to find stuff that is free. There are specific groups and collections of files on there which are aimed at tabletop gamers. However there is also a growing trend for digital sculptors and designers to use the Patreon funding platform to market and distribute work.
I currently support two Patreon campaigns, where for a monthly charge I get access to a number of STL files each month. Duncan ‘shadow’ Louca is well worth checking out. I first came across his work as part of a Kickstarter campaign which was creating tanks and armoured vehicle files for a ‘grimdark’ setting. However he has since branched out into miniatures which are primarily aimed at the fantasy roleplaying game market. Duncan is extremely prolific and the level of funding he is achieving each month is quite staggering. It is worth saying that the quality of the prints I have been getting from his files have been excellent as well. So both quantity and quality – winner!
Model by Duncan Louca
Model by Duncan Louca
Model by Duncan Louca
Model by Duncan Louca
Model by Duncan Louca
Model by Duncan Louca
Another Patreon I have also recently started supported is run by Rocket Pig Games. They again focus on fantasy monsters and creatures primarily for role playing (but for me ideal for planning out a Saga Age of Magic army). The big selling point of their models is the aforementioned lack of supports. Well worth checking out. They also run a seperate Patreon campaign which focuses more on Lovecraftian ‘cosmic horror’ style miniatures.
Astral Lurker (Rocket Pig Games)
Filbolg (Rocket Pig Games)
The thing that connects everything I have covered so far is that I am printing big models. In addition thanks to some recent Kickstarer campaigns and the wealth of treasures on Thingiverse I have been printing lots of scenery. Again, although often detailed, this is big chunky stuff. For the most part the models produced are sturdy and where supports are necessary they are relatively easy to remove.
Pre-support removal and clean up
What about normal sized 28mm scale miniatures though? I recently volunteered to print our some models that a friend had designed and purchased on HeroForge. This is a great site where you can design character miniatures for your games and then either get them printed and shipped out to you or receive the STL files for printing out yourself. It is here that I’ve noticed that you are really stretching the capabilities of a FDM printer. As you are effectively layering up a model by depositing thin layers of plastic you do get some lines on flat surfaces. For larger models these can be easily filed or treated post-printing (with plastic putty for example). Settings can again be tweaked in slicing software to increase the resolution of a print (by reducing the layer height, but thus increasing print times); combined with the ability to swap out nozzles of different diameters this can lead to some stunning results. Of course on smaller models even with a high resolution setting and a smaller nozzle size these lines do become more visible. Combine this with the issue of removing supports and you do start to get some problems with bits snapping off that shouldn’t or obsfucation of detail.
This very much became apparent when I was trying to print off these models – many came out well, but there were a few where the detail was just too fine and the oft mentioned patience became somewhat stretched.
Smaller minis are pushing the limits of what I can do on a FDM printer
There is some light on the horizon though. SLA (Stereolithography) printers are becoming much more affordable. These work in a slightly different way and although they tend to have a smaller print size and are somewhat messier (they use light to harden liquid resin that is contained in a reservoir to create the desired 3D shape), they are ideal for printing smaller more detailed minaitures.
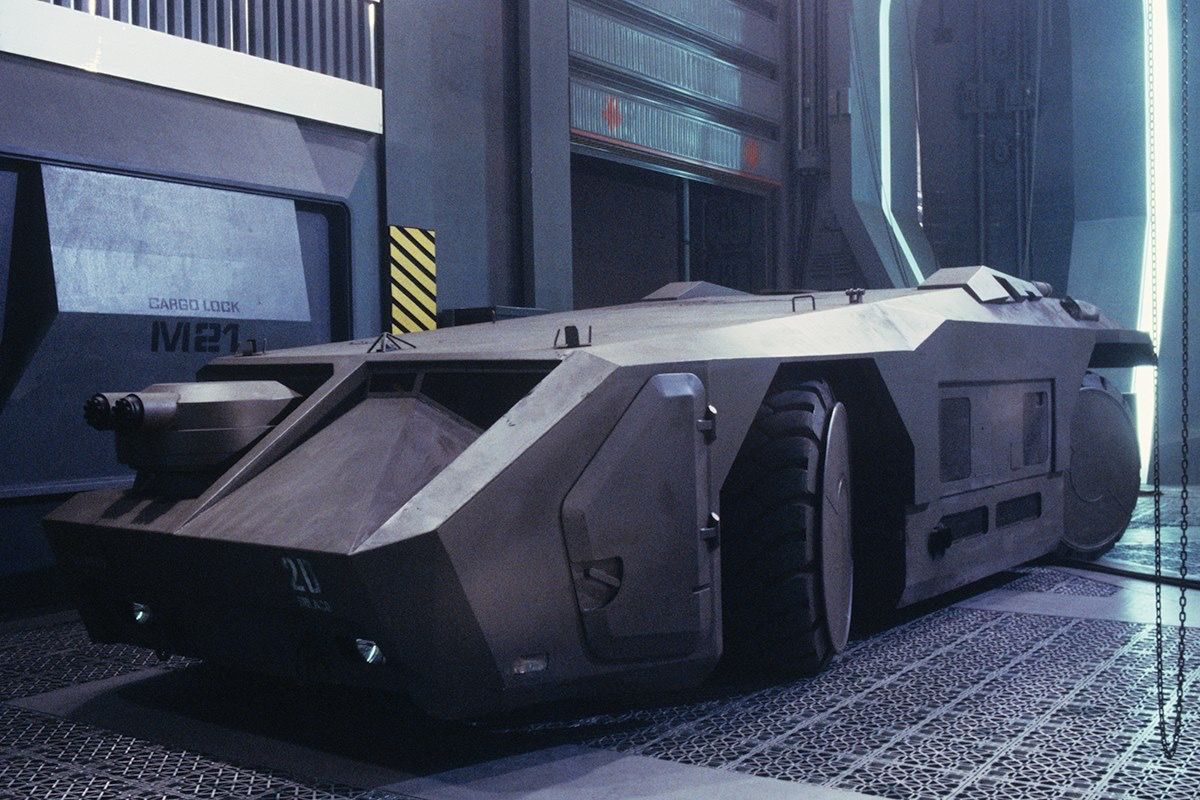
For an ‘Aliens obsessed’ friend I recently completed printing, assembling and painting the iconic Colonial Marines Armoured Personnel Carrier.
There were no shortage of models available to browse and download on Thingiverse. The once I settled on, based on being both pre-scaled and available to print almost in one piece (a big advantage of the large print bed the CR-10S gives me) was this by Iava808.
APC in 28mm by Iava808 – one piece chassis. Wheels and turrets printed separately.
Overall print time was long! The chassis alone took nearly a day, however the resulting model was well worth it.
Printed components ready for assembly and painting. SunTop Silk PLA filament.
Using a base of PSC German Field Grey from a can and a bit of drybrush highlighting followed by a wash of Citadel Athonian Camoshade did the job nicely.
Painted with Prodos ‘Unicast’ marine for scale reference. Top turret and door are movable.
As the nice gentleman said: “Game over man, game over…”.
I’ve always been kind of fascinated by North Sea Oil Rigs. There is something brutal, impossible and imposing about these behemoths. They just kind of look impossible (and a bit frightening).
From a gaming perspective I’ve never really been into sea based or naval wargaming, but having an oil rig/platform to play on brings to mind such inspiration as Bond (Diamonds are Forever) and the classic (in my eyes) North Sea Hijack! Of course the ideal game for such a setting is my go to favourite, 7TV.
In which Roger hates women but loves cats
So a few months ago I made up my mind that I was going to build an oil rig as a gaming table. The objective of this project would be to produce something that looked kind of realistic, was easy to game on and was modular and therefore easy to transport. I also felt that I wanted to have a go at scratch building much of this from household bits and pieces wherever possible. So just after Christmas I put the call out to friends and colleagues for any spare coffee and sweet tins. Because of the season I managed to get a huge variety of Roses, Miniatures Heroes, Celebrations and Roses tins in various shapes and sizes. At the time I wasn’t quite sure of my design but felt these would provide a good basis for legs or supports.
The design takes shape
Likewise for coffee tins, but I found these a bit harder to come by. I will admit at this point that I resorted to eBay and actually bought a job lot of empty Illy coffee tins (who know there was such a market for such a thing online?). Once these arrived my design began to take shape and these seemed like an obvious choice for my legs.
I got about 12 of these in total
The cap screws on, but also has a recess to allow them to sstack – this proved very useful
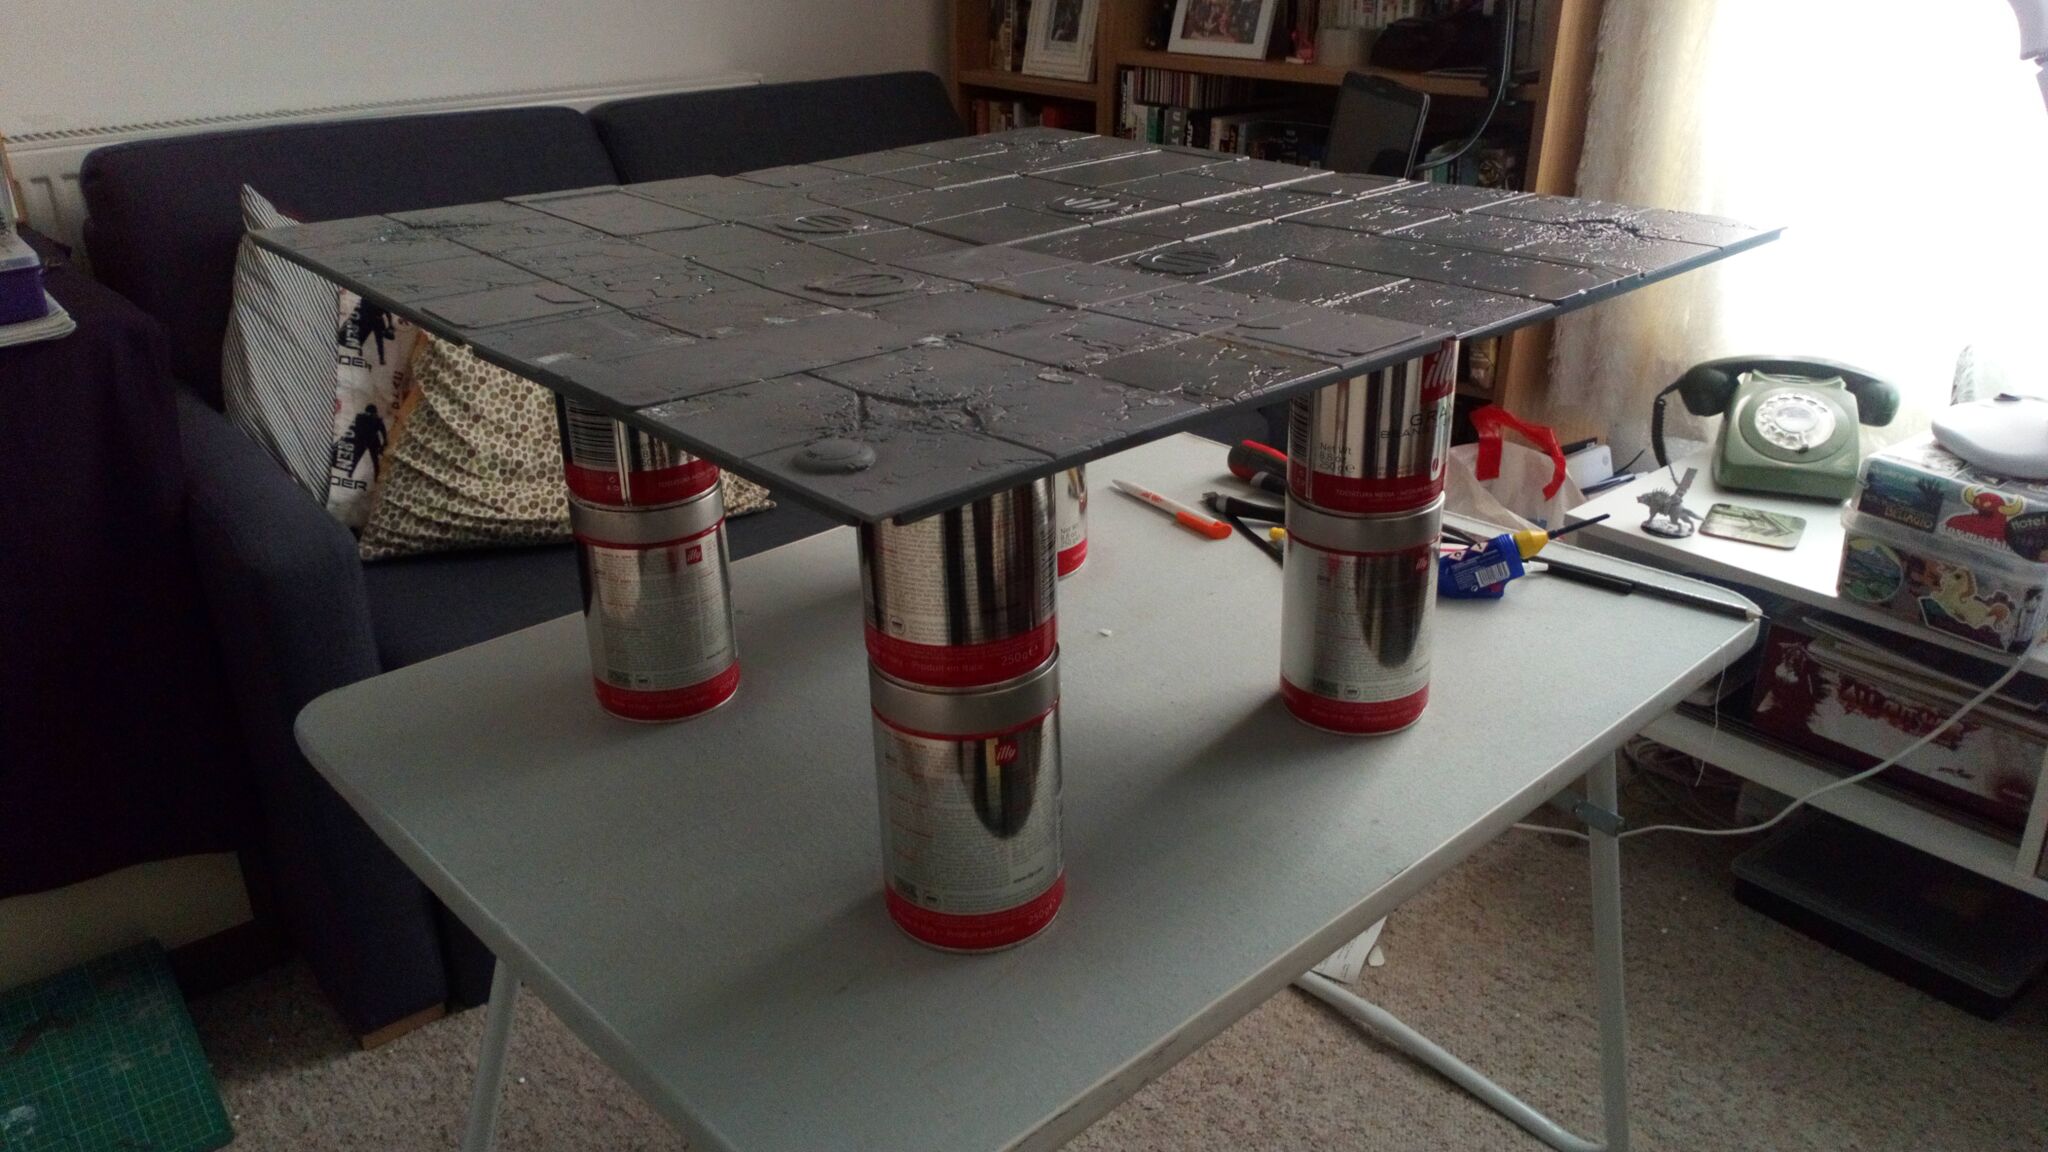
The actual playing surface itself was a bit of a cheat (and not at all based on recycling household items). Many years ago when running the shop I had stocked some modular plastic gaming tiles from Secret Weapon Miniatures. I still have four of these that were originally designed for Mantic’s Deadzone. As these were 1 foot square they would allow me to build the rig in four parts, each supported by a coffee tin leg with a chocolate tin as the concrete ‘boot’ or foundations.
Extending the modular idea, each quarter tile would be built in such a way that they could be put together in any order. I decided that each tile would also have a different purpose and I divided them as follows:
crew quarters / offices / command deck (I’m not entirely sure if on an Oil Rig you refer to a ‘bridge’
refinery (an industrial looking bit)
crane / cargo area
helicopter landing pad
I’d also aim to have some form of removable central structure that would be higher than the other parts of the rig and maybe culminate in some form of radar mast or communications array.
I’m going to cover the individual area builds in some future blog entries, but for the time being, with the weather being good and some free time on my hands this weekend I’ve cracked on with the super-structure!
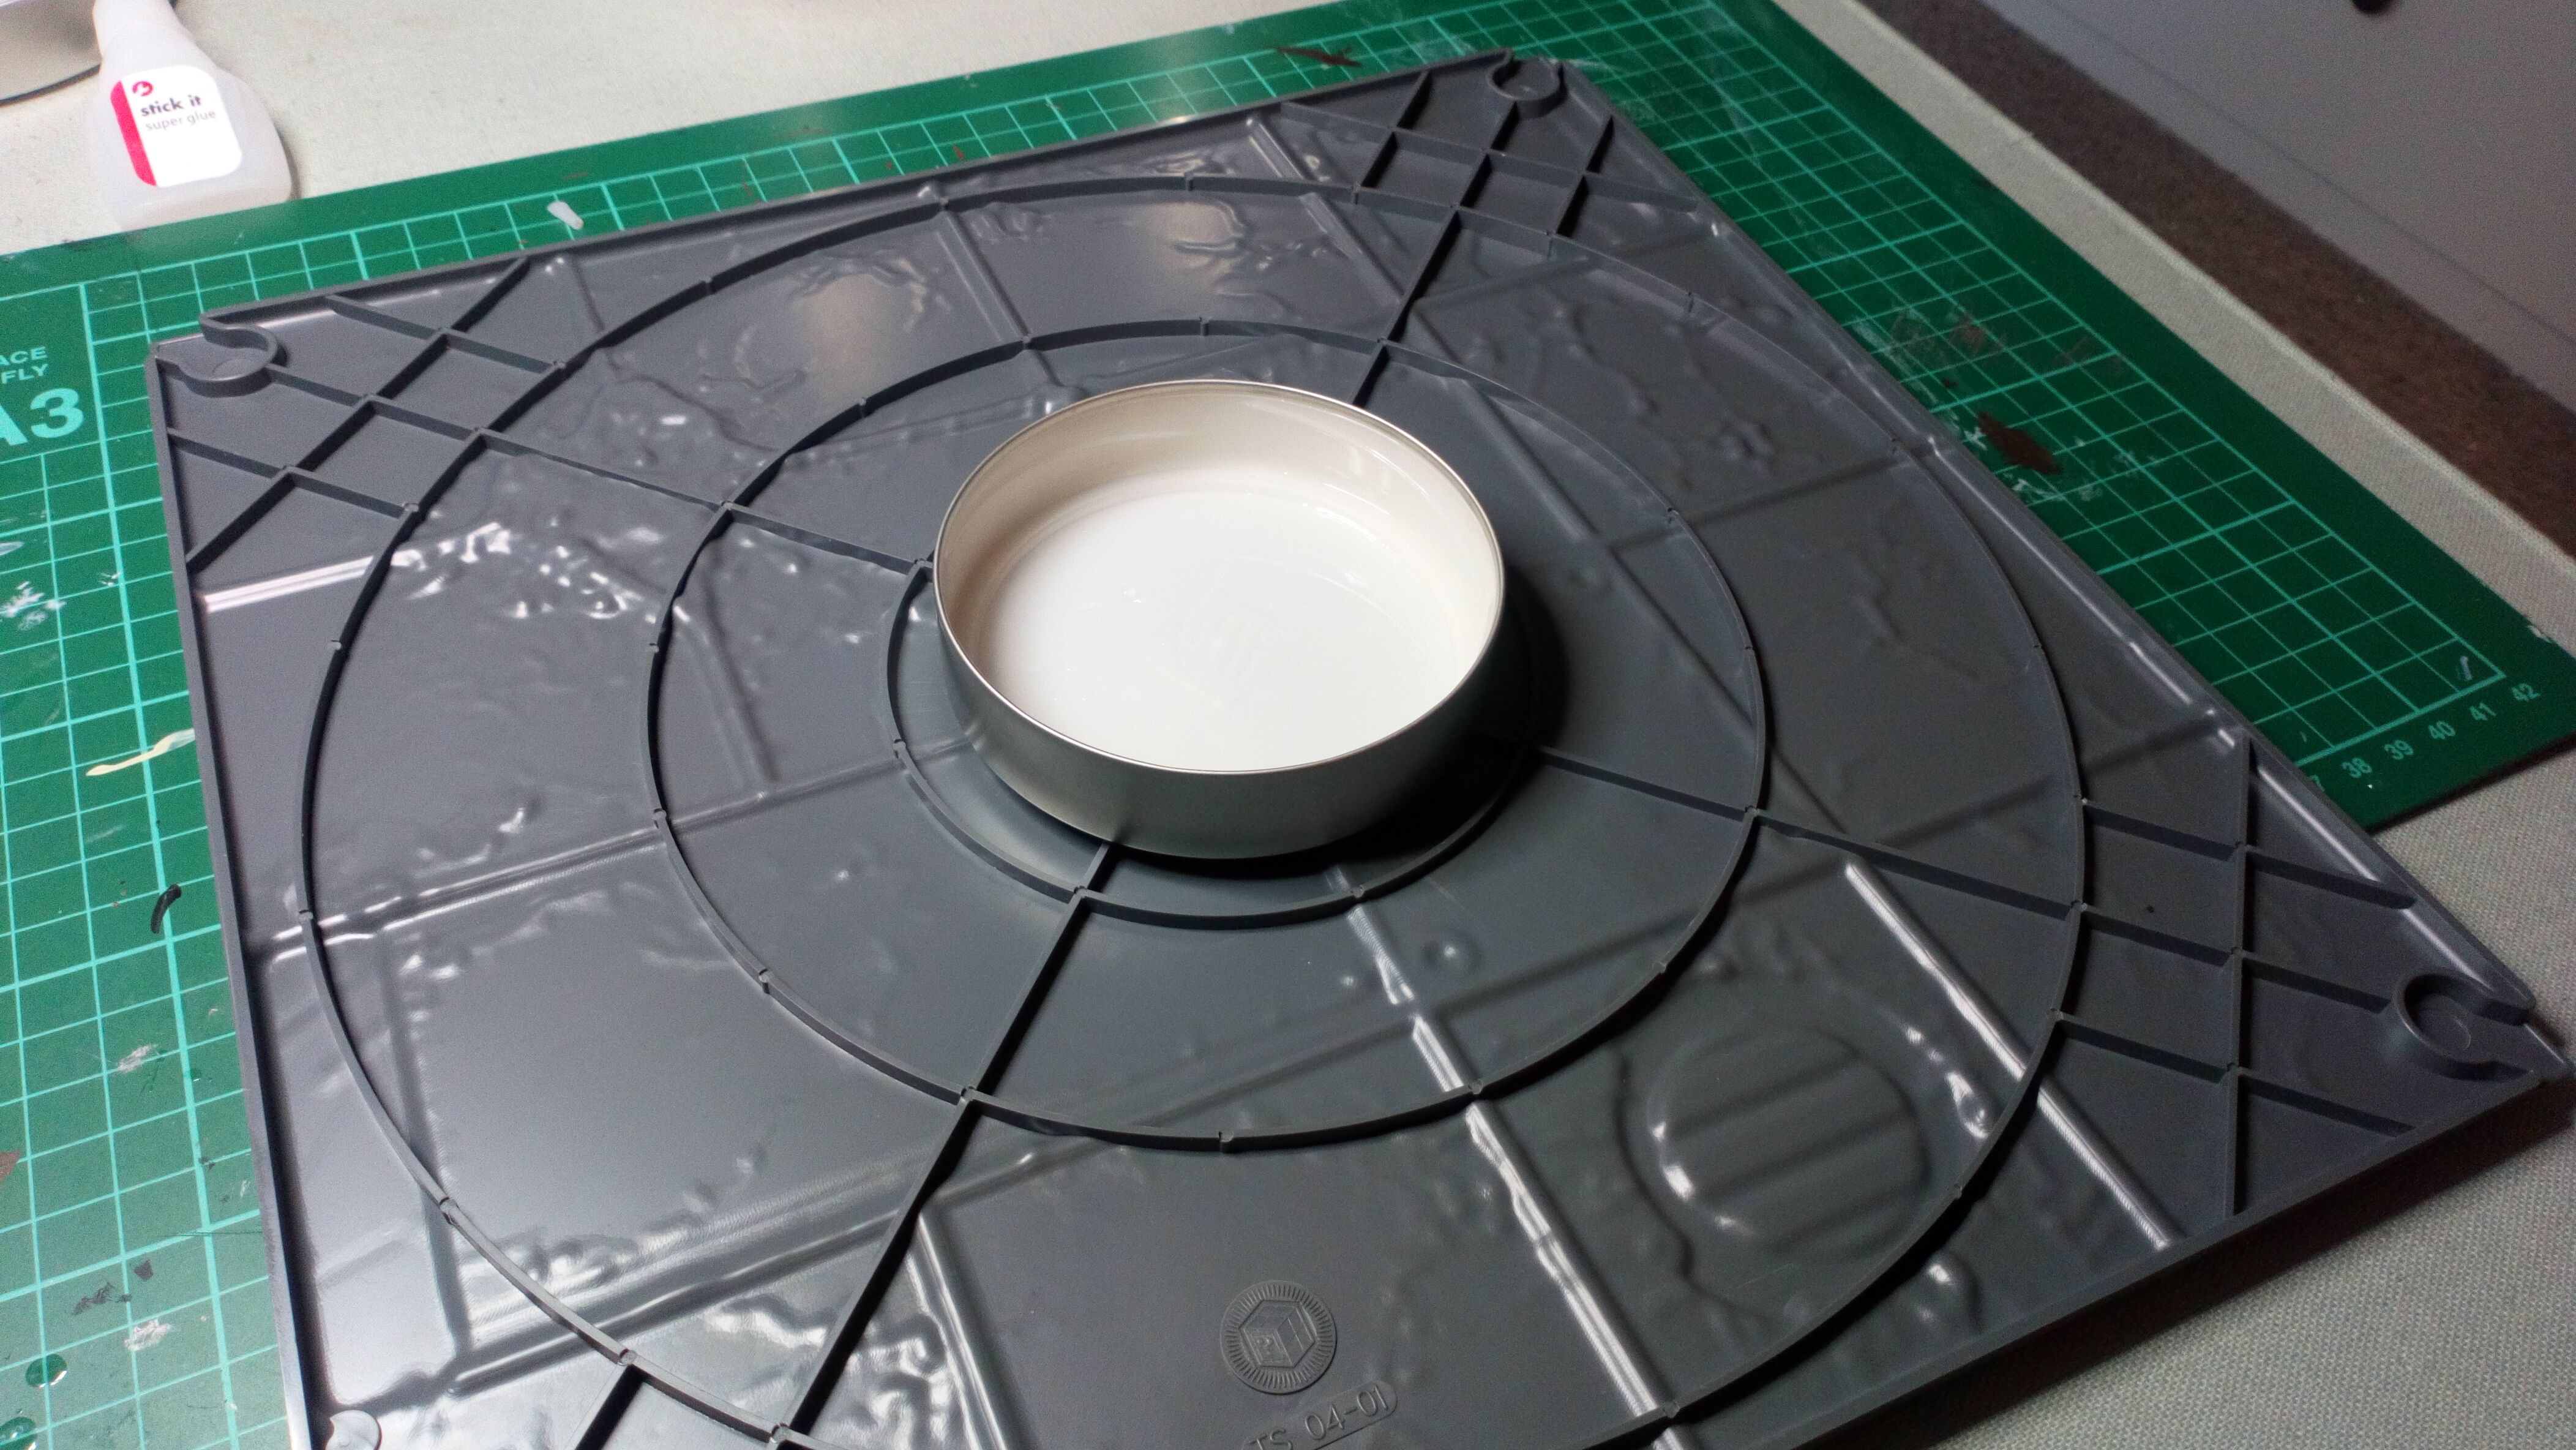
First off, the coffee tins proved to be really spot on for the purpose I had in mind. Each was the same size and came with a screw on lid. By affixing one lid to the bottom of each platform tile I have been able to easily implement a system for taking the rig apart for transport and storage. I decided on a ‘two tin’ height for each leg. By gluing the top of one tin to the bottom of another I could further disassemble each leg into two parts, again meeting the modular objective.
Lid affixed with super glue to the bottom of each platform section
Next lid glued to the base of the ‘previous’ tin
Component pieces
Top leg section screwed on
Bottom leg section screwed on
Flipped the correct way up – utilising the screw lids this can then be easily taken apart again
All four sections – showing assembly method
And the right way up
Four matching plastic chocolate ‘tins’ (Cadbury’s Miniature Heroes for those of you who are interested) were chosen as the ‘concrete’ foundations for each leg. These were inverted so the lid was at the bottom and a coffee tin sized hole was cut in each for the main leg to slot into and provide stability. I decided not to glue the lids of chocolate tins together as they had a good seal and I want the ability to add ballast to these if necessary in future.
The tiles themselves come with a system of clips which link them together, so these would provide some extra stability and stop the sections moving independently.
Top view
Paint was applied to ‘legs’ and ‘boot’s next. Black car primer for the undercoat followed by a cheap Nato green spray for the legs and my old favourite textured stone paint for the ‘boots’.
Paint Factory Nato Green (Matt) was only £2 a can (from Boyes)
I’ve covered the use of textured stone paint in a previous blog entry, but needless to say the same principles applied – lots of coats and considerable drying time between each. I started off using a mid-tone stone, but soon ran out so ended up with subsequent coats of a lighter ‘bleached stone’. Once this is weathered down I don’t think it will look too bad, and certainly from the off it gives a great representation of concrete.
Once I’d taken advantage of the decent weather to dry these components outdoors, it was time for a test build.
Et voila, so far, so good.
Size wise on it’s own this gives a 2′ by 2′ playing surface which is ideal for a small skirmish game, but plonk this on a bigger layout (maybe on a blue ‘sea’ cloth) with a few strategically placed boats and you could have for some quite interesting scenarios.
Next up will be to work on some the individual tiles. For the refinery I will be using a Pegasus/Conflix/Tehnolog ‘Chemical Plant’ kit with some Games Workshop and Mantic additions. The crane and containers will be an MDF kit, as will the living quarters, while for the helicopter pad I will be sticking with the coffee tin / confectionery container approach.